Home Blog

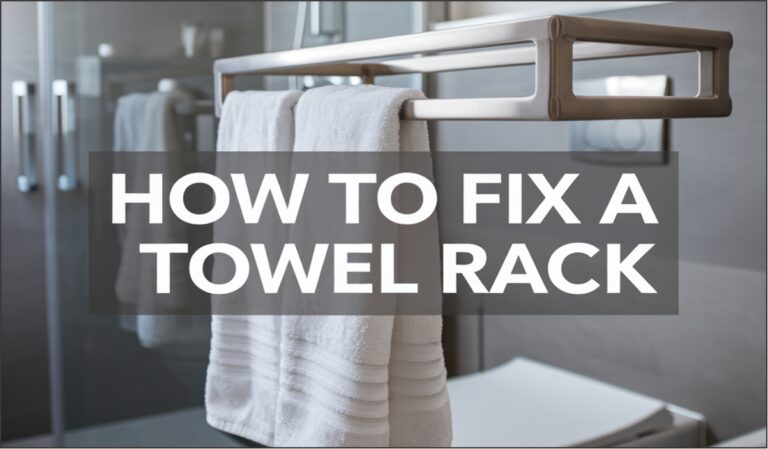
How to Fix a Towel Rack: A Step-by-Step Guide to Repairing and Installing Wall-Mounted Towel Holders

0

Introduction: How to Fix a Towel Rack & Why Towel Rack Repairs Are Common in Bathrooms

Towel racks are essential for keeping your bathroom organized, offering a designated place to hang towels for drying and convenience. However, frequent use, improper installation, or wear and tear can lead to issues such as loose screws, broken brackets, or even damage to the wall.

Repairing a towel rack might seem like a daunting task, but with the right tools and techniques, you can restore it to its original functionality quickly and efficiently. Whether you’re dealing with a wall-mounted towel holder, a towel rack for wall, or a bathroom wall shelf towel bar, this guide will walk you through everything you need to know.

From fixing drywall damage to replacing a towel bar above the toilet, this step-by-step guide ensures your towel rack stays securely in place for the long haul. This article provides the best answer to the question, ‘How to Fix a Towel Rack’.

Supplies You’ll Need to Fix a Towel Rack

Before starting the repair, gather all the necessary tools and materials to make the process smoother. Depending on the type of damage and the towel rack you’re fixing, you may need some or all of the following:

Essential Tools and Materials

  • Toggle Bolts: Ideal for securing the towel rack to drywall.
  • Wall Anchors: These are useful for ensuring a sturdy hold in plaster or drywall.
  • Screwdriver: A flathead or Phillips screwdriver, depending on your towel rack.
  • Drill: This is used to create precise holes in the wall.
  • Measuring Tape: To measure proper alignment and spacing.
  • Replacement Towel Bar or Rod: In case the original one is damaged.
  • Towel Rack Repair Kit: Includes screws, brackets, and sometimes wall anchors.
  • Putty Knife: For patching drywall if needed.
  • Drywall Patch: To repair holes left behind by old towel racks.
  • Painter’s Tape: To mark placement and prevent scratches on the wall.

Optional Items

  • Level: To ensure the towel rack is straight.
  • Adhesive Mounting Tape: A quick alternative for lightweight towel holders.
  • Replacement Towel Bar Rod: In case you’re replacing a shower towel bar or broken rack.

Pro Tip

If you’re unsure about the sturdiness of your wall, opt for wall-mounted towel bars that come with built-in reinforcements or use heavy-duty wall anchors.

Step 1: Assessing the Damage to Your Towel Rack

Before starting any repairs, it’s crucial to assess the extent of the damage to your towel rack wall or wall towel rack. This will help you determine the tools and materials you need for the repair.

Types of Towel Rack Issues

  1. Loose Towel Rack
    If your bathroom towel rack holder is wobbly or leaning away from the wall, it likely has loose screws or damaged wall anchors. Check for any visible holes or gaps around the mounting points.
  2. Broken Towel Bar
    If the towel bar above the toilet or other parts of your towel rack are completely broken, you may need to replace the towel bar rod or the entire unit. A replacement towel bar can be easily swapped in if you’re only replacing the rod.
  3. Damage to Drywall
    Sometimes, towel racks can pull out of the wall and leave large holes or damage to the drywall. If this is the case, you’ll need to repair the drywall before reattaching or installing a new towel wall rack.
  4. Damaged Mounting Brackets or Plates
    If the brackets or plates holding the towel rack in place are cracked, bent, or otherwise damaged, they’ll need to be replaced. Make sure you have the correct replacement towel rack hardware before moving forward.

How to Examine the Wall

  • Inspect the area where the towel rack was mounted, checking for any cracks, holes, or other damage to the wall towel holder area.
  • If the wall seems weak or soft, you may need to reinforce it with wall anchors or even add a new mounting location.
  • For towel rack drywall repair, check whether the damage is confined to a small area or if it’s a larger section that needs patching.

Taking the time to properly assess the damage will ensure you don’t miss any underlying issues. Once you’ve determined the extent of the damage, it’s time to move on to removing the old towel rack and preparing the area for repairs.

Step 2: Removing the Old Towel Rack or Bar Safely

To ensure a smooth repair process, it’s essential to remove the damaged towel rack or bar properly. Here’s how to safely dismantle it and prepare for the new installation or repair.

How to Remove a Towel Rack from the Wall

  1. Loosen the Screws
    Use a screwdriver to remove the screws holding the towel rack for wall or wall towel holder in place. If the screws are stripped or difficult to unscrew, you may need to use a drill to carefully remove them.
  2. Check for Hidden Screws or Anchors
    Some towel racks have hidden screws behind decorative covers or plates. Use a flathead screwdriver to pry off any covers, revealing the screws that need to be removed. If you find wall anchors or toggle bolts, carefully loosen them to avoid damaging the drywall.
  3. Carefully Remove the Towel Bar
    Once all screws are removed, gently pull the towel rack wall or wall-mounted towel bars away from the wall. Be cautious not to damage the wall or knock the bathroom towel rack holder loose.
  4. Inspect the Wall for Damage
    After the rack is removed, check the wall for any visible damage. If there are large holes or cracks, you’ll need to repair them before reinstalling a new towel bar replacement or replacement towel bar rod. This is especially important if the previous installation used toggle bolts that may have left large holes.

Dealing with Stubborn Towel Racks

If you encounter a towel rack for bathroom wall that’s difficult to remove, don’t force it. Apply gentle pressure while twisting, and if needed, use a putty knife to loosen stubborn parts. For wall towel rack units that are stuck due to damage, consider using a towel rack repair kit to fix or replace broken components before moving forward. While you’re at it, if you’re looking for tips on how to wash microfiber towel, be sure to follow the care instructions to keep your towels in great condition.

Once the old towel rack is removed, it’s time to clean up the area and get ready for the next step: repairing any wall damage.

Step 3: Repairing Drywall Damage (If Needed)

If your towel rack was attached to drywall and caused significant damage when removed, you’ll need to repair the wall before reattaching the towel rack. Properly repairing the drywall ensures the new wall towel rack or bathroom towel rack holder will be securely mounted and won’t cause further damage.

How to Repair Small Holes and Damage

For minor damage, like small holes where screws or wall anchors were, follow these simple steps:

  1. Clean the Area
    First, use a damp cloth to clean the wall around the hole. This removes any dust or debris that could interfere with the repair process.
  2. Apply Spackle or Joint Compound
    Use a putty knife to spread spackle or joint compound over the hole. Make sure to cover the edges of the hole completely and smooth the compound out evenly with the knife.
  3. Allow the Compound to Dry
    Let the spackle dry according to the manufacturer’s instructions. This usually takes 1-2 hours, but drying times can vary depending on the product.
  4. Sand the Area
    Once the compound is dry, use fine-grit sandpaper to smooth the surface. Sand until the wall feels flat and level with the surrounding area.
  5. Prime and Paint (Optional)
    If you want a more polished finish, you can apply a coat of primer and then paint over the patched area. This step is optional but can help blend the repair with the rest of the wall.

How to Repair Larger Holes

For larger holes, you may need to use a drywall patch. Here’s how:

  1. Cut the Hole into a Square Shape
    Use a utility knife to cut the damaged area into a square or rectangular shape. This helps ensure a clean patch.
  2. Install the Drywall Patch
    Fit a drywall patch into the hole, securing it with screws. Make sure it’s flush with the surrounding wall.
  3. Cover the Edges with Joint Compound
    Spread joint compound over the edges of the patch and blend it into the surrounding wall with a putty knife.
  4. Let it Dry and Sand Smooth
    Allow the compound to dry, then sand the patched area until it’s smooth and level with the wall.
  5. Prime and Paint (Optional)
    As with small holes, apply primer and paint if needed to restore the appearance of the wall.

Pro Tip

If you’re dealing with towel rack drywall repair on a larger scale, such as a wall towel rack that caused significant damage, consider reinforcing the patched area with extra wall anchors or toggle bolts when reinstalling the new rack.

Step 4: Attaching the New Mounting Plate or Bracket

Now that your wall is repaired and smooth, it’s time to install the new mounting plate or bracket for your towel rack. This is a critical step to ensure the towel rack for wall is securely fixed and can handle the weight of the bath sheet or bath towel. Here’s how to properly attach the new mounting hardware.

Choosing the Right Mounting Bracket or Plate

  1. Determine the Type of Towel Rack
    Different types of wall towel racks (like wall-mounted towel bars or wall hanging towel racks) may require different types of mounting plates or brackets. Make sure you have the appropriate replacement towel bar rod and the corresponding hardware for your new towel rack.
  2. Select the Correct Mounting Hardware
    Depending on the weight of your bathroom towel rack holder and the material of your wall (drywall, tile, etc.), you’ll need to choose the right mounting hardware:

    • For drywall: Use toggle bolts or wall anchors to ensure the rack stays securely attached.
    • For tile walls: You may need specialized drill bits and masonry anchors designed for tile.
    • For stud-mounted racks: If you can locate wall studs, use screws that go directly into the studs for a strong, stable installation.

How to Attach the Mounting Plate

  1. Mark the Spot for the Mounting Holes
    Use a level to mark the exact location where the wall towel holder will be attached. If you’re replacing a towel bar above toilet, ensure the height is comfortable for use and aligned with the overall bathroom layout.
  2. Drill Holes for the Mounting Hardware
    If your towel rack requires drilling, carefully drill holes at the marked spots. If you’re attaching to drywall, use a drill bit suitable for drywall anchors or toggle bolts. For tile, use a diamond-tipped drill bit for clean holes.
  3. Install the Mounting Plate
    Insert the mounting plate or brackets into the drilled holes. If using wall anchors, insert them into the holes before screwing in the plate. For toggle bolts, insert the bolt into the wall anchor and tighten to secure the plate in place.
  4. Level the Plate
    Double-check that the towel rack for bathroom wall is level before fully tightening the screws. Using a level ensures your towel rack will hang evenly once the towel bar is attached.
  5. Tighten the Screws
    Once you’re satisfied with the alignment, tighten all screws securely but avoid over-tightening, as this could damage the wall or cause the plate to bend.

Pro Tip

If you’re replacing an older towel rack with a new one, you may need to adjust the height or position slightly to avoid aligning the new holes with the previous ones. Be sure to patch any old holes that are no longer in use.

Step 5: Installing the Towel Rack or Bar

With the mounting plate or bracket securely attached to the wall, it’s time to install your new towel rack for wall or towel bar replacement. This step ensures that the rack will hold your towels effectively and remain stable for long-term use.

How to Install a Towel Bar or Rack

  1. Align the Towel Bar or Rack with the Mounting Plate
    Hold the replacement towel bar or towel rack for bathroom wall up to the mounting plate or bracket that you installed in the previous step. Ensure that the bar or rack aligns properly with the screws or mounts on the wall plate.
  2. Attach the Towel Bar to the Mounting Plate
    Depending on the type of towel rack or bar you are installing, use the provided screws or bolts to attach the towel rack wall to the mounting plate. If your wall towel rack for bathroom has decorative covers or caps, be sure to slide or snap them into place after the screws are tightened.

    • For wall towel holder units, the screws may go directly into the back of the rack or bar.
    • For wall-mounted towel holders, ensure the bracket or bar locks into place, creating a secure fit.
  3. Tighten the Screws Securely
    Once the towel bar is aligned and positioned correctly, tighten the screws firmly. Be cautious not to overtighten, as this can strip the threads or cause damage to the drywall or tile. The goal is to ensure the towel rack is snug but still removable if necessary for repairs.
  4. Check for Stability
    Gently test the towel bar or rack by applying light pressure to ensure it’s securely attached. A sturdy towel rack wall should not wobble or move when you hang towels on it.

Pro Tip

If you’re installing a towel rack for drying or a towel wall rack, ensure that the distance between the mounting plate and the bar is wide enough to accommodate several towels without them dragging on the floor. It’s a good idea to check the manufacturer’s recommended spacing for optimal functionality.

Troubleshooting Installation Issues

  • If the towel holder on wall is loose, double-check that the screws are tight and the wall towel racks are properly aligned.
  • If the towel bar replacement doesn’t fit well into the mounting plate, you may need to adjust the placement of the screws or use wall anchors if the wall material is soft or damaged.

Step 6: Attaching the Rest of the Towel Rack and Enjoying Your New Setup

With the mounting plate securely installed and the towel bar or rack attached, it’s time to complete the setup and start using your newly fixed wall towel rack. This final step ensures everything is in place and ready for daily use.

Attaching Additional Towel Bars or Racks (if applicable)

If you’re installing a multi-tiered or wall-mounted towel holder with additional bars or hooks:

  1. Attach the Additional Bars or Hooks
    Follow the same procedure used for the first towel bar. Align the extra bars or hooks with the mounting plate or bracket, ensuring they are level. Use the screws or fasteners provided to secure them firmly into place.
  2. Check for Proper Alignment
    Make sure all bars or hooks are evenly spaced and aligned with each other. This will ensure a neat and organized appearance, especially if you’re adding multiple bathroom towel rack holder units.

Testing the Towel Rack’s Stability

Before hanging your towels, it’s important to test the towel rack for drying and ensure it is stable. Gently pull on the rack or towel bar to check its strength. If everything feels secure, you’re ready to start using it!

  • If you installed a towel rack wall, make sure it is tightly fixed, as this will affect its performance when holding towels.
  • For towel rack replacement bar installations, ensure that all connections are tight and well-adjusted for maximum durability.

Enjoying Your Newly Fixed Towel Rack

Now that the towel rack is securely mounted, you can enjoy its full functionality. Whether you’re drying towels or organizing bathroom accessories, a well-installed bath towel bar replacement will make a noticeable difference in your bathroom’s organization and aesthetics.

Pro Tip: Regularly check the towel rack for bathroom wall to ensure it remains securely fastened, especially if it’s used frequently. Tighten the screws as needed to prevent loosening over time.

Frequently Asked Questions (FAQs)

Q1: How do I know if my wall can support a towel rack?
To ensure your wall can support a towel rack, check the material of the wall (drywall, tile, etc.). For drywall, use appropriate wall anchors or toggle bolts to distribute the weight. If you’re installing a towel rack on tile, use specialized drill bits for tile and strong masonry anchors for a secure fit.

Q2: Can I replace a porcelain towel bar with a metal one?
Yes, replacing a porcelain towel bar with a metal one is straightforward. Make sure the new towel bar’s mounting holes align with the existing ones. If not, you may need to patch up the old holes and drill new ones. Consider using towel bar replacement kits to simplify the process.

Q3: My towel rack is loose. What should I do?
If your towel rack drywall repair is loose, check if the screws or anchors need tightening. If the wall anchors or toggle bolts are damaged, replace them with stronger ones. In some cases, you may need to reinstall the rack on a more secure part of the wall, like a stud.

Q4: How do I fix a towel rack that keeps falling off the wall?
If your towel rack is consistently falling off, it could be due to weak anchors or incorrect mounting. First, remove the rack and check the condition of the towel rack repair kit. Ensure that you’re using the right anchors or bolts, especially if you’re mounting it on drywall or other soft surfaces.

Q5: Can I install a towel rack without drilling into the wall?
Yes, there are alternatives to towel bars such as adhesive towel racks or freestanding towel holders that don’t require drilling. These options are ideal for renters or for situations where drilling into the wall is not feasible.

Expert’s Suggestions: Fixing Your Towel Rack the Right Way

Fixing or installing a wall towel rack is a straightforward process that can significantly improve the functionality and appearance of your bathroom. By following these simple steps repairing drywall, selecting the right mounting hardware, and securely attaching your towel bar or rack you can enjoy a sturdy, reliable solution for hanging your towels.

If you encounter any issues, don’t hesitate to use towel rack repair kits or seek professional help for a more advanced repair. A well-mounted bathroom towel rack holder is an essential part of your bathroom setup, and with these tips, you’ll have a beautifully organized and functional space.

Ready to tackle your towel rack repair? Start by gathering your supplies and follow the steps in this guide to restore your wall towel rack for bathroom in no time!

How to Hang Bath Towels: Expert Tips for a Stylish and Functional Bathroom

0

Creating a visually appealing and organized bathroom goes beyond choosing the right fixtures; it also involves how you manage essentials like bath towels. Properly hanging bath towels can elevate your bathroom’s look, improve functionality, and even extend the lifespan of your towels.

In this comprehensive guide, we’ll explore effective and creative ways to hang bath towels using various tools and techniques. Whether you’re aiming for a decorative hotel-inspired setup or a simple, practical arrangement, these tips will transform your bathroom into a tidy and stylish space.

Table of Contents

Why Proper Towel Hanging Matters

The Importance of Organization in the Bathroom


Keeping your towels well-arranged on a towel rack or hook is more than just a visual upgrade—it’s a practical necessity. Organized towels reduce clutter, improve accessibility, and promote better hygiene by allowing your towels to dry effectively.

Benefits of Proper Towel Display

  • Hygiene: Towels that are hung properly on a towel bar or hook dry faster, reducing the risk of mildew.
  • Aesthetics: A well-arranged towel rack with towels adds a sophisticated touch to your bathroom decor.
  • Convenience: Knowing where to hang hand towels or bath towels ensures they’re always within easy reach.

Pro Tip: Consider using a towel rack with towels layered decoratively to maximize space and style.

What Types of Towels Do You Need to Hang?

Understanding the different types of towels and their uses can help you choose the best hanging method. Each towel serves a unique purpose, so organizing them accordingly can enhance both functionality and visual appeal.

Bath Towels

Bath towels are the largest and most commonly used towels. These are designed for drying off after a shower or bath. Given their size, they are best hung on towel bars or racks to allow proper drying. Using a hook rack for towels is another space-efficient option for smaller bathrooms. If you’re wondering how a bath towel compares to a bath sheet in terms of size and functionality, check out our detailed guide on Bath Sheet vs Bath Towel.

Hand Towels

Hand towels are smaller than bath towels and are used for drying hands. These are typically hung near the sink on a wall-mounted hand towel holder or a towel ring. Proper placement is essential for convenience, especially in guest bathrooms.

Decorative Towels

Decorative towels are primarily for display and adding a stylish touch to your bathroom. These can be layered over functional towels on a towel bar or folded neatly in a basket. When thinking about how to hang decorative towels in the bathroom, focus on symmetry and clean folds to achieve a polished look.

Guest Towels: Special Considerations

Guest towels should be both functional and visually pleasing. Place them in an accessible spot, such as on a towel rack or in a decorative holder. For added flair, consider how to hang guest bathroom towels decoratively, such as by rolling them or folding them into unique shapes.

Essential Tools for Hanging Towels

The right tools can make all the difference in how your towels are displayed and maintained. Below, we outline the most effective options for hanging towels in a way that combines style, functionality, and convenience.

Towel Bars

Towel bars are a classic choice for hanging towels, especially in bathrooms with enough wall space. They are ideal for bath towels because they allow towels to hang flat, promoting faster drying. If you’re wondering how to hang bath towels on a towel bar, simply fold the towel lengthwise in thirds and drape it evenly.

Pro Tip: Use a double towel bar if you’re short on space but need to hang multiple towels.

Towel Rings

Perfect for hand towels, towel rings are usually mounted near the sink for easy access. Knowing how to hang hand towels in the bathroom on a towel ring is key to keeping the space tidy. Fold the hand towel neatly and loop it through the ring, ensuring that it hangs evenly.

Best Use: Towel rings are great for guest bathrooms where decorative hand towels can double as a design element.

Towel Hooks

If you have limited space, towel hooks are an excellent option. They can be arranged in rows or individually to accommodate multiple towels. To master how to hang bath towels decoratively on hooks, pinch the towel in the middle, creating a gathered look, and drape it over the hook for a relaxed yet stylish effect.

Pro Tip: A hook rack for towels can provide additional storage while keeping the area organized.

Ladder Racks

A ladder rack is a modern and chic way to display towels. Drape towels over the rungs, starting with the largest on the bottom and working up to smaller ones. This creates a layered look that’s both functional and decorative.

Use Case: Great for displaying a towel rack with towels in bathrooms with rustic or minimalist themes.

Shelves with Hooks or Cubbies

Shelves with hooks or cubbies combine functionality with storage. Towels can be folded and placed in the cubbies while the hooks hold additional towels or accessories.

Perfect For: Maximizing space in small bathrooms while keeping towels within easy reach.

Step-by-Step Guide to Hanging Towels Perfectly

Mastering the art of hanging towels is essential for creating a clean and inviting bathroom. Follow these step-by-step instructions to hang your towels neatly and decoratively.

How to Hang Bath Towels on a Towel Bar

  1. Lay the Towel Flat: Spread the towel on a clean, flat surface with the front side facing down.
  2. Fold in Thirds Lengthwise: Fold the towel lengthwise into thirds to create a narrow, even shape.
  3. Fold in Half Horizontally (Optional): For smaller towel bars, fold the towel horizontally to adjust the length.
  4. Drape Over the Bar: Center the towel on the bar, ensuring both ends hang evenly.

Pro Tip: Layer a decorative towel over a functional one for a stylish hotel-inspired look.

How to Hang a Hand Towel on a Towel Ring

  1. Fold the Towel: Fold the hand towel lengthwise in thirds, keeping the edges tidy.
  2. Loop Through the Ring: Pass the folded towel through the ring, leaving equal lengths on both sides.
  3. Adjust for Neatness: Tug gently on both ends to smooth out wrinkles and ensure the towel hangs straight.

Pro Tip: When considering how to hang hand towels decoratively, use towels with patterns or embellishments for added flair.

How to Use a Hook Rack for Towels

  1. Gather the Towel: Pinch the towel at its center to create a natural fold.
  2. Drape Over the Hook: Hang the towel over the hook, allowing the ends to fall freely.
  3. Arrange Multiple Towels: If using a hook rack, space the towels evenly for a balanced appearance.

Best For: Small bathrooms or high-traffic areas where space efficiency is key.

Decorative Towel Hanging Ideas for a Stylish Bathroom

A functional bathroom doesn’t have to sacrifice style. With creative hanging techniques, you can turn ordinary towels into decorative elements that enhance your bathroom’s design.

Folding Techniques for a Hotel-Style Look

If you’ve ever admired the neat and luxurious towel displays at hotels, you can replicate that same elegance at home.

  1. Tri-Fold for Bath Towels
    • Lay the towel flat with the front side down.
    • Fold the long sides inward to meet at the center, creating a slim rectangle.
    • Fold in half or thirds depending on the size of your towel bar, and drape over.
  2. Creative Rolls for Hand Towels
    • Fold the towel in half lengthwise.
    • Roll tightly from one end to the other.
    • Stack the rolled towels in a decorative basket or cubby.

Pro Tip: This technique works beautifully when displaying guest towels on a towel rack with towels arranged decoratively.

Layering Towels on a Bar

For a more dynamic look, layer decorative towels with functional ones.

  • Start with a larger bath towel folded lengthwise and draped over the bar.
  • Place a hand towel folded in thirds on top of the bath towel.
  • Finish with a decorative towel folded in half and centered on the hand towel.

Best For: Bathrooms where you want to showcase your towels as part of the decor.

Using Accessories to Display Towels

Accessories can elevate your towel display by adding a unique and personal touch.

  • Adding Ribbon or Embellishments: Wrap a ribbon around folded towels or use clips to attach decorative elements like flowers or charms.
  • Hanging Towels in Thematic Styles: For seasonal updates, choose towels with holiday patterns and hang them in clusters.

Pro Tip: Think about how to hang decorative towels in a bathroom with hooks, racks, or baskets that complement your overall bathroom theme.

Innovative Ways to Hang Towels in Small Bathrooms

Small bathrooms often require creative solutions to maximize space while maintaining functionality and style. Here are some innovative ways to hang towels without compromising on design or convenience.

1. Over-the-Door Towel Racks

Over-the-door towel racks are perfect for bathrooms with limited wall space. These racks can hold multiple towels and keep them out of sight when the door is open.

Why It Works:

  • Utilizes vertical space efficiently.
  • Keeps towels organized and accessible without cluttering walls.

2. Ladder Towel Racks

A freestanding or wall-leaning ladder rack is both functional and decorative. Drape towels over each rung to create a layered, modern look.

Best For:

  • Bathrooms with a minimalist or rustic aesthetic.
  • Spaces where a statement piece is desired.

3. Hooks Mounted Inside Cabinets or Closet Doors

Install hooks on the inside of cabinet doors or bathroom closets to keep towels discreetly stored yet within easy reach.

Pro Tip: This method works well for hanging hand towels or smaller bath towels.

4. Towel Hammocks or Rope Racks

A towel hammock or rope rack is a unique solution that adds a touch of whimsy to your bathroom. Towels are slung loosely over the ropes, creating a relaxed, boho vibe.

Perfect For:

  • Adding texture to small bathrooms.
  • Showcasing decorative towels without taking up much space.

5. Wall-Mounted Shelf with Hooks

Combine storage and hanging space with a shelf that includes hooks underneath. Fold bath towels neatly on the shelf and use the hooks for hand towels or decorative pieces.

Why It’s Ideal:

  • Multi-functional for both storage and display.
  • Works well in compact bathrooms where every inch counts.

6. Use a Towel Ring Beside the Sink

For the tightest spaces, a towel ring near the sink can hold a single hand towel. This keeps the area functional and uncluttered.

Pro Tip: Knowing how to hang hand towels decoratively on a ring can make even small bathrooms look stylish.

Common Mistakes to Avoid When Hanging Towels

Even with the best intentions, small oversights can detract from the practicality and aesthetics of your towel arrangements. Avoid these common mistakes to ensure your bathroom looks tidy and functions efficiently.

1. Overcrowding Towels

Placing too many towels on a single bar, hook, or rack can prevent proper drying and lead to a cluttered appearance.

Solution:

  • Use multiple hooks, bars, or racks to space towels adequately.
  • If space is limited, consider folding and storing extra towels in a decorative basket.

2. Hanging Wet Towels in Poorly Ventilated Areas

Wet towels that don’t dry properly can develop unpleasant odors and mildew.

Solution:

  • Place towel racks in well-ventilated areas or near windows.
  • Use heated towel racks for quick drying in bathrooms with limited airflow.

3. Ignoring Functionality

Prioritizing style over usability can make accessing and using towels inconvenient.

Solution:

  • Arrange frequently used towels within easy reach.
  • Reserve decorative towels for less practical placements, like on top of bars or in display baskets.

4. Neglecting to Secure Towel Fixtures Properly

Towel bars, hooks, and rings that are not securely installed can become loose over time, leading to accidents or damage.

Solution:

  • Follow installation instructions carefully, ensuring fixtures are mounted into wall studs or with proper anchors.
  • Consider installing a bathroom hand towel holder with no-step screws for convenience.

5. Choosing the Wrong Hanging Method for the Space

Using bulky racks or inappropriate hanging methods in small bathrooms can make the space feel cramped and disorganised.

Solution:

  • Evaluate the space and choose slim, space-saving options like towel hooks or over-the-door racks.
  • Use a towel shelf with hooks to combine storage and hanging in one fixture.

6. Neglecting Aesthetic Considerations

While functionality is critical, towels that look haphazardly hung can detract from your bathroom’s overall appearance.

Solution:

  • Take a few extra moments to smooth wrinkles and align towels neatly.
  • Use cohesive colors or patterns to create a harmonious look.

Expert Tips for Maintaining a Well-Organized Bathroom

Now that you’ve mastered the art of hanging towels in a stylish and functional way, maintaining an organized and clean bathroom requires a few additional strategies. Here are some expert tips to help you keep your bathroom tidy and your towels fresh.

1. Regularly Rotate Towels

To keep your towels in good condition and maintain a balanced inventory, rotate your towels regularly. This ensures each towel gets used evenly and prevents wear on your favorite towels.

Tip: Keep a set of towels in rotation so that some can dry while others are in use. For example, reserve bath towels for hanging on the towel rack and hand towels for the towel ring to create a functional system.

2. Use Baskets for Extra Towels

Store extra towels in decorative baskets or storage bins to keep them within easy reach but out of sight. This approach helps keep your bathroom looking clean and minimizes clutter.

Pro Tip: Place baskets under a floating shelf or near the entrance to your bathroom for a neat, accessible storage solution.

3. Fold Towels Properly for Maximum Storage

How you fold towels can make a big difference in how much space they occupy. Proper folding ensures they stay neat and compact, allowing you to store more without overcrowding.

Method for Bath Towels:

  • Fold the towel lengthwise in thirds, then fold it in half or thirds again, depending on the size of your shelf or storage area.

Method for Hand Towels:

  • Fold the towel in half lengthwise, then fold in thirds to make a neat, small rectangle for storage.

4. Keep Towels Dry Between Uses

Ensure your towels dry properly between uses to maintain their freshness and longevity. Avoid leaving wet towels in piles, and instead, hang them on bars, hooks, or racks where air can circulate freely.

Pro Tip: Install a towel rack with towels spaced evenly so air can circulate and prevent damp towels from staying wet too long.

5. Deep Clean Towel Fixtures Regularly

Towel racks, hooks, and bars accumulate soap scum, dust, and moisture over time. Regularly clean and maintain these fixtures to prevent buildup and keep them looking fresh.

Tip: Wipe down towel racks with a soft cloth and mild cleaner weekly to ensure they remain functional and attractive.

6. Invest in High-Quality Towels

The quality of your towels impacts both their function and appearance. Invest in high-quality bath and hand towels that are absorbent, durable, and feel luxurious.

Best Choices:

  • Egyptian Cotton for softness and absorbency.
  • Turkish Cotton for durability and fast drying.
  • Bamboo Towels for a sustainable option.

7. Organize Towels by Frequency of Use

Keep towels you use most often within easy reach. Store guest towels or extra towels in less accessible spots like higher shelves or cabinets.

Tip: Designate a specific area for guest towels or seasonal towels to avoid crowding your everyday towels.

8. Maintain the Right Towel Quantity

Avoid overstocking your bathroom with too many towels, which can lead to clutter. Instead, keep a reasonable quantity of towels in rotation.

Pro Tip: Aim for at least two sets of bath towels per person, plus a few hand towels and washcloths for convenience.

How to Sanitize Laundry: Guide to Disinfecting Clothes Without Bleach and Using Laundry Sanitizers

0

When it comes to laundry, ensuring your clothes are not only clean but also sanitized is crucial for maintaining good hygiene and health. Whether you’re looking to disinfect laundry without bleach, eliminate bacteria from your towels, or sanitize clothes naturally, there are various methods and products available that can effectively do the job. From popular options like Lysol Laundry Sanitizer to natural alternatives such as vinegar or hydrogen peroxide, there are many ways to ensure your laundry is free of germs, bacteria, and unpleasant odors. In this guide, we’ll explore the best ways to sanitize clothes and disinfect laundry, offering solutions for every need, including how to sanitize laundry without bleach and how to use a laundry sanitizer in your washing machine.

Table of Contents

Why Sanitizing Laundry Is Essential

The Importance of Germ-Free Clothes and Linens


Keeping your laundry sanitized is about more than just cleanliness, it’s a critical step in maintaining your health. Unsanitized clothes, linens, and fabrics can harbour harmful bacteria, viruses, and fungi that may lead to skin irritations, infections, or even respiratory issues. Regular washing may remove dirt and stains, but sanitizing ensures these pathogens are effectively eliminated. If you’re unsure about the best washing methods for specific fabrics, such as microfiber, check out our guide on how to wash microfiber clothes.

Common Germs and Bacteria Found in Laundry


Your clothes come into contact with germs from various sources, including sweat, spills, and outdoor environments. Common microorganisms found in laundry include:

  • Escherichia coli (E. coli): Often transferred from soiled fabrics like underwear or baby clothes.
  • Staphylococcus aureus: Common in gym wear and towels.
  • Mold and Mildew: Thrives in damp laundry left unwashed.

Proper sanitization kills these germs, ensuring that your clothes and linens are safe for use.

Health Risks of Unsanitized Laundry


Failing to sanitize laundry can result in health complications, such as:

  • Allergic Reactions: Residual allergens like pet dander and pollen may cling to clothes.
  • Skin Infections: Unsanitized fabrics can irritate the skin or exacerbate existing conditions like eczema.
  • Illness Transmission: Shared linens or secondhand clothes can spread germs between users.

Understanding these risks highlights the importance of incorporating laundry sanitization into your routine.

When Should You Sanitize Your Laundry?

Situations Requiring Sanitization


Certain scenarios call for more than just regular washing to ensure your laundry is completely free from harmful pathogens:

  • After Illness or Infection: Items like bedding, towels, and clothing used by a sick person need extra care to prevent the spread of germs.
  • Gym Clothes and Towels: Sweaty, damp fabrics are breeding grounds for bacteria and odor-causing microbes.
  • Baby Clothes and Bedding: Infants’ immune systems are sensitive, so their laundry should be sanitized to protect against harmful germs.
  • Thrifted or Secondhand Clothing: Pre-owned clothing might contain bacteria or allergens from previous use.

Signs Your Laundry Needs Sanitizing


Sometimes, your laundry itself may give you hints that it’s time for sanitization:

  • Persistent Odors: Lingering smells even after washing may indicate bacteria or mold.
  • Visible Mold or Mildew: These can appear on damp clothes left in the washer for too long.
  • Skin Irritations or Allergies: If your skin reacts to freshly washed clothing, unsanitized residue might be the cause.

By identifying these situations and signs, you can determine when your laundry needs more than a standard wash.

The Difference Between Sanitizing and Disinfecting Laundry

Understanding Sanitizing vs. Disinfecting

When it comes to laundry care, the terms “sanitizing” and “disinfecting” are often used interchangeably. However, they serve distinct purposes:

  • Sanitizing: This process reduces the number of bacteria on fabrics to a safe level as determined by public health standards. It does not necessarily eliminate all viruses or fungi. Sanitizing is ideal for regular laundry items like clothes and linens that are not heavily contaminated.
  • Disinfecting: This is a more intensive process designed to kill nearly 100% of harmful microorganisms, including bacteria, viruses, and fungi. Disinfecting is essential for items exposed to illness, bodily fluids, or high-risk environments like hospitals.

Both methods are effective in their own right, but choosing the right one depends on the purpose of your laundry routine.

Why You Should Know the Difference

Health and Safety Benefits


Understanding the distinction between sanitizing and disinfecting helps you tailor your laundry care to specific needs. For instance, sanitizing might suffice for daily clothing, but disinfecting is necessary for hospital scrubs or bedding used by a sick family member.

Cost-Effective Laundry Care


Disinfectants are often more expensive and potent than sanitizers. Using them unnecessarily for everyday laundry can be wasteful and even harmful to certain fabrics. Recognizing when to sanitize versus when to disinfect can save you money and prolong the lifespan of your clothes.

Fabric Care and Longevity


Disinfectants, such as bleach, can be harsh on delicate fabrics, causing fading or deterioration over time. Sanitizing, on the other hand, is gentler and can be achieved using natural or less abrasive methods like distilled white vinegar or fabric sanitizer sprays.

How to Sanitize Laundry Without Bleach

Bleach has long been a go-to for sanitizing laundry, but its strong chemical composition can damage fabrics, irritate sensitive skin, and create an unpleasant odor. Fortunately, there are effective and safer alternatives to sanitize your laundry without using bleach. Below are effective methods for sanitizing laundry without bleach:

Natural Methods to Sanitize Laundry

  1. Hot Water and Steam
    • Use your washer’s sanitize setting or the highest water temperature suitable for your fabrics. Hot water can kill bacteria, viruses, and fungi.
    • Steam can also disinfect laundry effectively, particularly when used in combination with a dryer’s sanitize cycle.
  2. Distilled White Vinegar
    • Add 1 cup of white vinegar to your washing machine’s rinse cycle. It acts as a natural disinfectant for laundry, deodorizes, and softens clothes.
    • Vinegar is especially useful for sanitizing laundry naturally without harsh chemicals.
  3. Hydrogen Peroxide
    • Mix hydrogen peroxide with water (a 1:3 ratio) and add it to your washer. This method is perfect for disinfecting laundry without bleach and is safe for white and light-colored fabrics.
  4. Pine Oil-Based Products
    • Pine oil, found in products like Pine-Sol for laundry, is an excellent alternative to bleach. Add a small amount to your washer for sanitization.
    • Ensure the product is safe for colored fabrics and rinse thoroughly.
  5. Essential Oils
    • Antimicrobial oils like tea tree or lavender can be added to your wash. Use a few drops in combination with your detergent for an extra layer of sanitization.

Chemical-Free Products for Laundry Sanitization

  • Fabric Sanitizer Sprays: Ideal for spot-treating fabrics or freshening up items like upholstery and carpets.
  • Laundry Disinfectants: Choose eco-friendly laundry sanitizers for routine disinfection, particularly for sensitive skin or baby clothes.
  • Sanitizing Detergents: Look for laundry detergents that kill bacteria, such as those containing enzymes or antibacterial agents.

These methods provide a range of options for effectively sanitizing your laundry while protecting your skin, fabrics, and the environment.

How to Use Laundry Sanitizers Effectively

Laundry sanitizers are specially formulated to kill bacteria and viruses while being safe for most fabrics. Here’s a step-by-step guide to using them correctly:

Using Liquid Laundry Sanitizers

  1. Choose the Right Product
    • Popular options include Lysol Laundry Sanitizer, Clorox Laundry Sanitizer, or other trusted brands. Check the label to ensure compatibility with your fabric types.
  2. Add Sanitizer During the Rinse Cycle
    • Most laundry sanitizers are added during the rinse cycle. This prevents the product from being rinsed away during the wash and allows for effective sanitization.
  3. Measure the Correct Amount
    • Follow the manufacturer’s guidelines. Using too much sanitizer can leave residue on clothes, while too little may not disinfect effectively.
  4. Use in Hot or Warm Water
    • For best results, pair the sanitizer with the highest temperature your fabrics can handle. This enhances the effectiveness of killing bacteria and germs.

Using Fabric Sanitizer Sprays

  1. Pre-Treat Clothing and Linens
    • Spray directly onto areas prone to bacteria build-up, such as underarm regions or cuffs. Products like fabric sanitizer sprays work well for quick touch-ups.
  2. Let It Sit Before Washing
    • Allow the spray to sit for at least 5-10 minutes to maximize its disinfecting power.
  3. Wash Normally
    • Place the pre-treated items in the washing machine and proceed with your regular detergent.

Using Laundry Sanitizers in the Washing Machine Or any Situation

Some machines have a sanitize setting, designed to work with specific sanitizing products:

  • Add the sanitizer to the designated compartment or directly into the drum.
  • Combine with your regular detergent for a thorough cleaning and disinfection.

Using laundry sanitizers not only keeps your clothes free from bacteria but also adds an extra layer of safety, especially for those with sensitive skin or allergies.

How to Sanitize Clothes in the Washing Machine

The washing machine is an essential tool for maintaining clean, fresh clothes. However, to ensure that your clothes are properly sanitized, you must use the right products and settings. Here’s a guide on how to effectively sanitize clothes in the washing machine:

1. Use a Laundry Sanitizer

  • Adding a laundry disinfectant like Lysol Laundry Sanitizer during the rinse cycle is an excellent way to kill germs without bleach.
  • These products are specifically designed to sanitize clothes and disinfect laundry without damaging the fabric. You can use laundry sanitizers in both front-load and top-load washers.
  • For best results, always follow the product instructions, and ensure you add the sanitizer during the rinse cycle for effective disinfection.

2. Activate the Washer’s Sanitize Cycle

  • Many modern washing machines are equipped with a sanitize cycle that uses hot water to kill bacteria and viruses.
  • If your machine has this option, make sure to select it for loads that require extra disinfection. This cycle is especially useful for sanitize towels, clothing, and bed linens.
  • Some washers even feature a sanitize setting on the dryer, which can be useful for further sanitizing after washing.

3. Wash With Hot Water

  • If your washing machine does not have a sanitize cycle, wash clothes in the hottest water setting your fabric can handle.
  • Hot water is a powerful tool for disinfecting clothing and sanitizing laundry. It can kill germs, bacteria, and viruses, making it one of the best ways to sanitize clothes without relying on chemicals.
  • Always check care labels to ensure the fabric can withstand hot water temperatures (typically 130°F-140°F/54°C-60°C).

4. Use a Disinfecting Laundry Detergent

  • If you want to ensure your laundry is thoroughly sanitized, consider using a disinfecting laundry detergent that contains antibacterial agents.
  • These detergents are formulated to kill germs while cleaning your clothes. Look for options like disinfecting laundry detergent or laundry disinfect for a more powerful disinfecting effect.
  • Many of these detergents can be used for regular laundry loads, making them versatile for everyday use.

5. Add White Vinegar for Natural Disinfection

  • Vinegar is a natural disinfectant that can help sanitize your laundry, especially for clothes without bleach.
  • Add 1/2 to 1 cup of distilled white vinegar to the rinse cycle to kill germs and soften clothes. Vinegar also helps to remove odors, leaving clothes fresh and sanitized.

6. Consider a Washer Cleaning Product

  • A clean washing machine ensures your clothes stay sanitized. Regularly clean your washing machine with a disinfectant washing machine cleaner or a special washing product to kill bacteria.
  • Run a monthly cycle with a washing machine cleaner, using hot water to maintain hygiene inside the drum, which can harbor bacteria and germs.

These simple steps will ensure that your laundry is both clean and sanitized. Whether you’re dealing with everyday wear, towels, or even thrifted clothes, knowing how to sanitize clothes in the washing machine effectively can help prevent the spread of germs and ensure your clothes are safe to wear.

How to Sanitize Clothes Without Bleach

For delicate fabrics or those that bleach might damage:

  • Distilled White Vinegar: Use 1 cup in the rinse cycle for effective sanitization.
  • Hydrogen Peroxide: Ideal for sanitizing light fabrics.
  • Pine Sol in Laundry: A powerful disinfectant safe for non-bleachable fabrics.
  • These methods are perfect for those seeking natural solutions for how to sanitize clothes without bleach.

How to Sanitize Thrifted Clothes

Secondhand clothing requires extra care to eliminate bacteria, allergens, or odors:

  • Pre-soak clothes in a mixture of disinfecting laundry detergent and warm water.
  • Run them through a washer with a sanitize cycle or hot water setting.
  • Use a cloth disinfectant spray to treat areas like collars and cuffs before washing.

How to Sanitize New Clothes Without Washing

  • For items you cannot launder, such as jackets or dry-clean-only garments:
    • Use a disinfectant spray for clothes to kill bacteria on the surface.
    • Steam clean using a fabric steamer to sanitize and freshen.
    • Hang clothes in direct sunlight for natural UV-based sanitization.

How to Get Hand Sanitizer Out of Clothes

Accidental spills of hand sanitizer can leave stubborn stains:

  • Blot the stain immediately with a damp cloth to remove excess sanitizer.
  • Wash with a laundry detergent that kills bacteria and add a small amount of vinegar to the rinse cycle to remove residue.

How to Disinfect Clothes Without Washing

For items that can’t be washed immediately:

  • Use a clothing disinfectant spray to kill germs on contact.
  • Place fabrics in a dryer on the sanitize setting for 20 minutes.
  • UV radiation is another effective option, especially for outdoor gear or shoes.

How to Sanitize Laundry Naturally

If you prefer to avoid chemicals, there are several natural methods for sanitizing laundry effectively. These options are gentle on fabrics, environmentally friendly, and safe for sensitive skin.

1. Vinegar as a Natural Disinfectant

  • Adding distilled white vinegar during the rinse cycle is a simple way to sanitize your laundry.
  • It eliminates odors, softens fabrics, and serves as a natural laundry disinfectant.
  • Vinegar works particularly well for sanitizing clothes without bleach.

2. Baking Soda for Odor and Germ Removal

  • Baking soda is a powerful deodorizer and helps remove bacteria.
  • Combine it with your detergent for an extra boost in disinfecting laundry.

3. Sunlight as a Natural Sanitizer

  • Drying clothes under direct sunlight acts as a natural disinfectant for clothes.
  • UV rays effectively kill bacteria and viruses, making it ideal for sanitizing thrifted clothes or freshly washed items.

4. Essential Oils for Sanitizing Laundry

  • Antimicrobial oils like tea tree, eucalyptus, or lavender can be added to your wash.
  • They are excellent for laundry sanitizing and leave clothes smelling fresh.

5. Hot Water Washing

  • Washing clothes in hot water at 60°C (140°F) or higher can kill most bacteria and viruses.
  • Use the sanitize setting on washers for added effectiveness.

Benefits of Natural Sanitizing Methods

  • Safe for people with sensitive skin or allergies.
  • Ideal for sanitizing laundry without bleach or other harsh chemicals.
  • Cost-effective and eco-friendly.

Natural methods provide a practical way to maintain hygiene in your laundry routine while avoiding exposure to harmful chemicals

Benefits of Bleach Alternatives

  • Safer for sensitive skin and delicate fabrics.
  • Prevents fabric discoloration and deterioration caused by bleach.
  • Compatible with various fabric types and washing machines.

These alternatives ensure your laundry is hygienically clean without compromising fabric quality or skin safety.

How to Sanitize Thrifted Clothes and New Clothes Without Washing

Sanitizing thrifted or new clothes is essential to remove potential bacteria, germs, or residues from previous handling. Here’s how to do it effectively, even without washing:

1. Use a Fabric Sanitizer Spray

  • Products like fabric sanitizer sprays or cloth disinfectant sprays are ideal for quick sanitization.
  • Spray generously on all surfaces of the clothing, focusing on areas like underarms and seams.
  • Let the spray dry completely before wearing or storing.

2. Steam Treatment

  • Use a handheld steamer or a steam iron to sanitize clothes.
  • High-temperature steam effectively kills germs and is a chemical-free way to sanitize thrifted or delicate clothes.
  • This is particularly effective for fabrics that can’t be machine washed.

3. Sunlight Exposure

  • Place clothes in direct sunlight for several hours.
  • UV rays act as a natural sanitizer and deodorizer, making this an excellent option for sanitizing thrifted clothes naturally.

4. Use the Dryer’s Sanitize Cycle

  • If you have a dryer with a sanitize setting, use it to disinfect clothes without washing.
  • The high heat effectively eliminates bacteria and viruses.

5. Essential Oil Mist

  • Create a natural sanitizer mist using water and a few drops of tea tree or eucalyptus oil.
  • Spray lightly over the garments and allow them to air dry.

Why Sanitize New and Thrifted Clothes?

  • Thrifted Clothes: May carry bacteria, allergens, or odors from previous use.
  • New Clothes: Often treated with chemicals like formaldehyde to preserve their appearance, which can irritate sensitive skin.

These methods ensure your clothes are clean, fresh, and safe to wear without the need for immediate laundering.

How to Sanitize Laundry in the Washing Machine

Using a washing machine is one of the most efficient ways to sanitize laundry, but it’s important to understand the best practices and products for effective disinfection. Here’s how to ensure your washing machine does a thorough job of sanitizing laundry:

1. Use a Laundry Sanitizer in the Wash


  • Lysol Laundry Sanitizer and Clorox Laundry Sanitizer are specially formulated to eliminate bacteria without bleach.
  • Add the sanitizer during the rinse cycle to kill germs and bacteria on your clothes.
  • If you’re using a front loader or a top loader, ensure the sanitizer is added when the washer fills with water to ensure maximum distribution.

2. Activate the Sanitizing Cycle

  • Many modern washing machines come with a sanitized setting or a “sanitize cycle.”
  • This cycle uses hot water (usually above 140°F/60°C) to help kill bacteria, viruses, and fungi.
  • If your machine lacks a dedicated sanitize cycle, you can run a hot wash with detergent and a disinfectant like laundry disinfectant or disinfectant laundry detergent.

3. Hot Water Settings for Effective Disinfection

  • Washing clothes in hot water is one of the most effective methods for sanitizing laundry in the machine.
  • If you don’t have a sanitize cycle, use the hottest water your clothes can safely handle. Hot water effectively eliminates bacteria and viruses, including harmful germs.

4. Add Disinfectant Laundry Detergent

  • Choose disinfecting laundry detergent that contains antibacterial properties.
  • Products like disinfectant clothes spray or disinfectant laundry soap can enhance the effectiveness of your detergent, ensuring that your laundry is disinfected without relying on bleach.

5. Regularly Clean Your Washing Machine

  • Clean your washing machine regularly to ensure the machine doesn’t harbor germs.
  • Run an empty cycle with hot water and washing disinfectant or a special washer cleaner to remove any lingering bacteria.

Best Laundry Sanitizing Tips for Different Fabrics

  • Towels & Bedding: Towels and bedding should be washed using the hottest setting, along with a laundry sanitizer detergent for thorough disinfection.
  • Delicates: For delicate fabrics, consider using sanitizing laundry soap or laundry disinfectant designed for sensitive fabrics, and always avoid using hot water unless the label permits it.

By using these methods and products, you can ensure that your laundry comes out clean, sanitized, and fresh, ready to wear or use without any lingering germs or bacteria.

Why You Should Learn How to Sanitize Laundry

Sanitizing laundry is important for more than just cleanliness. Here’s why you should be concerned about sanitizing clothes in your laundry routine:

1. Preventing the Spread of Germs and Bacteria

  • Sanitizing laundry helps to prevent the spread of harmful bacteria and viruses. Regular disinfection is especially important during cold and flu season, or when handling laundry from high-risk environments (e.g., gyms, hospitals, or public transportation).
  • Using products like laundry disinfectant or sanitizing laundry soap ensures your laundry is free from germs that could lead to illness.

2. Allergy Relief

  • Many germs and bacteria that thrive in laundry can contribute to allergy flare-ups. By using laundry sanitizers and regularly disinfecting laundry, you reduce allergens like dust mites and mold, which can irritate skin and airways.

3. Hygiene and Freshness

  • Sanitized laundry not only looks clean but feels fresh and hygienic. Disinfecting clothes helps to remove stubborn odors, and a properly sanitized load ensures your laundry is free of bacteria that can cause unpleasant smells.


Bath Sheet vs Bath Towel: Understanding the Key Differences, Sizes, and Uses

0

When it comes to bath linens, many people find themselves choosing between a bath sheet vs bath towel. While both serve the same purpose of drying off after a shower or bath their key differences lie in their size, comfort, and absorbency. A bath towel is typically smaller, measuring around 27 inches by 52 inches, making it ideal for everyday use. Its compact size makes it convenient to store and perfect for quick drying. On the other hand, a bath sheet, which measures approximately 35 inches by 60 inches or more, offers a larger, more luxurious option for those who prefer a more enveloping towel. The added size of a bath sheet allows for greater comfort, as it provides more coverage and is often preferred by those who enjoy being fully wrapped up in their towel. While both bath sheets and bath towels are made from similar materials, such as cotton, the additional size of a bath sheet typically means more absorbency, making it a great choice for those who want a more absorbent and comfortable option after their bath or shower.

What is a Bath Towel?

A bath towel is a standard-sized towel that most people use every day. With dimensions of around 27 inches by 52 inches, it’s the most common towel size found in bathrooms, offering a balance of coverage and convenience. Bath towels are designed to be compact enough for easy storage, while still providing sufficient absorbency to dry off after a shower or bath. Typically made from soft, absorbent materials like cotton, bath towels come in various styles and qualities, ranging from basic towels to high-end options. When deciding between a bath towel vs bath sheet, it’s important to consider the purpose of the towel and how much space you have for storage. A bath towel is perfect for people who prefer a lighter, more manageable towel that dries them off quickly but doesn’t take up as much space as a bath sheet. The bath towel is also versatile, and it can be found in most homes, hotels, and gyms. Whether you’re looking for bath towels sheets or simply a reliable towel for everyday use, a bath towel offers a practical and cost-effective solution for your bathroom needs.

What is a Bath Sheet?

A bath sheet is a larger version of a bath towel, typically measuring around 35 inches by 60 inches or more. This extra size offers more coverage and comfort, making it ideal for those who prefer a more enveloping towel after a bath or shower. Bath sheets provide a luxurious feel, allowing you to wrap yourself up fully and dry off with ease. The added fabric means a higher absorbency, making it a perfect choice for people who want a towel that can handle more moisture. Many individuals opt for a bath sheet when they want a towel that provides ultimate comfort, especially in spas, hotels, or at home for a more indulgent experience. Oversized bath sheets are particularly popular in settings that prioritize luxury and comfort, offering a spa-like experience every time you step out of the bath. Commonly found in colors like white bath sheets or made from high-quality cotton, these towels can make a bathroom feel like a relaxing retreat. However, the larger size of a bath sheet also means that it requires more storage space, which is an important consideration when choosing between a bath sheet vs bath towel. Whether you prefer wamsutta bath sheets or simply a high-quality towel, bath sheets are a top choice for those looking for extra comfort.

What is a Bath Sheet Used For?

A bath sheet is primarily used for drying off after a shower or bath, but its larger size makes it more versatile compared to a standard bath towel. The extra fabric can be wrapped around the body more comfortably, making it ideal for those who prefer to be fully enveloped in their towel. Bath sheets are also useful for people who have more moisture to absorb or those who want a larger towel to dry off multiple areas of the body simultaneously. Oversized bath sheets are particularly beneficial in this regard, offering a generous amount of fabric to quickly and efficiently absorb water. Whether you’re using a wamsutta bath sheet or a luxury version, their larger surface area makes them a great option for anyone who values comfort and practicality. Beyond personal use, bath sheets are often found in spas and luxury hotels, providing a premium towel experience. For those who have larger body types or prefer a more luxurious feel after a bath or shower, a bath sheet vs bath towel can make all the difference. The increased size and absorbency make bath sheets a more effective option for post-bath drying, especially if you’re looking for something soft and comforting.

Bath Sheet vs Bath Towel: Size Comparison

When considering a bath sheet vs bath towel, the most noticeable difference is their size. Bath towels are typically smaller, around 27 inches by 52 inches, making them easy to handle and quick to dry off with. They are great for everyday use, especially if you need a towel that is practical and space-efficient. However, if you’re someone who enjoys a more luxurious experience, a bath sheet may be the better option. Bath sheets measure approximately 35 inches by 60 inches or more, providing extra fabric for larger coverage. This extra size means that bath sheets are better for wrapping around your body, giving you a more comfortable and drying experience. The larger surface area also means bath sheets can absorb more water, which is helpful if you have thick hair or prefer a more thorough drying process. While both towels and sheets are made from similar materials like cotton, the bath sheet towel size makes a clear distinction when it comes to comfort and absorbency. If you need a towel that offers more space and comfort, a bath sheet is the way to go, but if you prefer something more compact and easy to store, a bath towel might be your best choice.

ath Sheet Dimensions vs Bath Towel Dimensions

Understanding the dimensions of both towels is crucial when deciding between a bath sheet vs bath towel. Bath sheets are typically larger, providing more coverage, while bath towels are more compact and easier to store. Below is a quick comparison of the typical dimensions for both:

Type of Towel Dimensions Ideal Use Key Features
Bath Sheet 35 inches x 60 inches or more Best for full-body coverage, comfort, and absorbency Larger size, high absorbency, ideal for those who want to wrap fully or need extra fabric.
Bath Towel 27 inches x 52 inches Everyday use, smaller storage space More compact, quicker drying, and easier to handle.

As you can see, the bath sheet dimensions provide more coverage and space for drying off, while the standard bath towel is more practical for everyday use. The larger dimensions of a bath sheet make it an ideal choice for those who prefer a more luxurious feel after a bath or shower. If you’re looking for something to wrap around your body fully, a bath sheet vs bath towel will come down to the size and comfort you need.

Bath Sheet vs Beach Towel

While both bath sheets and beach towels are large, they serve different purposes. A beach sheet towel is designed for outdoor use, typically larger than a bath sheet, measuring around 40 inches by 70 inches or more. It’s designed to be spread out on sand or grass for lounging, and its larger size ensures you have ample room to relax comfortably in the sun. A bath sheet vs beach towel comparison reveals that while both towels are large, beach towels are often made from more durable and quick-drying fabrics suited for outdoor use. A bath sheet, on the other hand, is made from softer, more absorbent cotton, ideal for drying off after a bath or shower. Additionally, a beach towel is usually not as thick as a bath sheet, which makes it less absorbent. Whether you’re headed to the beach or drying off after a shower, knowing the difference between a bath sheet vs beach towel will help you choose the right towel for the job.

What is the Difference Between a Bath Sheet and Bath Towel?

The main difference between a bath sheet and a bath towel lies in their size and intended use. A bath sheet, as mentioned, is larger and provides more coverage, making it ideal for those who want a more luxurious, enveloping experience after a bath or shower. The bath sheet bath towel difference is immediately noticeable when you compare their dimensions. Bath towels are more compact, making them easier to handle and store. The difference between bath sheet and bath towel isn’t just about size, but also absorbency. The larger surface area of a bath sheet allows it to absorb more moisture, which is beneficial if you have thicker hair or prefer a towel that can quickly dry off a larger body surface.

Another key difference is in the texture and fabric quality. Bath sheets are often made from higher-quality materials like luxury bath sheets, which are softer and thicker than regular bath towels. They are designed to provide an extra layer of comfort, making them perfect for spas, hotels, and high-end bathroom setups. If you’re seeking something that feels more like a treat after a long shower or bath, a wamsutta bath sheet or similar high-end brands can provide the plush, absorbent experience you’re looking for.

In contrast, a bath towel is designed for practicality and everyday use. While it may not offer the same luxurious feel as a bath sheet, it still provides excellent absorbency for daily drying purposes. For those who prefer a towel that’s more compact, a bath towel vs sheet comparison highlights the practical nature of a bath towel for smaller bathrooms or tight storage spaces.

White Bath Sheets: A Classic Choice

When it comes to white bath sheets, they are a timeless and classic option that adds elegance to any bathroom setting. White towels are associated with cleanliness and luxury, making them a popular choice for both bath sheets and bath towels. The bath sheets towels comparison isn’t just about function, but also about aesthetics. White towels tend to be easier to match with other bathroom linens and décor, creating a cohesive and fresh look. Additionally, white bath sheets are often made from high-quality cotton or a cotton blend, which makes them both absorbent and soft.

For those who prefer a clean, bright look in their bathroom, white bath sheets offer the perfect solution. These towels are also commonly found in luxury hotels and spas due to their high-quality fabric and the sense of sophistication they convey. Whether you’re looking for bath sheets in Macy’s or other premium retailers, white bath sheets offer a versatile and luxurious option for anyone wanting to enhance their bathroom style.

Bath Sheet Sets: Convenience and Style

If you’re looking to upgrade your towel collection, bath sheet sets are a convenient option. These sets typically include a bath sheet, bath towel, hand towel, and washcloth, providing a complete linen set for your bathroom. Purchasing a bath sheet set not only ensures that you have towels of the right size for various purposes, but it also gives your bathroom a uniform, polished look. Many high-end brands, such as Brook linen bath sheet vs bath towel, offer towel sets with matching colours and designs, so you can create a cohesive and stylish bathroom environment.

By investing in bath sheet sets, you ensure that you have the right towel for every situation whether you’re drying off after a shower, cleaning up after a bath, or using a smaller towel for quick touch-ups. The consistency in quality and design makes these sets a popular choice for those who want to elevate their bathroom aesthetics and functionality.

What is a Bath Towel Used For?

A bath sheet is primarily used for drying off after a bath or shower. Its larger size makes it perfect for individuals who want more coverage and comfort when they step out of the water. Whether you prefer to wrap yourself completely or need extra space for drying your hair, the bath sheet vs bath towel comparison shows that a bath sheet is a superior option for those seeking full-body coverage. Additionally, its absorbent nature allows it to soak up moisture more efficiently than a standard bath towel, which makes it ideal for drying off after a long soak in the tub or a shower.

The bath sheet or towel debate often depends on personal preference and bathroom space. While bath towels are often more than sufficient for drying off, the luxurious experience of a bath sheet can elevate the post-shower ritual. For a plush, spa-like feel, many people opt for oversized bath sheets to indulge in the comfort they provide. If you have larger bathroom spaces or prefer larger towels, you’ll likely find that a bath sheet suits your needs more effectively.

Beyond personal use, bath sheets also make excellent gifts. For special occasions such as birthdays, holidays, or housewarmings, bath sheets from renowned brands like Wamsutta bath sheet or Field crest bath sheet are often appreciated for their softness, durability, and high-quality material.

Bath Sheet Size vs Bath Towel Size: Which is Right for You?

The bath sheet size and bath towel size comparison is an important factor when choosing the right towel for your needs. If you prefer a towel that gives you ample room to wrap yourself up comfortably, then a bath sheet is the best choice. The larger dimensions of a bath sheet are perfect for people who have a taller frame or those who simply enjoy the extra space for drying off. In contrast, bath towels are typically more compact, making them ideal for everyday use in smaller bathrooms or for quick drying after a shower.

The bath sheet dimensions are generally 35 inches x 60 inches or more, which is significantly larger than a standard bath towel, typically measuring 27 inches x 52 inches. This size difference is what makes the bath towel vs bath sheet decision so significant for consumers. If you’re looking for towels to use on a daily basis and have limited storage space, a bath towel might be your best option. However, if you want something that offers more coverage and luxury, the larger size of a bath sheet is the better option.

The Benefits of Oversized Bath Sheets

Oversized bath sheets are the ultimate choice for those who value comfort and luxury. These towels typically measure even larger than standard bath sheets, offering more space for wrapping around your body. Oversized bath sheet towels are perfect for those who want the ultimate indulgence when drying off after a shower or bath. Not only do they provide ample coverage, but they also absorb moisture more quickly due to their increased surface area.

The added benefit of an oversized bath sheet is that it can often double as a beach towel for lounging in the sun, providing both comfort and versatility. When considering whether to purchase a standard bath towel or an oversized bath sheet, think about your personal preferences for coverage, drying speed, and overall bathroom space.

Bath Sheet vs Bath Towel: Which One is Better for Your Bathroom?

When comparing bath sheet vs bath towel, it’s essential to consider the space available in your bathroom, your drying needs, and personal preferences. The bath sheet is ideal for individuals who want maximum comfort, extra coverage, and faster drying. Its larger dimensions make it perfect for taller individuals or those who prefer to envelop themselves completely after a shower or bath. On the other hand, the bath towel is more compact and practical, fitting easily into smaller bathrooms or for those who don’t mind a little less coverage.

If your bathroom has ample space and you enjoy the luxurious feeling of extra material after drying off, the bath sheet vs bath towel decision might be easy for you to make. However, if you have limited storage or space and need something more convenient and quick-drying, the bath towel might be your preferred choice. Ultimately, the choice comes down to personal preference, lifestyle, and bathroom setup.

Table: Bath Sheet vs Bath Towel – Size and Functionality Comparison

Feature Bath Sheet Bath Towel
Size Typically 35” x 60” or larger Typically 27” x 52”
Coverage Provides more coverage, ideal for wrapping the entire body Offers standard coverage, good for quick drying
Absorbency More absorbent due to larger surface area Absorbs moisture but may require more time to dry the body completely
Storage Space Requires more storage due to larger size Takes up less space in the bathroom
Best For People who enjoy extra coverage and comfort People who prefer convenience and quicker drying

What is the Difference Between a Bath Sheet and Beach Towel?

While both bath sheets vs beach towels may look similar, they serve different purposes. A beach towel is usually larger and designed for use at the beach or pool, often being made from materials that can dry quickly under the sun. On the other hand, a bath sheet is designed for bathroom use, typically made from thick, absorbent materials that offer a more luxurious experience after a bath or shower. While both towels are meant to dry the body, bath sheets are generally thicker, plush, and more absorbent than beach towels.

A bath sheet might be perfect for wrapping yourself after a warm shower, while a beach towel would be more suitable for laying on the sand or drying off after swimming in the ocean. The difference between a bath sheet and a beach towel comes down to their intended use, material, and size. Bath sheets are meant for warmth and absorbency, while beach towels are designed for portability, quick drying, and outdoor comfort.

Popular Bath Sheet Brands and Their Unique Features

When it comes to purchasing the best bath sheets, several popular brands offer top-quality towels with a range of features. For instance, Wamsutta bath sheets are known for their luxurious softness and durability, making them a favourite among those who want high-end towels. Similarly, Field crest bath sheets are appreciated for their plush feel and thick texture, offering great absorbency and comfort after a shower. If you are looking for bath sheets that offer both style and functionality, you might also consider options from high-end brands like Brook linen bath sheet vs bath towel, which provide a blend of softness, size, and absorbency.

These brands ensure that their bath sheets are made from top-quality cotton sheets or microfiber sheets, providing a luxurious drying experience. Many also offer bath sheet sets, which include matching towels, hand towels, and washcloths, ensuring that your bathroom has a coordinated and premium look.

How to Choose the Right Bath Sheet and Bath Towel for Your Needs

When deciding between a bath sheet vs bath towel, several factors can help guide your decision. Understanding your bath sheet dimensions and how they fit into your bathroom setup is crucial. For example, if you have a larger bathroom and prefer a towel that wraps around your body comfortably, a bath sheet might be the best option. On the other hand, if you’re working with limited storage space or prefer something more compact, a bath towel could be a more practical choice.

Consider the following factors when choosing a bath sheet:

  • Material: Choose a bath sheet made from soft, absorbent materials such as Egyptian cotton or Turkish cotton for maximum comfort and drying efficiency.
  • Size and Dimensions: Make sure the bath sheet size fits your needs. Typically, a bath sheet is 35” x 60” or larger, which gives you ample space to wrap yourself up comfortably.
  • Storage Space: While bath sheets towels offer luxurious coverage, they require more storage space. Consider how much room you have in your linen closet.
  • Color and Aesthetics: Opt for white bath sheets or other colours that complement your bathroom decor. White towels are classic and provide a clean, crisp look.

Additionally, always check customer reviews and ratings before making a purchase. Some brands, like Wamsutta bath sheets, offer superior absorbency and feel, while others may provide a thinner material that dries faster but offers less comfort.

Bath Sheet vs Bath Towel: Which One Lasts Longer?

The longevity of your bath sheet or bath towel depends largely on the material and how well you take care of it. Towels made from high-quality cotton, such as Turkish cotton or Egyptian cotton, tend to be more durable and long-lasting. Bath sheets usually require more care due to their larger size, but when cared for properly, they can outlast standard bath towels in terms of both durability and comfort.

The key to extending the lifespan of both bath sheets and bath towels is regular washing, proper drying, and avoiding harsh chemicals. Wash your towels in cold water and dry them on a low heat setting to prevent damage to the fibers. It’s also essential to avoid using fabric softeners, as they can reduce the towel’s absorbency over time. For detailed guidance on cleaning microfiber towels and cloths, check out our article on How to Wash Microfiber Towels & Cloths.

Expert’s Suggestions: Bath Sheet vs Bath Towel

In the expert suggestion section, the bath sheet vs bath towel debate boils down to personal preference, bathroom space, and how much comfort or convenience you value. If you’re after extra coverage and luxury, a bath sheet might be the best choice for you. On the other hand, if you prefer something more compact and versatile, a bath towel is a great option.

Consider the bath sheet dimensions, material, and care instructions to choose the towel that best fits your lifestyle. Whether you opt for white bath sheets, oversized bath sheets, or a classic bath towel, make sure to invest in high-quality towels that offer long-lasting comfort and performance.

How to Use Sanitary Pads (Napkins) for Comfort and Confidence

0

Sanitary napkins, also known as pads, play a crucial role in managing menstrual hygiene, providing comfort, and helping women maintain confidence during their periods. For those new to using pads, understanding how to properly put on a pad and how long to wear it is essential to avoid leaks and ensure comfort throughout the day. In this guide, we’ll cover everything you need to know about how to use a pad from choosing the right type, to how to put a pad on securely, and knowing how long you should wear a pad for optimal hygiene.

With so many options available, it’s normal to wonder how to wear the pad correctly or which style suits you best. This guide aims to provide clear, step-by-step instructions on how to put on a period pad and use it safely and comfortably. Whether you’re a beginner or looking for tips to enhance your experience, this article covers all the essential details, giving you the confidence to manage your period comfortably. This article provides the best answer to the question, ‘How to Use Sanitary Pads (Napkins).’

How to Use Sanitary Pads (Napkins)?

Sanitary pads (napkins), commonly referred to as pads, are absorbent products designed to manage menstrual flow by absorbing and containing it. Worn on the inside of underwear, these pads come in a range of shapes, sizes, and absorbency levels, making it easier to choose one that fits each person’s needs. Learning how to use a pad effectively is essential for ensuring comfort and security during menstruation.

Typically, a pad consists of layers that provide absorbency and help prevent leaks, keeping you feeling dry and comfortable throughout the day. For beginners who may be asking, “How do I put a pad on?” or “How to wear the pad?”, understanding these basics can make a big difference. Whether using a pad for the first time or trying out a new type, it’s helpful to explore the options and find what works best for your body and lifestyle.

Pads are essential for maintaining menstrual hygiene and can be worn during different activities, including sleeping, working, or exercising. Knowing how to wear pads correctly and how they work can empower you to stay confident and comfortable throughout your period.

Benefits of Using Sanitary Napkins (Pads) for Menstrual Hygiene

Sanitary napkins offer numerous benefits, especially when you know how to wear the pad properly. Pads are a convenient and reliable choice for managing menstruation, allowing you to maintain hygiene and feel confident during your period. Whether you’re new to using pads or already familiar with how to put on a period pad, understanding the advantages can help you make informed choices.

  • Comfort and Protection


Pads provide a comfortable and secure way to manage menstrual flow. When you know how to put on a pad correctly, it stays in place and prevents leaks, even during movement. This allows you to go about your daily activities without worry.


  • Hygiene and Health


Sanitary napkins help reduce the risk of infections by keeping menstrual blood contained and away from the skin. Learning how long you should wear a pad and when to change it can support better hygiene and prevent irritation.


  • Variety of Choices


Sanitary pads come in many styles, from thin liners to thicker, more absorbent pads. If you know how to use a pad and select one suited to your flow and lifestyle, you can achieve both comfort and peace of mind. For example, choosing a night pad with added absorbency can help you feel secure while sleeping.

These benefits make sanitary napkins an effective and accessible option for menstrual hygiene. Understanding how to wear pads correctly and knowing the types available can ensure you have a positive experience every time.

Types of Sanitary Pads (Napkins) and How to Choose the Right One

Choosing the right sanitary napkin is essential for comfort and effectiveness. With a variety of options available, it’s helpful to know the different types and understand how to use a pad that fits your specific needs. Whether you’re deciding how to put on a pad for light or heavy flow days, selecting the right type can make all the difference.

  • Sanitary Day Pads vs. Sanitary Night Pads

      • Day Pads: Typically lighter and thinner, ideal for daytime use and lower levels of activity. If you’re wondering how to wear the pad comfortably throughout the day, day pads offer flexibility and are usually less bulky.
      • Night Pads: Thicker and longer for overnight protection. These pads provide extra absorbency, so you can sleep comfortably without worrying about leaks.
  • Thickness and Absorbency Levels

      • Thin Pads (Panty Liners): For light spotting or as backup protection. Learning how to put on a period pad that’s thin and breathable can be ideal for days when your flow is light.
      • Moderate and Heavy Flow Pads: For regular to heavy days, these offer more absorbency. If you know how to wear pads and align them properly in your underwear, these pads can give you the security you need during heavier flow.
  • Winged vs. Non-Winged Pads

      • Winged Pads: The wings secure the pad in place, wrapping around the edges of the underwear to prevent shifting. This can be especially helpful if you’re learning how to properly put on a pad for the first time and want to ensure it stays in place.
      • Non-Winged Pads: These pads provide good protection but may shift more than winged varieties. They’re an option for those who prefer a simpler design.
  • Material and Scented vs. Unscented Pads

    • Some pads are made with breathable materials or have natural ingredients to reduce irritation. Women wearing a pad often find that unscented, natural options are gentler on sensitive skin.

By understanding the types of sanitary napkins available, you can find the one that best fits your flow, comfort preferences, and lifestyle. Knowing how do you put on pads correctly, especially if you’re trying different styles, can enhance both comfort and confidence.

How to Use a Sanitary Pads (Napkins) Correctly

Using a sanitary napkin properly is key to staying comfortable and preventing leaks. For those who are new to using pads or wondering how to wear pads securely, following these steps can help you feel confident.

Step-by-Step Guide for Beginners

  • Prepare the Pad

      • Remove the sanitary napkin from its packaging and unfold it carefully. If it’s a pad with wings, you’ll notice extra flaps on each side.
      • If you’re unsure how to put a pad on, make sure the sticky side is facing down so it adheres to your underwear.
  • Positioning the Pad

      • Place the pad in the center of your underwear, ensuring it aligns with the area that will provide maximum coverage. Many people find that knowing how to properly put on a pad in the middle of the underwear prevents leaks.
      • For pads on underwear with wings, fold the wings over the sides of the underwear to keep the pad securely in place. This extra step helps if you’re learning how to wear the pad without worrying about it shifting.
  • Securing the Pad in Place

      • Press down on the pad to ensure it sticks to the fabric. Double-check that the wings, if present, are securely wrapped. Learning how to put on a period pad correctly ensures it stays in place, providing reliable protection.
  • Making Adjustments for Comfort

    • Walk around or sit down to check if the pad feels comfortable and is aligned correctly. If it feels too far forward or backward, gently adjust it so it stays where you need it most.

By following these steps on how to use a pad, you’ll have a secure, comfortable experience each time. Practicing how to put on a pad correctly can make a big difference in managing your period with confidence.

When to Change a Sanitary Napkin (Pad)

Knowing how long you should wear a pad and when to change it is essential for maintaining good menstrual hygiene and staying comfortable. On average, it’s recommended to change a sanitary napkin every 4 to 6 hours, but this can vary based on your flow and activity level.

  • Listen to Your Body

      • During heavier flow days, you may need to change your pad more frequently. If you notice discomfort or the pad feeling damp, it’s time to switch to a fresh one.
      • Staying aware of how to use a pad for different levels of flow can help prevent leaks and keep you comfortable.
  • Avoid Wearing a Pad Too Long

      • Prolonged use of a single pad can lead to discomfort and even skin irritation. Changing pads regularly also reduces the risk of bacterial growth, keeping you fresh throughout the day.
      • Learning how long should u wear a pad safely is especially important for overnight use, as extended wear may require a thicker, night-specific pad for better protection.
  • Tips for Changing Pads on the Go

    • If you’re active or on the move, pack a few extra pads in your bag for easy access. Many women wearing a pad during the day prefer keeping a backup to stay prepared in case of unexpected changes in flow.

Being mindful of how long you should wear a pad and changing it regularly can keep you feeling clean and confident during your period.

Tips for Comfortable and Confident Use of Sanitary Napkins (Pads)

Using sanitary napkins correctly ensures comfort and confidence throughout your period. Whether you’re just starting to learn how to wear the pad or are a seasoned user, following these tips will help you get the most out of your pad for comfort and leak protection.

    1. Choose the Right Size and Absorbency

      • Make sure the pad you choose matches your flow. For light days, you might opt for a thinner pad, while heavier days may require a thicker one with higher absorbency. Knowing how to wear the pad for different flow levels is crucial for comfort.
      • How to put on a period pad becomes easier once you know which size and absorbency to select based on your needs.
  • Wear the Right Underwear

      • Choose snug, breathable underwear to help keep your pad in place. Tight-fitting underwear helps prevent pads from shifting around, ensuring comfort and stability. Pads on underwear that fit well are less likely to move during the day.
  • Stay Active and Confident

      • Don’t let your period hold you back. If you’ve learned how to put on a pad and use it correctly, you can continue with your regular activities like exercising, working, or socializing without worry.
      • Practice how to properly put on a pad to ensure it stays secure during physical activity.
  • Practice Regular Changes

      • As mentioned earlier, regular changes are essential to stay fresh. Learn how long should u wear a pad and follow the guideline to avoid wearing one for too long. This will help you feel more comfortable and confident throughout the day.
  • Keep a Backup Plan

    • Always carry extra pads with you, especially if you’re going to be out for long periods. If you’re wondering how to put a pad on in a public restroom, having a backup ensures you don’t get caught off guard.

By following these tips and learning how to wear the pad properly, you can ensure a comfortable, leak-free experience that allows you to go about your day with confidence.

How to Dispose of a Sanitary Pads (Napkins)

Proper disposal of sanitary napkins is essential for hygiene and environmental reasons. Knowing how to dispose of a sanitary napkin correctly ensures that you maintain cleanliness and avoid any unpleasant odors.

  • Wrap the Used Pad

      • After you’ve worn the pad for the recommended time and are ready to change it, fold it carefully and wrap it in the wrapper it came in or in a small piece of tissue. This helps contain any odors and ensures privacy. How to put a pad on is only one part of menstrual hygiene; proper disposal is equally important.
  • Avoid Flushing Pads

      • Although it might seem convenient, you should never flush sanitary napkins down the toilet. They are not designed to break down in water and can cause plumbing issues. Be sure to dispose of them in a sanitary bin.
  • Use a Disposal Bag for On-the-Go

      • If you’re out and about, bring along a disposal bag to store the used pad until you find a trash bin. This is especially important if you’re unsure how to put a pad on during a day out and need to change it in a public restroom.
  • Dispose of Pads in a Trash Bin

    • Once you’ve wrapped the pad properly, place it in a sealed trash bin. In some areas, you may find dedicated sanitary disposal bins in public restrooms for this purpose. Proper disposal is an essential part of knowing how to wear pads and keeping things clean.

By following these steps, you can dispose of your sanitary napkins properly and maintain hygiene, ensuring that the whole process from how to wear the pad to its disposal is seamless and discreet.

Expert’s Suggestions

For a comfortable, leak-free period, it’s important to practice proper usage and disposal of sanitary napkins. Experts recommend that you always choose the right pad for your flow and change it regularly to maintain hygiene and comfort. How to wear pads correctly, along with how to put on a period pad securely, can make a significant difference in your overall experience.

It’s also crucial to avoid wearing a pad for too long; ideally, you should change it every 4-6 hours, depending on your flow. By paying attention to how long should u wear a pad and selecting the right absorbency, you can ensure a hassle-free and confident day. Additionally, learning how to properly put on a pad and keeping backups on hand will prepare you for any situation.

Taking these expert tips into consideration will not only help you navigate menstruation with ease but also ensure that you’re making the best choices for both your comfort and hygiene.


How Often to Change Tampon: Essential Tips and Safety Guidelines

0

Understanding Tampon Use: How Often to Change Tampon and Why It Matters

Tampon hygiene is essential for your comfort and health, and knowing how often to change your tampon plays a crucial role in maintaining both. Proper tampon use not only enhances your overall menstrual experience but also significantly reduces the risk of infections and other complications. Generally, it’s recommended to change a tampon every 4-8 hours. However, the exact timing can vary based on several factors, including flow intensity, tampon absorbency, and individual comfort levels.

For instance, during heavier flow days, you may find yourself needing to change your tampon more frequently potentially every 3-4 hours to ensure optimal protection and comfort. Conversely, on lighter days, a longer interval may be appropriate, provided the tampon is still absorbing effectively. Frequent changing helps to prevent any potential risks, such as irritation and discomfort, while also mitigating more severe health concerns like toxic shock syndrome (TSS). Ultimately, understanding your body’s unique rhythm and responding to its needs will empower you to make informed decisions about tampon use, leading to a safer and more comfortable menstrual experience. This article provides the best answer to the question, ‘How Often to Change Tampon.’

How Often Should You Change Your Tampon on Light and Heavy Days?

On lighter days, you might find that you don’t need to change your tampon as frequently, but it’s still important to avoid leaving a tampon in for more than 8 hours. On heavier days, you may need to change it more often, possibly every 3-4 hours, to manage the increased flow and prevent leaks. For those new to tampons, check out our guide on How to Put in a Tampon for easy, step-by-step instructions. Keep an eye on how saturated the tampon feels, and don’t wait too long between changes to stay fresh and protected.

Signs It’s Time to Change Your Tampon

If you feel any dampness, or if you start to notice an odor or any discomfort, it’s likely time to change your tampon. Remember, how often you should change a super tampon may differ from a regular one. Heavier flow can saturate a super tampon within a few hours, while on lighter days, a regular tampon might last longer.

How Many Times a Day Should You Change Your Tampon?

Typically, changing a tampon 3-6 times a day is sufficient for most people. This frequency ensures you stay comfortable and reduce the risk of any irritation or infection. Adjust your changes based on your unique flow patterns and absorbency needs.

Common Tampon Questions and Concerns

Can You Wear a Tampon Overnight? Safe Practices and Tips

Wearing a tampon overnight can be convenient, but there are some important safety tips to keep in mind. Experts recommend not leaving a tampon in for more than 8 hours to prevent potential health risks like toxic shock syndrome (TSS). For overnight use, consider inserting a fresh tampon right before bed and choosing an absorbency level that matches your flow. If you sleep longer than 8 hours or are concerned about risks, you may want to use a pad instead. For a comparison, see our guide on Tampons vs Pads to help you decide which option might be best for you.

Is It Okay to Change a Tampon Before It’s Full?

Yes, it’s perfectly fine to change your tampon before it’s completely saturated. Changing tampons more frequently can help reduce any risk of leaking or discomfort. For lighter flows, using a lower-absorbency tampon and changing it every few hours can also provide a better fit and feel.

Why Do I Leak When Wearing a Tampon? Troubleshooting and Tips

If you notice leaks while wearing a tampon, it could be due to using the wrong absorbency level or not inserting it properly. Make sure the tampon is placed high enough in the vaginal canal and consider using a higher-absorbency option on heavier days. Additionally, if your tampon feels uncomfortable or you experience frequent leaks, you may want to try a different brand or style to find one that suits you better.

Risks of Not Changing Your Tampon Regularly

What Are the Health Risks of Prolonged Tampon Use?

Leaving a tampon in for too long can lead to discomfort, irritation, and in rare cases, a serious bacterial infection called toxic shock syndrome (TSS). TSS is associated with prolonged tampon use, particularly with higher-absorbency tampons, so it’s important to follow recommended changing intervals. Sticking to a schedule and changing your tampon every 4-8 hours, even on lighter days, can help minimize any health risks.

Understanding Toxic Shock Syndrome (TSS)

Toxic shock syndrome is a potentially life-threatening condition caused by bacteria that can enter the body and release harmful toxins. Symptoms may include sudden high fever, rash, vomiting, and muscle aches. While TSS is rare, taking simple steps like changing tampons frequently and using the right absorbency for your flow can significantly reduce the risk. If you suspect TSS, it’s essential to remove the tampon immediately and seek medical help. “If you suspect TSS, it’s essential to remove the tampon immediately and seek medical help. For guidance on how to safely remove a stuck tampon, refer to our article on How to Remove a Stuck Tampon.

Can Using Tampons Affect Your Period Length?

Do Tampons Make Your Period Last Longer? What Studies Show

Many wonder if using tampons can impact the duration of their period. Generally, tampons don’t change the length of a menstrual cycle. Some people feel that tampons make their period last longer because they absorb the flow rather than allowing it to pass naturally. However, there’s no scientific evidence that using tampons directly influences the duration of a period. It’s important to choose tampons based on comfort and flow needs without worrying about them prolonging your period.

Do Tampons Shorten or Slow Down Your Period?

Similarly, there’s no evidence that tampons shorten or slow down menstrual flow. Tampons are designed to absorb blood efficiently, but they don’t have any effect on the speed or length of the period itself. If you feel that your period behaves differently with tampons, it may be worth trying various types or brands to find the best fit for your flow and comfort.

Choosing the Right Tampon Type for Different Flow Levels

How to Know When to Change a Super Tampon vs. Regular Tampon

Selecting the correct tampon absorbency is key to managing comfort and reducing the need for frequent changes. A super tampon is best for heavier flows, while a regular tampon works well for moderate days. If you’re experiencing leakage with a regular tampon, it may be time to switch to a super absorbency option. Likewise, if a super tampon feels uncomfortable or remains dry after several hours, try a lower absorbency to avoid dryness and irritation. Knowing how often you should change a super tampon or a regular one depends on your unique flow patterns, but in general, check every 4-8 hours to see if a change is needed.

Are Organic Tampons Better for Frequent Changing?

Organic tampons are made without synthetic materials or chemicals, which appeals to those with sensitive skin. While organic options aren’t scientifically proven to be safer than conventional tampons, they may feel more comfortable for frequent changes due to their natural composition. Regardless of tampon type, maintaining regular changes is the most important factor for health and comfort.

Tampon Use for Specific Situations

How Often Should You Change Your Tampon When Swimming?

When swimming, it’s important to change your tampon both before and after getting into the water. A fresh tampon ensures better protection against leaks and potential exposure to bacteria in pools or natural bodies of water. If you’re swimming for extended periods, aim to change your tampon every 4-6 hours, or sooner if needed, to stay comfortable and safe.

Tips for Wearing a Tampon During Physical Activities

Engaging in physical activities like sports or workouts may require a more frequent tampon change. Movement and sweating can sometimes cause discomfort or leaks, so consider changing your tampon every 3-4 hours during exercise. Opting for a higher absorbency tampon or combining with a panty liner can also provide extra protection for intense or long-duration activities.

Key Takeaways for Safe and Comfortable Tampon Use

Tampon hygiene is essential for both comfort and health, with changing intervals playing a critical role. To recap:

  • Change Frequency: Tampons should be changed every 4-8 hours, depending on flow and comfort level. On heavier days, you may need to change as frequently as every 3-4 hours.
  • Overnight Use: While it’s safe to wear a tampon overnight, avoid leaving it in for more than 8 hours. Opt for a fresh tampon before bed or consider using a pad instead.
  • Risks of Extended Use: Not changing tampons regularly can lead to irritation or, in rare cases, toxic shock syndrome (TSS). Always use the lowest absorbency that suits your flow and change tampons on time.
  • Special Situations: For activities like swimming or sports, change tampons more frequently for maximum comfort and protection.

By following these guidelines and listening to your body, you can ensure safe and comfortable tampon use throughout your period.

Expert’s Suggestions

For the safest and most comfortable tampon experience, experts recommend following a few essential guidelines. Always choose the correct absorbency level for your flow to reduce the need for excessive changing and avoid dryness or irritation. Remember, it’s best to change your tampon every 4-8 hours, even if your flow is light, to maintain hygiene and reduce health risks like toxic shock syndrome. If you’re active or planning to swim, consider changing your tampon more frequently to ensure ongoing protection and comfort. Ultimately, pay attention to your body’s signals, and don’t hesitate to reach out to a healthcare provider if you have any concerns about tampon use. Staying informed and proactive about tampon hygiene can make a big difference in managing your period with confidence.

How to Fold Towels for a Luxurious Bathroom: A Complete Guide

0

Folding towels may seem simple, but there’s an art to it that can transform your bathroom’s appearance and organization. Knowing how to fold towels effectively can save space, enhance your decor, and make your bathroom feel more inviting. If you’re interested in different types of towels, you might also wonder how do cooling towels work. In this guide, we’ll explore various techniques, tips, and tricks to help you master towel folding. This article provides the best answer to the question, ‘How to Fold Towels.’

Why Proper Towel Folding is Important

Understanding the significance of proper towel folding is essential. Neatly folded towels not only look appealing but also make the most of your bathroom space. This practice can help maintain a tidy appearance, making it easier to grab towels when needed. Proper towel folding also contributes to better organization on your towel shelf or in bathroom cabinets.

Basic Towel Folding Techniques

How to Fold a Towel

To start, let’s cover the most basic method. Here’s how to fold a towel:

  1. Lay the Towel Flat: Start with the towel completely unfolded on a flat surface.
  2. Fold in Half: Take one side and fold it over the other, aligning the edges.
  3. Fold Again: Depending on your preference, you can fold it in half again to create a smaller rectangle.
  4. Final Touch: Make sure the edges are aligned neatly.

This simple technique is the best way to fold towels for storage or display on your towel shelf bathroom.

How to Roll Towels

Rolling towels is an efficient way to save space, especially when using limited storage options. Here’s how to roll towels effectively:

  1. Lay the Towel Flat: Begin with a flat towel.
  2. Fold in Half Lengthwise: This creates a long rectangle.
  3. Start Rolling: Begin from one end and roll tightly toward the other end.
  4. Secure the Roll: Tuck the end under the roll or use a band to keep it secure.

This method is particularly useful when organizing rolled towels in baskets or on shelves.

Creative Towel Folding Ideas

How to Fold Bath Towels Fancy

Adding a decorative touch can elevate the look of your towels. Here’s how to fold bath towels in a fancy way:

  1. Create a Tri-Fold: After folding the towel in half, fold it into thirds.
  2. Add Decorative Touches: Consider tucking a flower or decorative item into the fold for an elegant display.

This technique is perfect for towel shelves for bathrooms that need an aesthetic upgrade.

How to Fold Towels for Display

For a visually appealing display, here are some ideas:

  1. Stacked Display: Neatly stack folded towels on a shelf, using coordinating colors to create visual harmony.
  2. Basket Displays: Use decorative baskets for rolled towels, creating a rustic charm.

These methods not only enhance your decor but also show guests that you care about the small details.

Space-Saving Towel Folding Techniques

How to Fold Towels to Save Space

When space is at a premium, consider these space-saving methods:

  1. Trifold Method: Fold the towel in half, then fold into thirds to create compact sizes that stack easily.
  2. Towel Compression: For bulkier towels, tightly roll and secure them to reduce their size.

These techniques will help you maximize the available space in your bathroom while keeping your towels organized.

How to Fold Bathroom Towels for Hanging

For towels intended to hang, follow these steps:

  1. Fold in Half: Start by folding the towel in half lengthwise.
  2. Fold into Thirds: Create a compact rectangle by folding it into thirds.
  3. Hang with Style: Use decorative hooks to display your folded towels attractively.

This technique allows you to keep your towels accessible while maintaining a stylish appearance.

Frequently Asked Questions (FAQs)

What Is the Best Way to Fold Towels?

The best way to fold towels involves a method that suits your storage style, whether it’s rolling, stacking, or folding them for display. Experiment with different techniques to see which fits your space best.

How Do You Fold Towels for a Towel Rack?

For a towel rack, fold towels into thirds or quarters to make them fit nicely without overwhelming the space.

How to Fold Hand Towels for Display?

To fold hand towels decoratively, you can create a simple tri-fold or go for a fancy fold, like the swan towel, to impress your guests.

Expert’s Suggestions

Mastering how to fold towels can greatly enhance the organization and beauty of your bathroom. From basic folding techniques to towel decorative ideas, these methods will help you make the most of your space and impress anyone who visits. Remember, whether you’re using rolled bath towel tuck methods or exploring towel shelving options, the right folding technique can transform your towels into a stylish feature of your home.


What Are the Clots in Menstrual Blood? A Comprehensive Guide

0

Menstrual blood clots are thick, jelly-like masses that sometimes appear during menstruation. They usually contain coagulated blood, tissue, and mucus from the uterine lining. While the presence of blood clots during periods can be unsettling, they are often a natural part of menstruation.

During each menstrual cycle, the uterus sheds its inner lining (endometrium), which flows out of the body through the vagina. When the bleeding is heavy or rapid, the blood does not have enough time to remain liquid, causing clots to form. These clots vary in size, color, and frequency, and their appearance can provide insights into your menstrual health.

However, not all clots are normal. Large clots, frequent clotting, or bright red period blood accompanied by heavy menstrual flow with blood clots may indicate an underlying issue that needs attention. This article explores the causes, meanings, and management of period blood clots to help you better understand what’s normal and when to seek medical advice.

Key Things to Know About Blood Clots During Periods

  1. Blood clots during period are a common occurrence, especially on days with heavier flow. Most women experience period clots at some point in their lives, which are generally harmless unless they are large or accompanied by other symptoms.
  2. Jelly-like blood clots during period occur when the body releases a combination of blood and uterine tissue. The body produces anticoagulants to keep menstrual blood flowing smoothly, but heavy bleeding can overwhelm this mechanism, resulting in clots.
  3. Clumps of blood during menstruation are usually no cause for concern. However, large clots period after period, or heavy menstrual flow with blood clots, could be a sign of a health issue, such as uterine fibroids or hormonal imbalances.
  4. The colour of blood during periods provides helpful clues about your menstrual health. For instance, bright red menstrual blood usually indicates fresh bleeding, while darker blood suggests older blood that took longer to exit the body.
  5. Heavy menstrual cycle with clots can result from several factors, such as stress, hormonal shifts, or conditions like Polycystic Ovary Syndrome (PCOS). It’s important to monitor the colors of blood period to notice any unusual patterns.

By understanding what’s typical during menstruation, you can better assess whether your clots in menstrual blood are normal or if you need to seek medical advice.

Are Blood Clots During Your Period Normal?

In most cases, blood clots during periods are a natural part of menstruation. They occur when the uterine lining sheds faster than the body can expel it as liquid, resulting in clots forming in the flow. Small, occasional period clots are usually not a cause for concern, but large clots period after period may signal an underlying issue.

The following are some indicators that clots in period blood are normal:

  • They appear on days with the heaviest flow.
  • They are jelly-like blood clots and smaller than a quarter in size.
  • The color of blood during periods ranges from bright to dark red, indicating the freshness of the blood.

However, clotting during period may indicate a medical concern if:

  • The biggest period blood clot you pass is larger than a quarter.
  • Clots are frequent and accompanied by heavy bleeding and blood clots lasting more than seven days.
  • You feel fatigued, dizzy, or notice symptoms of anemia.
  • The blood color stays bright red throughout the period without turning darker.

Monitoring your flow helps identify changes that may need attention. If you experience heavy menses with clots consistently, it’s worth consulting a healthcare provider to rule out any underlying conditions.

What Causes Blood Clots During Menstruation?

Several factors can lead to the formation of period blood clots. While occasional clotting is normal, understanding what triggers clots in menstrual blood helps you recognize when medical intervention may be necessary. Below are the primary causes:

1. Heavy Menstrual Flow (Menorrhagia)

When the uterine lining sheds rapidly, the body’s natural anticoagulants don’t have enough time to break down the blood, resulting in heavy menstrual flow with blood clots. This may occur due to hormonal changes, stress, or nutritional deficiencies.

2. Uterine Fibroids or Polyps

Fibroids or polyps are non-cancerous growths in the uterus that may cause large clots period after period. These conditions also increase the overall volume of bleeding, making clotting more likely.

3. Polycystic Ovary Syndrome (PCOS)

PCOS can cause irregular ovulation, leading to infrequent but heavy menstrual cycles with clots. Hormonal imbalances often cause clumps of blood during menstruation and spotting between periods.

4. Hormonal Imbalances

An imbalance in estrogen and progesterone levels can make the endometrial lining thicker than usual, causing clots in period blood and heavier bleeding. This is often seen during perimenopause or adolescence.

5. Endometriosis or Adenomyosis

Endometriosis occurs when uterine tissue grows outside the uterus, while adenomyosis involves tissue growth within the uterine wall. Both conditions can result in painful periods, blood clots during period, and excessive bleeding.

6. Miscarriage or Ectopic Pregnancy

Sometimes, bright red menstrual blood with large clots might indicate a miscarriage or ectopic pregnancy, especially if accompanied by severe pain. If you suspect pregnancy and experience heavy bleeding and blood clots, seek medical attention immediately.

These causes demonstrate the importance of tracking your flow and noting any unusual patterns. If you frequently pass large clots period or experience clotting during period alongside other symptoms, consulting a healthcare provider is essential to ensure there are no underlying health concerns.

Signs Your Period Bleeding May Be Heavy

Determining whether your period is abnormally heavy can help you manage potential health concerns. Heavy menstrual flow with blood clots may signal a condition like menorrhagia, which refers to excessive bleeding lasting longer than seven days. Here are key signs your flow might be considered heavy:

  • Blood clots period larger than a quarter.
  • Changing your pad or tampon every 1-2 hours due to saturation.
  • Passing menstruation big blood clots throughout your period rather than just during the first few days.
  • Bright red menstrual blood lasting for the entire cycle instead of gradually darkening.
  • Symptoms such as fatigue, shortness of breath, or dizziness (potential indicators of anemia).

A heavy menstrual cycle with clots can affect your daily routine, causing discomfort and increasing the risk of iron deficiency. If you pass large clots period frequently or find that bleeding interferes with your lifestyle, you may need to consult a healthcare provider.

When Should You See a Healthcare Provider for Heavy Bleeding?

While clots in menstrual blood are often normal, some situations require medical attention. If you experience any of the following symptoms, it’s important to speak with a healthcare provider:

  • Period blood clots larger than a quarter consistently.
  • Bleeding heavily for more than seven days.
  • Clotting during period accompanied by severe cramps or pelvic pain.
  • Needing to change pads or tampons every 1-2 hours for multiple days.
  • Feeling fatigued, dizzy, or noticing pale skin (potential signs of anemia).
  • Bright red period blood persists throughout your cycle without turning darker.
  • Symptoms such as irregular periods, missed cycles, or unusual spotting between periods.
  • A sudden increase in heavy bleeding and blood clots compared to your usual cycles.
  • Jelly-like blood clots during period accompanied by nausea or sharp abdominal pain.

Additionally, if you suspect pregnancy and experience heavy bleeding and blood clots, it could indicate a miscarriage or ectopic pregnancy, which requires immediate medical care. Conditions such as PCOS, endometriosis, and uterine fibroids may also contribute to heavy menses with clots and should be evaluated by a healthcare provider to ensure proper treatment.

Being proactive about your menstrual health allows you to identify potential problems early. If you’re unsure about whether clots in period blood are normal or have concerns about heavy bleeding, consulting a medical professional is always the safest course of action.

What Does the Color of Menstrual Blood Mean?

The color of blood during periods can provide valuable insights into your health and hormonal balance. Different shades and tones of menstrual blood can indicate whether your period is normal or if something needs attention. Below are common period blood colors and their possible meanings:

1. Bright Red Period Blood

  • Indicates fresh, fast-flowing blood.
  • It’s typical during the early days of your cycle or during a heavy menstrual cycle with clots.
  • Bright red menstrual blood that continues throughout the period may indicate fibroids or a miscarriage.

2. Dark Red or Brown Blood

  • Represents older blood that has taken longer to exit the uterus.
  • Common at the start or end of a period.
  • It’s normal to see clumps of blood during menstruation with darker tones.

3. Pink or Light Red Blood

  • May indicate low estrogen levels.
  • Often seen with lighter periods or spotting.
  • If accompanied by period blood clots, it may signal hormonal imbalances.

4. Gray or Off-White Blood

  • Could indicate an infection or miscarriage.
  • If you notice clots in period blood with grayish discharge, consult a healthcare provider immediately.

5. Jelly-like Blood Clots During Period

  • These clots are typically dark red or maroon, representing coagulated blood and tissue.
  • While jelly-like blood clots during period are often normal, large or frequent clots may require medical attention.

Understanding the period blood color meaning allows you to monitor your health and detect changes early. If your menstrual blood color or clotting patterns suddenly shift or seem unusual, it’s a good idea to keep track and consult your doctor when necessary.

What Causes Heavy Bleeding and Blood Clots During Menstruation?

Several factors can contribute to heavy menstrual flow with blood clots. Identifying these underlying causes helps manage symptoms effectively. Below are some common reasons for heavy bleeding and blood clots during menstruation:

1. Hormonal Imbalances

  • When the body produces too much estrogen or insufficient progesterone, the uterine lining becomes thicker, resulting in heavy menses with clots.
  • Hormonal fluctuations are common during puberty, perimenopause, or when you skip periods due to stress.

2. Uterine Fibroids and Polyps

  • These non-cancerous growths can increase menstrual bleeding and cause large clots period after period.
  • Fibroids also cause cramping, pressure, and irregular periods.

3. Polycystic Ovary Syndrome (PCOS)

  • PCOS can cause irregular or absent ovulation, which leads to thick endometrial tissue. When this lining eventually sheds, it results in heavy menstrual cycles with clots.

4. Endometriosis and Adenomyosis

  • Endometriosis involves uterine-like tissue growing outside the uterus, while adenomyosis occurs when it grows into the uterine walls. Both can cause blood clots period along with severe pain and heavy bleeding.

5. Pregnancy-Related Issues

  • Clots in menstrual blood could indicate miscarriage, especially if accompanied by severe cramps and bright red period blood.
  • An ectopic pregnancy (implantation outside the uterus) can also cause abnormal bleeding and clots. Immediate medical attention is needed in these cases.

6. Use of Intrauterine Devices (IUDs)

  • Some people with IUDs experience clotting during period and heavier-than-usual bleeding, especially in the first few months after insertion.

7. Bleeding Disorders

  • Conditions like von Willebrand disease or platelet disorders can lead to heavy bleeding and blood clots. If your periods have always been heavy, it’s worth discussing this possibility with your healthcare provider.

Understanding these causes helps you take appropriate steps to manage clumps of blood during menstruation. If your period blood clots seem excessive or cause discomfort, it’s essential to seek advice from a healthcare provider to rule out serious conditions and explore treatment options.

How to Manage Heavy Menstrual Flow with Blood Clots

Managing heavy menstrual flow and the presence of blood clots during your period can help improve your overall comfort and health. Here are some strategies to consider:

1. Track Your Cycle

  • Keeping a menstrual diary or using a period tracking app can help you monitor flow patterns, the size of clots in menstrual blood, and any accompanying symptoms. This information can be invaluable when discussing your period with a healthcare provider.

2. Use the Right Products

  • Choose menstrual products designed for heavy flow, such as super absorbent pads or tampons, period underwear, menstrual cups and learn how to clean menstrual cups for personal use. Also, learn about the differences between tampons and pads. This will help you manage heavy menstrual cycles with clots more effectively.
  • Change your menstrual products regularly to avoid leaks and maintain hygiene.

3. Pain Management

  • Over-the-counter pain relievers like ibuprofen can help alleviate cramping and discomfort associated with heavy bleeding and period blood clots.
  • Applying heat, such as a heating pad or hot water bottle, can also provide relief from cramps.

4. Stay Hydrated and Maintain a Balanced Diet

  • Drinking plenty of water and eating a balanced diet rich in iron, vitamins, and minerals can help counteract the effects of heavy bleeding and prevent anemia. Foods high in iron include leafy greens, beans, and lean meats.

5. Consider Hormonal Treatments

  • Hormonal birth control methods (pills, patches, or IUDs) can help regulate menstrual cycles and reduce heavy bleeding. Consult with your healthcare provider to discuss the most suitable option for you.

6. Lifestyle Modifications

  • Regular exercise and stress management techniques like yoga or meditation can help balance hormones and may improve menstrual symptoms over time.
  • Maintaining a healthy weight can also contribute to hormonal balance and regular cycles.

7. Seek Medical Advice

  • If you notice persistent heavy menstrual flow with blood clots, seek medical advice. Conditions like fibroids, endometriosis, or hormonal imbalances may require treatment to manage symptoms effectively.

Managing heavy bleeding and blood clots involves a combination of lifestyle choices and medical advice. Tracking your menstrual health and being proactive about changes can lead to better management and improved quality of life.

Expert’s Suggestion

Understanding what are the clots in menstrual blood and their implications is crucial for maintaining menstrual health. While blood clots during your period are often normal, being aware of your body and recognizing unusual patterns can help you take proactive steps toward better health.

Remember that:

  • Occasional period blood clots are common, especially on heavy flow days.
  • The color of blood during periods can indicate various health factors, so keep an eye on these changes.
  • If you frequently experience heavy menstrual cycles with clots, it’s essential to consult a healthcare provider to rule out any serious conditions.
  • Managing your symptoms through lifestyle changes, appropriate menstrual products, and tracking your cycle can greatly improve your comfort during menstruation.

By being informed and attentive to your menstrual health, you can navigate your periods with greater confidence and ease. If you have any concerns about your menstrual flow or clots in menstrual blood, don’t hesitate to seek medical advice for personalized guidance.

Microfiber vs Cotton Sheets: Which One is Right for You?

0

When it comes to choosing the perfect bed sheets, two of the most popular options are microfiber and cotton sheets. Each offers unique qualities in terms of feel, durability, and maintenance, making it essential to understand how they differ before making a purchase. Cotton sheets are well-known for their breathability and natural softness, making them a go-to option for those seeking a luxurious sleeping experience. On the other hand, microfiber sheets made from finely woven synthetic fibers are celebrated for their affordability, stain resistance, and low-maintenance qualities.

Deciding between these two materials depends on your personal preferences and lifestyle. If you prioritize breathability, comfort, and high-quality sheets, cotton might be your best bet. However, if you need sheets that are easy to care for and resistant to wrinkles, microfiber sheets could be the better choice. While some question “Are microfiber sheets good” or wonder, “is microfiber bed sheets bad for you,” the answer largely depends on how well the material matches your needs.

This article will explore both materials in depth, covering their key features, pros and cons, and care instructions. By the end, you’ll have a clear understanding of microfiber vs cotton sheets and which one is ideal for your bedroom. Consider visiting our page at Sanitation Towel for more information on high-quality sanitation towels.”

Understanding Microfiber and Cotton Sheets

Both microfiber and cotton sheets have distinct qualities that set them apart, making each suitable for different types of sleepers and environments. Understanding these materials helps clarify what makes them unique and which factors to consider when deciding between the two.

What Are Microfiber Sheets?

Microfiber sheets are made from extremely fine synthetic fibers, often composed of polyester or nylon. These fibres are tightly woven to create a soft, smooth texture. One key benefit is their low maintenance and stain resistance, which makes them an attractive option for people seeking easy-care bedding. They are also known for retaining body heat, making them a popular choice in colder climates.

However, some people wonder “is microfiber bed sheets bad for you?” This concern often arises because microfiber can trap heat and moisture, which may not be ideal for individuals prone to night sweats. Nevertheless, microfiber sheets are durable and can withstand frequent washing without losing their softness, adding to their value. This durability sparks discussions about “microfiber sheet’s pros and cons,” which are crucial to consider before purchase.

What Are Cotton Sheets?

Cotton sheets are made from natural fibers derived from the cotton plant, and they are often praised for their breathability and softness. Higher-quality cotton sheets, such as those made with long-staple cotton, are particularly sought after for their luxurious feel. Cotton bedding works well in warmer climates or for hot sleepers, as it promotes better air circulation.

People often search for good cotton sheets because not all cotton sheets are the same thread count, weave type, and cotton quality play critical roles in overall comfort and durability. High quality sheets generally have a higher thread count, offering a balance of softness and durability.

While cotton sheets are known for their comfort, they do require more maintenance. They can shrink or wrinkle after washing, which adds to their care needs. Despite these minor drawbacks, cotton sheets remain a top choice for those who value natural fabrics and long-lasting quality.

Key Features of Microfiber and Cotton Sheets

Understanding the key features of both microfiber and cotton sheets can help you make an informed decision. Each material excels in certain areas, catering to different sleeping needs and lifestyles.

Durability

When it comes to durability, both microfiber and cotton sheets perform well, but in different ways. Microfiber sheets are known for their resilience against frequent washing and general wear and tear. They resist stains and wrinkles, making them ideal for everyday use. In contrast, cotton sheets, especially those made from high-quality, long-staple cotton, can last for years if cared for properly. However, they are more prone to wrinkling and may shrink if not washed correctly.

Breathability and Temperature Control

Cotton sheets excel in breathability, making them ideal for people who tend to sleep hot or live in warmer climates. Their natural fibers allow air to circulate, promoting a cool and comfortable night’s sleep. Microfiber sheets, on the other hand, are less breathable but better at retaining heat. This makes them a great option for cooler weather or for people who prefer a warmer sleeping environment. However, those who experience night sweats might find microfiber sheets less comfortable, which raises concerns about whether “microfiber bed sheets good or bad” for them.

Comfort and Feel

Cotton sheets offer a soft, crisp feel that many people find luxurious, especially with high thread count sheets. They tend to feel softer with every wash, making them a favorite for people who value comfort. In comparison, microfiber sheets have a smoother and silkier feel, which some may prefer. Despite their softness, some people wonder “are microfiber sheets good” compared to cotton when it comes to long-term comfort.

Maintenance and Care

Microfiber sheets require minimal care they dry quickly, resist wrinkles, and don’t shrink. This makes them a popular choice for busy individuals or families. Cotton sheets, on the other hand, require more care. They can wrinkle easily and might shrink if not washed according to the care instructions. However, with proper care, cotton sheets can maintain their quality for a long time, making them an investment in high quality sheets.

Types of Fabrics and Weaves in Microfiber and Cotton Sheets

Both microfiber and cotton sheets come in different varieties, offering options that suit various preferences for feel, durability, and style. Understanding the types of fabrics and weaves can help you select sheets that meet your expectations.

Microfiber Sheets: Fabric Variations and Thickness

Microfiber sheets vary in thickness based on the denier of the fibers used. Some microfiber sheets are ultra-lightweight, offering a smoother feel, while others are thicker for better warmth and insulation. While microfiber is made from synthetic materials like polyester, higher-quality microfiber can mimic the feel of natural fabrics. However, one concern some people have is, “what microfiber is made of” since it’s synthetic, it may not be the best choice for those looking for organic options.

The tight weave of microfiber makes it inherently stain-resistant and durable, which explains why it’s preferred by people seeking low-maintenance and high-durability bedding. These qualities make it clear why many search for “microfiber bed sheets pros and cons” to assess their fit for everyday use.

Cotton Sheets: Thread Count and Weave Options

Cotton sheets come in various weaves, each offering a distinct feel and experience. The most popular weaves include:

  • Percale: A crisp and breathable weave, ideal for hot sleepers.
  • Sateen: A silky, smooth weave that offers a luxurious feel.
  • Egyptian or Pima Cotton: Known for their long-staple fibers, which enhance softness and durability.

Thread count is another important factor when choosing cotton sheets. High-quality sheets typically have a thread count of 300 or more, balancing softness and durability. Sheets made from long-staple cotton fibers are less likely to pill, ensuring a longer lifespan. This is why people often search for “good cotton sheets” to get the best value for their money.

Both microfiber and cotton offer variety, but cotton weaves tend to provide more options in terms of texture and breathability. If you’re looking for durability without compromising on feel, microfiber sheets might be a better fit. However, if you prefer a natural fabric that offers a luxurious experience, cotton sheets will be the ideal choice.

Common Uses for Microfiber and Cotton Sheets

Both microfiber and cotton sheets serve different purposes depending on personal preferences, climate, and lifestyle. Let’s explore when each type of sheet is most suitable.

When to Use Microfiber Sheets

  • Cold Weather: Microfiber sheets are great for colder months or people who prefer to stay warm at night due to their heat-retention properties.
  • Busy Lifestyles: They require little maintenance, making them ideal for busy individuals or families who need low-maintenance bedding.
  • Allergies: Because of their tight weave, microfiber sheets naturally repel dust and allergens, making them a good option for people with sensitivities.
  • Children’s Bedding: Microfiber sheets are stain-resistant, making them perfect for kids’ beds where spills are common.

However, for some, the question “microfiber bed sheets good or bad?” remains. While they are durable and easy to care for, those who sleep hot might find them less comfortable.

When to Use Cotton Sheets

  • Warm Weather: Cotton sheets excel in hot climates or summer months because of their breathable and moisture-wicking qualities.
  • Luxury Sleep Experience: For those looking for a touch of luxury, high thread count cotton sheets offer unmatched softness and comfort.
  • Sensitive Skin: Natural cotton is gentle on the skin, making it an excellent choice for people with allergies or skin sensitivities.
  • Eco-Conscious Consumers: Cotton sheets, especially organic ones, appeal to those looking for sustainable, natural materials.

Whether you prefer microfiber or cotton sheets, each has distinct uses. Cotton is the go-to option for hot sleepers and those who value comfort, while microfiber offers practicality and warmth, making it better suited for cooler weather or low-maintenance households.

Choosing the Right Sheets for Your Needs

When deciding between microfiber or cotton sheets, it’s important to consider several factors, such as sleeping habits, climate, and care preferences. Here are key elements to keep in mind to help you make the best choice.

Climate and Temperature Preferences

  • Microfiber Sheets: If you live in a cooler area or enjoy the feeling of extra warmth, microfiber sheets are an excellent option as they trap heat effectively.
  • Cotton Sheets: In warmer climates, cotton sheets are the better choice, thanks to their breathable nature and ability to regulate body temperature during sleep.

Comfort and Skin Sensitivities

  • Good Cotton Sheets: For people with sensitive skin, natural fabrics like cotton feel softer and cause less irritation. High-quality sheets made from long-staple cotton are especially gentle and durable.
  • Microfiber Sheets: While microfiber sheets are smooth and soft, some people find synthetic fibers less comfortable over time, leading to the search for “microfiber bed sheets pros and cons” to weigh long-term comfort.

Maintenance and Care Needs

  • Microfiber Sheets: If you need sheets that require minimal upkeep, microfiber is a smart choice. They are wrinkle-resistant, stain-resistant, and do not shrink.
  • Cotton Sheets: Although cotton sheets require more attention, proper care extends their lifespan. High quality sheets made from cotton will soften over time with washing, rewarding the effort with lasting comfort.

Price and Longevity

  • Cost-Effective Microfiber: Microfiber sheets are typically more affordable, making them a good option if you need budget-friendly bedding. They offer good value due to their resistance to stains and damage.
  • Investment in Cotton: Cotton sheets, particularly those made with premium long-staple cotton, are an investment. However, they can last for many years with proper care, offering high-end comfort over time.

Ultimately, your choice will depend on what you prioritize most comfort, care, or cost. Both microfiber and cotton sheets have their place, but knowing their strengths and limitations will guide you in selecting the right sheets for your lifestyle.

Proper Care for Your Microfiber and Cotton Sheets

Caring for your bed sheets is essential to maintain their quality and longevity. Proper maintenance can enhance your sleeping experience and keep your bedding looking fresh. Here’s how to care for both microfiber and cotton sheets effectively.

Caring for Microfiber Sheets

  • Washing: Microfiber sheets can usually be washed in cold water on a gentle cycle. Avoid using bleach, as it can break down the fibers and reduce their lifespan. For detailed guidance on washing microfiber products, check out our article on How to Wash Microfiber Towels and clothes.
  • Drying: Tumble dry on low heat or hang them to dry. They dry quickly, so it’s best to remove them promptly to prevent wrinkles.
  • Avoiding Fabric Softener: While it may seem tempting to use fabric softeners, they can coat the fibers and reduce the inherent softness of microfiber sheets over time.

Caring for Cotton Sheets

  • Washing: Wash cotton sheets in warm water to help remove dirt and oils effectively. Opt for a gentle detergent to preserve the quality of the fibers.
  • Drying: Tumble dry on low or medium heat to avoid shrinking. If you prefer a crisp feel, remove them slightly damp and iron if needed.
  • Avoiding Overloading the Washer: Give your sheets enough room to move during washing to prevent tangling and maintain their quality.

General Maintenance Tips

  • Rotation: Rotate your sheets regularly to prevent uneven wear. This practice helps extend their lifespan, whether you choose microfiber or cotton.
  • Storage: Store sheets in a cool, dry place, away from direct sunlight. This prevents fading and keeps the fibers in good condition.
  • Frequency of Washing: It’s recommended to wash your sheets every 1-2 weeks. However, if you have allergies or night sweats, you might consider washing them more frequently.

Understanding the proper care for your sheets will ensure you enjoy a comfortable and fresh sleeping environment for years to come, whether you choose microfiber or cotton sheets.

Microfiber and Cotton Sheets: Pros and Cons

Understanding the advantages and disadvantages of microfiber and cotton sheets can significantly influence your buying decision. Each material comes with its own set of pros and cons, which can help you determine the best fit for your needs.

Microfiber Sheets: Pros and Cons

Pros:

  • Affordability: Microfiber sheets are generally more budget-friendly than cotton, making them an attractive option for those seeking value.
  • Low Maintenance: These sheets are easy to care for, as they resist wrinkles and stains, requiring minimal effort to maintain their appearance.
  • Softness: Many find microfiber sheets to be exceptionally soft and smooth against the skin, offering a cozy sleeping experience.
  • Durability: Microfiber sheets are strong and resilient, often lasting longer than cotton sheets without losing their quality.

Cons:

  • Heat Retention: Microfiber can trap heat, making them less suitable for hot sleepers or warm climates, leading to discomfort during the night.
  • Synthetic Material: Some individuals may prefer natural fabrics and may question if “microfiber bed sheets good or bad” for overall health, especially those with sensitivities to synthetic materials.
  • Less Breathable: Compared to cotton, microfiber is less breathable, which might not be ideal for those prone to night sweats.

Cotton Sheets: Pros and Cons

Pros:

  • Breathability: Cotton sheets are known for their breathability, making them a great choice for hot climates and sleepers who tend to overheat at night.
  • Natural Fiber: Being made from natural materials, cotton sheets are often preferred by eco-conscious consumers and those with sensitive skin.
  • Comfort: High-quality cotton sheets become softer with each wash, providing a luxurious feel over time.
  • Variety: Cotton sheets come in various weaves and thread counts, allowing for more choices to suit individual preferences.

Cons:

  • Wrinkling: Cotton sheets tend to wrinkle easily, which can require ironing or special care to keep them looking fresh.
  • Care Requirements: They need more attention during washing and drying to prevent shrinking and maintain their quality.
  • Higher Cost: Quality cotton sheets can be more expensive than microfiber, making them less accessible for budget-conscious shoppers.

By weighing the pros and cons of both microfiber and cotton sheets, you can make a more informed decision based on your individual needs, preferences, and lifestyle.

Expert’s Suggestion: Which Sheets Should You Choose?

In the debate between microfiber vs cotton sheets, both options offer unique benefits and drawbacks that cater to different preferences and lifestyles. Your choice ultimately depends on your specific needs, including comfort, climate, and maintenance requirements.

Microfiber sheets are ideal for those seeking affordability, low maintenance, and a soft sleeping surface. They work well in cooler environments and are suitable for individuals with busy lifestyles or families. However, their heat retention may not be the best fit for hot sleepers or those sensitive to synthetic materials. The question of whether “microfiber bed sheets good or bad” largely depends on personal comfort and health considerations.

On the other hand, cotton sheets offer breathability, comfort, and a natural feel, making them a preferred choice for those who prioritize quality and a luxurious sleeping experience. While they require more care and can come at a higher price, their long-term durability and comfort are often worth the investment. For many, the luxurious feel of good cotton sheets can transform their sleeping environment.

Ultimately, whether you choose microfiber or cotton sheets, understanding their features, care requirements, and potential benefits will lead you to make a choice that enhances your sleep quality and aligns with your lifestyle. No matter your decision, investing in the right sheets can greatly improve your overall sleeping experience.


How Do Cooling Towels Work? The Science and Benefits Behind Instant Relief

0

Staying cool in hot weather is essential, whether you’re an athlete, traveler, or just someone battling a heatwave. One practical and increasingly popular solution is the cooling towel. But how do cooling towels work, and what makes them so effective? In this comprehensive guide, we’ll explore the science, benefits, materials, and practical uses behind these innovative products. We’ll also compare them with alternative cooling methods to help you make an informed decision. This article provides the best answer to the question, ‘How Do Cooling Towels Work?’.

What Are Cooling Towels?

Cooling towels are specially designed fabrics that, when soaked in water and wrung out, stay cool for extended periods. These towels are lightweight, reusable, and chemical-free, offering a sustainable way to beat the heat. They are particularly useful for athletes, outdoor workers, travelers, and people prone to heat-related health issues.

While a regular towel can absorb moisture, cooling towels go a step further by using advanced fabrics and evaporation technology to actively cool the skin. Their versatility makes them ideal for sports, travel, and everyday use.

How Do Cooling Towels Work? Understanding the Science Behind Instant Cooling

At the core of a cooling towel’s functionality is the principle of evaporative cooling. When water evaporates, it draws heat from the surface it touches, resulting in a cooling effect. These towels are made from special materials like microfiber or PVA that are designed to absorb and retain water longer than regular towels. As the water in the towel evaporates, it pulls heat from the skin, providing a sensation of instant relief.

The moisture-wicking properties of the fabric also play a role. As the water spreads evenly throughout the towel, the surface area exposed to air increases, speeding up evaporation. This simple but effective process works without the need for any chemicals or refrigerants, making cooling towels safe for all users, including children and pets.

Materials Used in Cooling Towels: What Makes Them Effective?

Material Properties Usage
Microfiber Soft, lightweight, highly absorbent Ideal for sports and travel
PVA Retains water longer, provides lasting cooling Great for outdoor work and sports
Bamboo Fabric Naturally antimicrobial, eco-friendly Suitable for sensitive skin and kids

Microfiber is one of the most commonly used materials in cooling towels due to its high absorbency and soft texture. However, like all microfiber products, these towels require special care to maintain their performance. If you’re wondering about the proper way to maintain them, check out our detailed guide on How to Wash Microfiber Towels. Understanding how to wash and care for microfiber ensures that your cooling towel stays in top condition for longer use.

Benefits of Using Cooling Towels

1. Instant Relief from Heat

Cooling towels provide immediate relief when exposed to high temperatures, making them essential for athletes, outdoor workers, and anyone spending extended time in the sun.

2. Lightweight, Portable, and Convenient

Unlike bulky cooling devices, these towels are lightweight and easy to carry. They fold compactly and can fit into small bags, making them perfect for travel.

3. Reusable and Eco-Friendly

Cooling towels are reusable and easy to clean, helping to reduce waste compared to disposable cooling products. They don’t require batteries or refrigerants, making them environmentally friendly.

4. Safe for All Ages and Skin Types

Since cooling towels are chemical-free, they are safe to use on children, pets, and people with sensitive skin. Their gentle cooling effect prevents overheating without irritation.

5. Versatile for Sports, Travel, and Medical Use

These towels are popular among athletes for post-exercise recovery, travelers dealing with heat, and medical personnel for heatstroke prevention. Their versatility makes them a must-have accessory in warm weather.

How to Use Cooling Towels for Maximum Effectiveness

Here’s a step-by-step guide to activating your cooling towel:

  1. Soak the towel in water until it is fully saturated.
  2. Wring out excess water to prevent dripping.
  3. Snap the towel a few times to activate the cooling effect.
  4. Apply the towel to your neck, forehead, or any area that needs cooling.
  5. Re-soak and wring the towel as needed for continuous relief.

These towels can stay cool for up to 2-3 hours, depending on the material and ambient temperature.

Alternative Cooling Methods: Are Cooling Towels the Best Option?

There are several other ways to stay cool in hot conditions, but cooling towels offer a unique blend of convenience, portability, and eco-friendliness. Here’s a comparison:

Cooling Method Pros Cons
Cooling Vests Provides full-body cooling Bulky, expensive
Ice Packs Quick cooling relief Requires refrigeration, not portable
Fans and Misters Provides airflow or moisture Requires power or batteries
Cooling Towels Lightweight, portable, reusable Cooling duration may vary

While each method has its advantages, cooling towels stand out for their ease of use, portability, and effectiveness in multiple situations.

Frequently Asked Questions about Cooling Towels

How Long Do Cooling Towels Stay Cool?

Most cooling towels provide relief for 2-3 hours, depending on the material and environmental conditions. Re-soaking the towel can extend the cooling effect.

Can I Use a Regular Towel as a Cooling Towel?

While regular towels can absorb water, they lack the moisture-wicking and evaporative properties of cooling towels, making them less effective for staying cool.

Are Cooling Towels Safe for Kids and Pets?

Yes, cooling towels are chemical-free and safe for use on children and pets. They provide a gentle cooling effect without irritation.

Expert’s Suggestion: Why Cooling Towels Are an Essential Tool for Heat Relief

Cooling towels are a highly effective and versatile solution for staying comfortable in hot weather. Their moisture-wicking fabrics and reliance on evaporative cooling make them superior to regular towels, offering instant relief without needing chemicals, batteries, or refrigeration. These towels are lightweight, easy to use, and reusable, making them eco-friendly and practical for everyday activities like sports, travel, and outdoor work. Whether preventing heat exhaustion or enhancing post-exercise recovery, cooling towels provide safe cooling for all ages, including children and pets. Unlike other cooling methods, such as bulky vests or ice packs, cooling towels are portable and convenient, allowing users to beat the heat anytime. With long-lasting cooling effects and minimal maintenance, they are an essential tool for athletes, travelers, and anyone needing reliable relief from rising temperatures. Embracing a cooling towel ensures you stay comfortable and prepared, no matter the weather conditions.