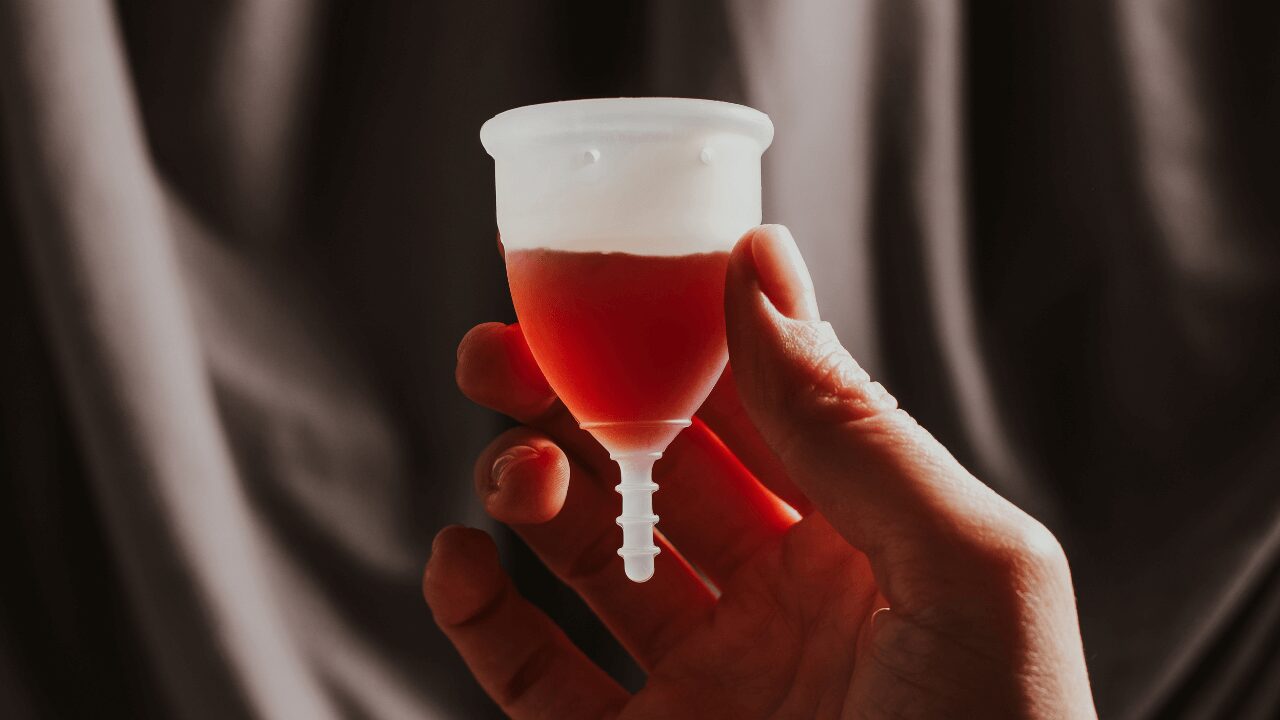
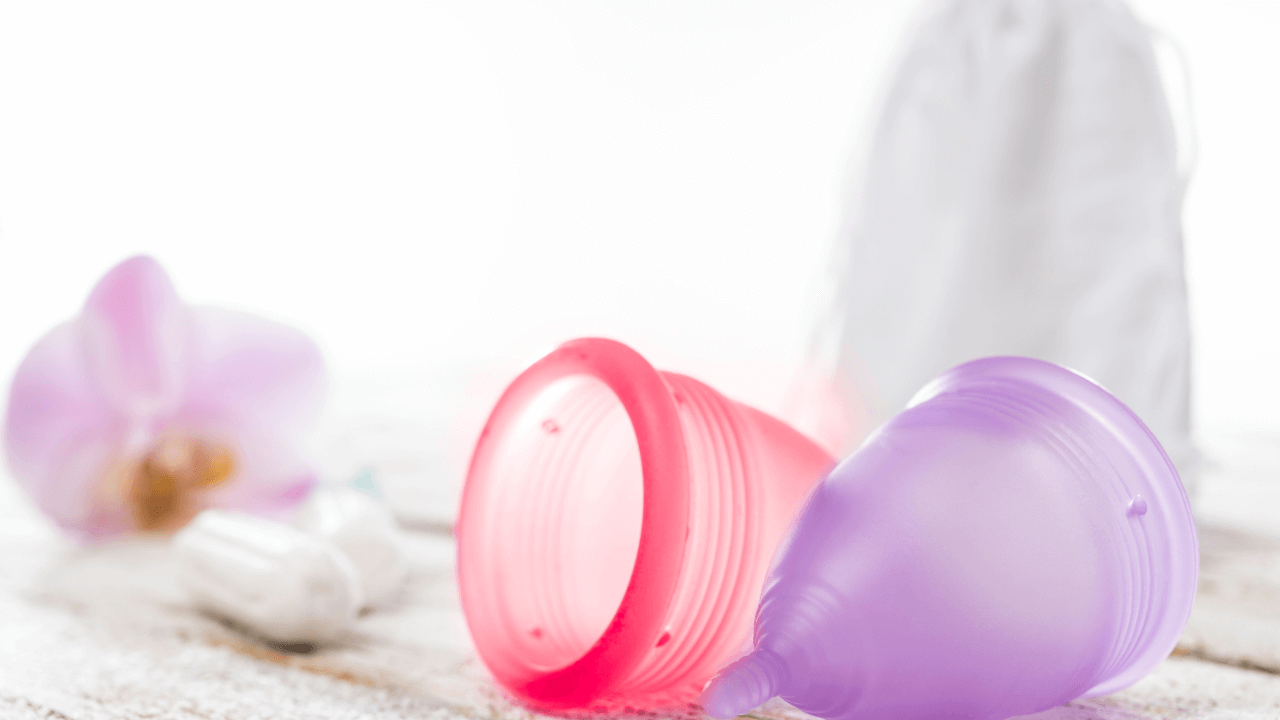
Menstrual cups have become popular among women seeking sustainable and healthier alternatives to traditional menstrual products. Yet, like any reusable product, they require proper cleaning to remain safe and effective. This blog post will guide you how to clean menstrual cup and ensure a healthy menstrual cycle while being kind to the environment. We’ve covered you, from boiling your cup to using the right soap.
What is a Menstrual Cup?
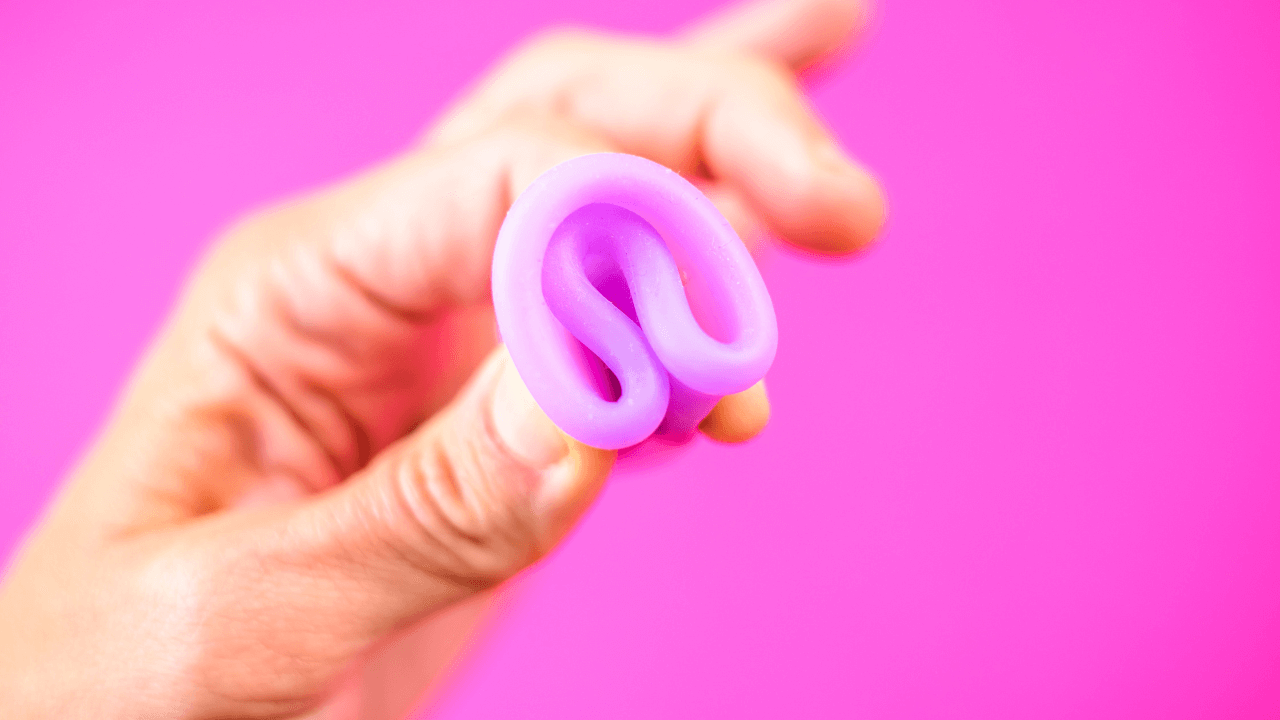
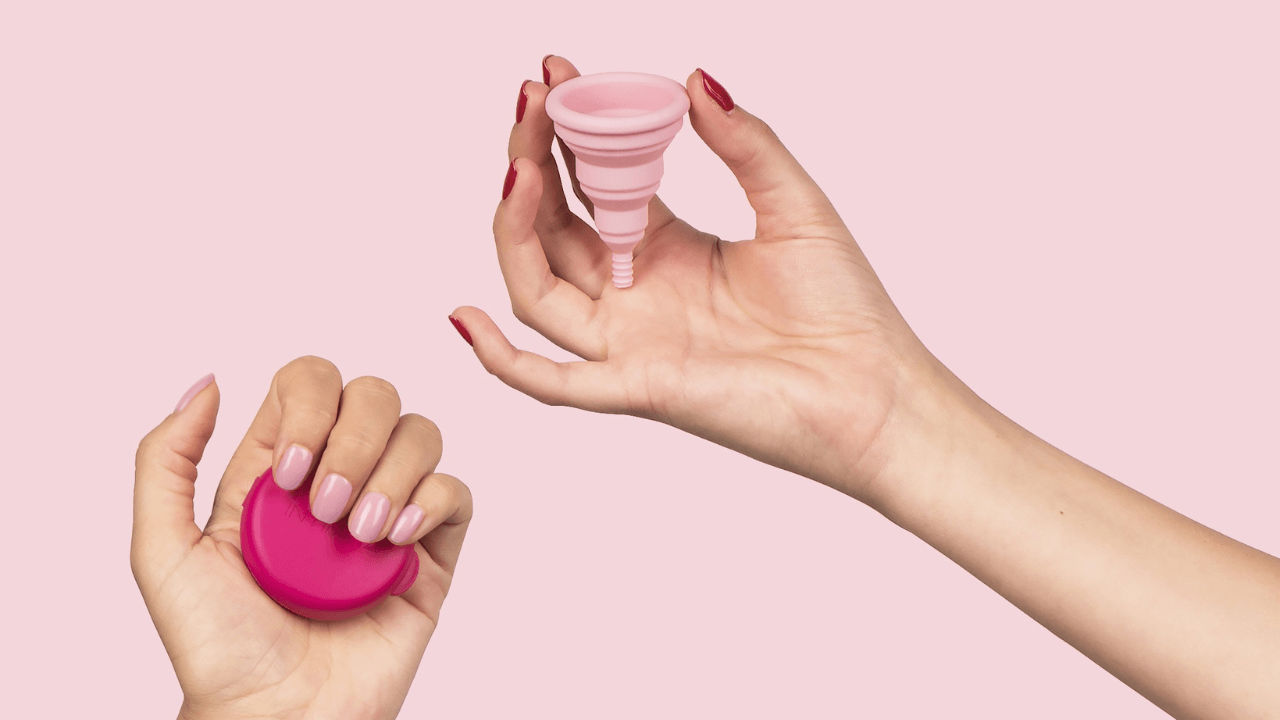
A menstrual cup is a small, flexible cup made of medical-grade silicone, rubber, or latex that is inserted into the vagina to collect menstrual fluid. Unlike tampons and pads, menstrual cups do not absorb blood but catch and hold it until emptied. They are reusable and can last several years with proper care, making them an eco-friendly and cost-effective choice for many women.
Menstrual cups come in various sizes and shapes to suit different body types and flow levels. They offer the freedom to engage in various activities without worrying about leaks, making them an excellent option for active individuals.
Switching to a menstrual cup can initially feel daunting, but once you get the hang of it, you may find it more convenient and comfortable than traditional methods. But remember, proper cleaning is key!
You Just Bought a Menstrual Cup – Now What?
Congratulations on switching to a menstrual cup! Before using it for the first time, it’s essential to clean it thoroughly. Most cups come with specific cleaning instructions, so be sure to read those carefully.
Start by washing your hands with soap and water. Then, rinse the cup with clean water and boil it for 5-10 minutes to sterilize it. This step removes any residual manufacturing residue, leaving your cup fresh and ready for use.
Once your cup is cool, you’re ready to insert it. Remember, practice makes perfect, so don’t be discouraged if it takes a few tries to get it right.
How to Clean a Menstrual Cup?
Properly cleaning your menstrual cup is essential for maintaining its integrity and ensuring your menstrual health. Here are some tried-and-true methods to keep your cup in tip-top shape.
Rule #1 Boil Between Periods
Boiling your menstrual cup between cycles is a simple yet effective sterilization method. Bring a pot of water to a rolling boil and submerge your cup for 5-10 minutes. This process kills bacteria and ensures your cup is clean and safe.
Be sure not to leave your cup unattended while boiling, as it could cause the silicone to deteriorate. Use a dedicated pot for this purpose, or thoroughly clean the pot before and after boiling your cup.
Allow the cup to cool completely before handling it. Once cooled, store it in a breathable pouch to keep it dry and away from dust.
Rule #2 During Periods, Wash with Clean Water
During your period, you’ll need to empty and rinse your menstrual cup every 4-12 hours, depending on your flow. Start by washing your hands with soap and water. Then, remove the cup, empty its contents into the toilet, and rinse it thoroughly with clean water.
If clean water isn’t available, you can wipe the cup with unscented tissue or a menstrual cup wipe until you can rinse it properly. Always wash your hands before reinserting the cup to prevent introducing bacteria.
Regular rinsing during your period keeps the cup clean and reduces the risk of infections.
Can I Use Soap? The Best Soap to Clean a Menstrual Cup
Yes, you can use soap to clean your menstrual cup, but choosing the right kind is crucial. Opt for a mild, fragrance-free, and oil-free soap that won’t leave any residue on the cup. Avoid harsh chemicals and antibacterial soaps, as they can degrade the silicone and cause irritations.
Squirt a small amount of soap onto the cup and gently scrub it with your fingers or a soft brush. Rinse thoroughly with clean water to ensure no soap residue remains, which can cause discomfort and infections.
Ensure the cup is completely dry before storing it in a breathable pouch. This prevents bacteria growth and keeps your cup in good condition for future use.
How to Clean Air Holes in a Menstrual Cup
Air holes near the rim of your menstrual cup help create the necessary suction to keep it in place. Cleaning these holes can be tricky but is essential for maintaining the cup’s functionality.
Use a soft-bristled toothbrush, a toothpick, or a specialized menstrual cup brush to clean the air holes. Gently scrub or poke through each hole to remove any buildup. Rinse the cup thoroughly afterward.
Regularly cleaning the air holes ensures your cup functions correctly and maintains a good seal.
How to Clean a Menstrual Cup in a Public Restroom?
Cleaning your menstrual cup in a public restroom can seem daunting, but with some preparation, it can be managed easily and discreetly. Here’s a step-by-step guide to help you maintain cleanliness while on the go:
1) Come Prepared:
Before heading out, pack a small kit with essential items. Include a water bottle, unscented tissue or menstrual cup wipes, and hand sanitizer. These items will help you clean your menstrual cup efficiently.
2) Find a Private Stall:
If available, choose a stall with a toilet and sink. If not, a regular stall will suffice. Wash your hands with soap and water before entering the stall to minimize the introduction of bacteria.
3) Remove the Cup:
Sit or stand comfortably, then gently remove your menstrual cup following your usual method. Be cautious to avoid any spills, and pour the contents into the toilet.
4) Rinse with Water:
If you have a water bottle, rinse the cup thoroughly. Pour water over the cup to remove any menstrual fluid. You can rinse the cup if a sink is available within the stall.
5) Wipe the Cup:
If clean water isn’t available, use unscented tissue or menstrual cup wipes to clean the cup. Wipe the inside and outside of the cup to ensure it’s clean before reinsertion.
6) Reinsert the Cup:
Once the cup is clean, reinsert it as you usually would. Make sure it’s positioned correctly to prevent leaks.
7) Sanitize Your Hands:
After reinserting the cup, use hand sanitizer to clean your hands before touching public surfaces.
8) Dispose of Clean-Up Materials:
If you’ve used tissue or wipes, dispose of them properly in the trash bin. Double-check that you’re leaving the stall clean for the next person.
Following these steps ensures your menstrual cup remains clean and hygienic, even in a public restroom. With practice, this process will become second nature, allowing you to manage your menstrual health wherever you go confidently.
Tips for Cleaning a Menstrual Cup While Traveling
Traveling can present unique challenges for maintaining menstrual hygiene, but with a few practical tips, you can keep your menstrual cup clean and ensure convenience and ease throughout your journey.
Pack a Cleaning Kit
Prepare a compact cleaning kit to bring along whenever you travel. This kit should include:
- A small, dedicated pot for boiling your cup.
- A water bottle for rinsing.
- Fragrance-free, oil-free soap.
- Unscented menstrual cup wipes or tissue.
- A soft-bristled toothbrush or a menstrual cup brush.
- Hand sanitizer for when you lack access to soap and water.
Packing these essentials will prepare you for various cleaning situations.
Boil Before You Go
Before setting out, boil your menstrual cup at home to start your trip with a sterile cup. Bring your dedicated pot if you’re staying somewhere where boiling it again might be necessary.
Use Clean Water Bottles
Access to clean water on the go can be unpredictable. Carry a water bottle filled with purified or bottled water to rinse your cup whenever necessary. This is especially crucial when traveling to areas where clean tap water isn’t readily accessible.
Take Advantage of Wipes
When clean water is unavailable, use unscented menstrual cup wipes to clean your cup. These wipes are designed to be gentle on the silicone material and won’t leave a residue that could irritate.
Find Private Spaces
Look out for accessible private restrooms or family bathrooms that might offer more space and privacy. Airports, hotels, and rest stops often have better facilities than public restrooms, making cleaning easier and more comfortable.
Utilize Hand Sanitizer
Ensure your hands are clean before and after handling your menstrual cup. Hand sanitizer can be a lifesaver in travel scenarios where soap and water aren’t immediately available. Use it liberally to avoid introducing bacteria into your cup.
Plan Regular Cleaning Times
If you’re on a long journey, plan to clean your menstrual cup during layovers, rest stops, or hotel stays. Regularly rinsing your cup every 4-12 hours, aligned with your menstrual flow, ensures you maintain hygiene without hassle.
Store Safely
When not in use, store your menstrual cup in a breathable pouch. Avoid storing it in airtight containers, as this could promote bacterial growth. Keep your cup and storage pouch in an easily accessible part of your luggage.
With a bit of planning and the right supplies, traveling with a menstrual cup can be seamlessly incorporated into your routine. By following these tips, you can ensure that your menstrual health is well managed, no matter where your travels take you.
How to Clean a Menstrual Cup that Has Discolored?
Menstrual cups can sometimes become discolored over time, especially if used frequently. Although a change in color does not affect the performance or safety of the cup, many users prefer to maintain its clarity for aesthetic reasons. Here is an in-depth guide on how to clean a menstrual cup that has discolored:
Causes of Discoloration
Several factors can contribute to the discoloration of a menstrual cup:
- Menstrual Blood: Natural pigments in menstrual blood can stain the silicone or rubber material over time.
- Cleaning Products: Some soaps and cleansers can leave residues that contribute to discoloration.
- Hard Water: Minerals in hard water can build up on the cup, leading to a yellowish tint.
- Storage: Storing the cup in direct sunlight or an airtight container can cause or exacerbate discoloration.
Steps for Cleaning a Discolored Menstrual Cup
- Boiling
- What to Do: Boil your menstrual cup in a dedicated pot for 5-10 minutes. This process sterilizes the cup and can help lift some stains.
- Why It Works: High temperatures can break down staining agents and sterilize the cup, removing bacteria and buildup.
- Lemon Juice Soak
- What to Do: Soak your cup in lemon juice for 30 minutes, then rinse thoroughly with water.
- Why It Works: Lemon juice’s citric acid helps to bleach and break down stains, brightening the cup.
- Hydrogen Peroxide Solution
- What to Do: Mix a 1:1 solution of hydrogen peroxide and water, and soak the cup for at least 6 hours or overnight. Rinse thoroughly afterward.
- Why It Works: Hydrogen peroxide is a natural bleaching agent and can effectively remove stubborn stains and discoloration.
- Baking Soda Paste
- What to Do: Create a paste using baking soda and water. Apply this paste to the cup using a soft-bristled toothbrush and scrub gently. Rinse thoroughly.
- Why It Works: Baking soda is mildly abrasive yet gentle enough to use on silicone. It helps in lifting stains and removing stubborn residues.
- White Vinegar Soak
- What to Do: Soak the cup in a 1:1 mixture of white vinegar and water for 30 minutes. Then, thoroughly rinse it.
- Why It Works: Vinegar’s acetic acid content helps to break down mineral deposits and stains.
Preventing Future Discoloration
- Use Fragrance-Free and Oil-Free Soaps: When washing your cup, choose mild, unscented, and oil-free soaps to reduce residue buildup.
- Rinse with Cold Water First: After emptying your cup, rinse it with cold water before using hot water. Cold water helps prevent blood from settling into the silicone.
- Avoid Direct Sunlight: Store your menstrual cup in a breathable pouch away from direct sunlight to minimize UV exposure that can cause discoloration.
- Regular Boiling: Make boiling your cup a regular habit, either at the end of your menstrual cycle or periodically, to keep it clean and stain-free.
By following these steps and preventive measures, you can maintain the appearance and hygiene of your menstrual cup, ensuring it remains a reliable and clean option for menstrual management.
Which is the Easiest Menstrual Cup to Clean?
When choosing a menstrual cup that is easy to clean, several factors come into play. Different cups offer varying features that can impact how straightforward the cleaning process is. Here are some considerations to help you identify the easiest menstrual cup to clean:
Material
Menstrual cups are made from different materials, with medical-grade silicone being one of the most common. Silicone cups are generally easier to clean because of their smooth, non-porous surface that resists staining and buildup. TPE (Thermoplastic Elastomer) and rubber are other materials used but may not offer the same ease of cleaning as silicone.
Design Features
- Smooth Rim and Body: Cups with a seamless design and smooth rim are easier to clean as they have fewer crevices where menstrual blood can get trapped.
- Air Holes: Menstrual cups have small air holes near the rim to help with insertion and removal. Cups with larger or strategically placed holes are easier to clean as debris is less likely to get lodged in them.
- Grip Stem: Cups with a solid, smooth grip stem are easier to clean than those with a ridged or hollow stem, which can trap residue.
Capacity and Size
While capacity and size might not directly relate to cleaning ease, a cup that suits your flow and anatomy can simplify overall maintenance. A well-fitting cup is less likely to cause leakage, reducing the need for frequent cleaning.
Cleaning Guidelines by Brand
Different menstrual cup brands offer specific cleaning guidelines that can influence the ease of maintenance:
- DivaCup: Known for its clear silicone and straightforward design, the DivaCup includes detailed cleaning instructions and a dedicated cleaning solution.
- Lunette: This cup has an exceptionally smooth surface and slightly larger air holes, making cleaning easier. Lunette also offers its liquid cleanser.
- Saalt Cup: Made from medical-grade silicone, the Saalt Cup features a simple design with minimal ridges and offers clear cleaning instructions.
- MeLuna: Available in TPE and silicone, MeLuna cups offer different stem options (classic, ball, ring) that affect ease of cleaning.
User Reviews and Feedback
User experience can provide valuable insights into which menstrual cups are easier to clean. In their reviews, many users highlight the importance of the cup’s material and design and the practicality of following cleaning instructions. Popular forums and review sites can offer firsthand accounts that might help your decision-making.
Additional Cleaning Tools
Some menstrual cup users find supplementary tools helpful for easier cleaning:
- Cup Washers: Specialized cup washers can be used for a more thorough cleaning process, focusing on hard-to-reach areas like air holes.
- Sterilizers: Electric or microwave sterilizers offer a quick way to sanitize the cup between uses.
- Cleaning Brushes: Small, soft-bristled brushes can be used to clean air holes and other tight spots efficiently.
How to Deep Clean a Menstrual Cup?
Deep cleaning of your menstrual cup is crucial to ensure its longevity and to maintain optimal hygiene. While regular cleaning is essential during your cycle, a thorough, deep clean can help eliminate any lingering bacteria, stains, or odors that may accumulate over time. Here’s a step-by-step guide on how to deep clean your menstrual cup:
Boiling Method
- Preparation: Wash your menstrual cup with mild, unscented soap and rinse it thoroughly before boiling.
- Boil Water: Fill a small pot with water and bring it to a rolling boil.
- Submerge the Cup: Carefully place your menstrual cup in the boiling water. Ensure that the cup is fully submerged and does not touch the bottom or sides of the pot to avoid any deformities.
- Boiling Time: Let it boil for 3-5 minutes. Avoid over-boiling as it may degrade the silicone over time.
- Remove and Dry: Use tongs to remove the cup from the water. Place it on a clean, dry cloth or paper towel to cool and dry completely before storing it.
Hydrogen Peroxide Soak
- Solution Preparation: In a clean container, mix a 3% hydrogen peroxide solution with equal water.
- Soak the Cup: Place your menstrual cup in the solution and let it soak for at least 6 hours or overnight.
- Rinse Thoroughly: After soaking, rinse the cup thoroughly with plain water to remove any residue.
- Dry: Allow the cup to air-dry completely on a clean, dry cloth or paper towel.
Baking Soda Paste
- Make the Paste: Combine baking soda and a small amount of water to create a thick paste.
- Apply the Paste: Using a soft-bristled toothbrush, apply the baking soda paste to your menstrual cup, focusing on any stained areas or crevices.
- Scrub Gently: Gently scrub the cup with the toothbrush to remove stubborn stains and residue.
- Rinse and Dry: Rinse the cup thoroughly with water and let it air-dry completely before storing it.
Vinegar Soak
- Solution Preparation: Mix equal white vinegar and water in a container.
- Soak the Cup: Submerge your menstrual cup in the vinegar solution and let it soak for 30 minutes.
- Rinse Thoroughly: After soaking, rinse the cup well with plain water to remove any vinegar residue.
- Dry: Place the cup on a clean cloth or paper towel to air-dry completely.
Sterilizing Tablets
- Dissolve the Tablet: Follow the manufacturer’s instructions to dissolve a sterilizing tablet in water.
- Soak the Cup: Submerge your menstrual cup in the sterilizing solution for the recommended time, usually around 15 minutes.
- Rinse Thoroughly: After soaking, rinse the cup thoroughly with plain water.
- Dry: Allow the cup to air-dry on a clean, dry cloth.
Additional Tips
- Check Air Holes: Make sure the air holes around the rim of your cup are clear. Use a soft-bristled brush or a toothpick to clean them gently.
- Inspect Regularly: Check your cup regularly for signs of wear and tear, such as sticky spots, discoloration, or unusual odor. Replace the cup if it appears damaged or compromised.
- Store Properly: After deep cleaning, store your menstrual cup in a breathable pouch away from direct sunlight to prevent any UV damage.
By following these deep cleaning methods, you can keep your menstrual cup in excellent condition, ensuring it remains a safe and reliable option for menstrual management.
How to Sterilize Your Menstrual Cup Without Boiling?
Sterilizing your menstrual cup is a key step in maintaining its hygiene and ensuring it remains free from harmful bacteria and pathogens. While boiling is a common and effective method, there are alternative ways to sterilize your menstrual cup if you lack access to a stove or want to avoid the hassle of boiling. Below are several in-depth methods to sterilize your menstrual cup without boiling:
Microwave Steam Sterilization
- Microwave Sterilization Bags: These bags are designed specifically for steam sterilization in the microwave. Place your cup in the bag and add the recommended amount of water (usually about 60 ml).
- Microwave: Seal the bag and place it in the microwave. Heat it on high for the recommended time, typically between 3 to 5 minutes, depending on the microwave’s wattage.
- Cooling: Allow the bag to cool for a few minutes before opening it. Carefully remove the cup using clean hands or tongs to avoid burns. Place the cup on a clean cloth to air dry.
Sterilizing Tablets or Solutions
- Purchase Sterilizing Tablets: These are available in most pharmacies and online. Common brands include Milton and Sterilizing Tablets from specific menstrual cup brands.
- Prepare the Solution: Follow the manufacturer’s instructions to dissolve the tablet in a specific amount of water. This solution is designed to sterilize baby bottles and can also be used for menstrual cups.
- Soak the Cup: Submerge your menstrual cup in the sterilizing solution for the recommended time, usually around 15-20 minutes.
- Rinse and Dry: After soaking, rinse the cup thoroughly with plain water to remove any residual chemicals. Allow it to air-dry on a clean, dry cloth.
UV Sterilizer
- Purchase a UV Sterilizer: These devices use ultraviolet light to kill bacteria and viruses. They are available online or in stores specializing in personal care products.
- Place the Cup in the Sterilizer: Most UV sterilizers have a designated space or compartment to place your menstrual cup.
- Activate the Sterilizer: Follow the manufacturer’s instructions to turn on the sterilizer. The process typically takes only a few minutes.
- Dry and Store: Once the UV cycle is complete, remove the cup and place it on a clean cloth to cool down. It will be germ-free and ready for use or storage.
Hydrogen Peroxide Soak
- Prepare a Solution: Mix equal parts of 3% hydrogen peroxide and water in a clean container.
- Soak the Cup: Fully submerge your menstrual cup in the solution and let it soak for at least 6-8 hours or overnight for thorough sterilization.
- Rinse Thoroughly: After soaking, rinse your cup with plain water to remove all peroxide residue.
- Dry and Store: Place the cup on a clean, dry cloth to air-dry completely before storing it properly.
Vinegar Solution Soak
- Mix the Solution: Combine equal parts of white vinegar and water in a clean container.
- Soak the Cup: Immerse your menstrual cup in the vinegar solution, allowing it to soak for about 30 minutes.
- Rinse Well: Rinse the cup thoroughly with water to remove vinegar traces.
- Dry Thoroughly: Place the cup on a clean, dry cloth and let it air-dry completely before storing.
Isopropyl Alcohol Wipes
- Purchase Alcohol Wipes: Ensure they contain at least 70% isopropyl alcohol, which is effective for sterilization.
- Wipe Down the Cup: Use the wipes to thoroughly clean all surfaces of your menstrual cup, paying special attention to folds and crevices.
- Rinse and Air Dry: After wiping, rinse the cup well with water to remove any alcohol residue. Then, let it air-dry on a clean cloth.
Key Considerations
- Material Compatibility: Before using any sterilization method, ensure that it is compatible with the material of your menstrual cup. Some substances may degrade silicone or TPE over time.
- Routine: Incorporate sterilization into your menstrual cycle routine, ideally after each cycle, to maintain optimal hygiene.
- Safety: Always follow manufacturer recommendations for the menstrual cup and cleaning products. Avoid methods that could damage the cup, such as prolonged exposure to extreme heat or harsh chemicals.
Utilizing these non-boiling sterilization methods allows you to maintain a high level of hygiene for your menstrual cup, making it a reliable and safe option for menstrual management.
How to Wash Your Menstrual Cup Carry Pouches?
Keeping your menstrual cup carry pouch clean is essential for maintaining the hygiene of your menstrual cup. Here’s a comprehensive guide on washing your menstrual cup carry pouches to ensure they remain clean and suitable for storing your cup.
Materials Needed
- Mild detergent or soap
- A basin or sink
- Clean water
- Soft brush or cloth (optional)
- Clean towel
Step-by-Step Guide
1) Empty the Pouch:
Ensure your menstrual cup is removed from the pouch before cleaning. Shake out any residual debris that might be inside.
2) Check the Label:
Before washing, check any care instructions the manufacturer provides on the label, usually found inside the pouch. Different materials may have specific washing guidelines.
3) Prepare the Cleaning Solution:
Fill a basin or sink with warm water and add a few drops of mild detergent or soap. Avoid harsh chemicals or bleach, which can degrade the fabric and potentially irritate your skin.
4) Soak the Pouch:
Submerge the pouch in the soapy water and let it soak for a few minutes. This helps to loosen any grime or stains.
5) Gently Clean:
Use your hands to agitate the pouch in the water gently. If there are any stubborn spots or stains, you can scrub them gently with a soft brush or cloth. Be careful not to be too rough, as this can damage the fabric.
6) Rinse Thoroughly:
Once cleaned, rinse the pouch under running water to remove all soap residues. Rinse thoroughly; any leftover soap can cause skin irritation or damage the fabric over time.
7) Dry the Pouch:
Lay the pouch flat on a clean towel and gently press to remove excess water. Do not wring out the pouch, which can damage the fabric and shape. Allow the pouch to air-dry completely in a well-ventilated area. Avoid direct sunlight, which can fade colors and degrade certain materials.
Special Considerations
- Frequency of Cleaning: Ideally, the carry pouch should be washed regularly, especially after each menstrual cycle or if it has been exposed to moisture or dirt.
- Fabric Type: Some pouches are made from delicate fabrics such as silk or organic cotton, which might require special care. Utilize gentle, eco-friendly detergents suitable for delicate fabrics.
- Storage Post-Cleaning: After drying, store the pouch in a clean, dry place to prevent mold and mildew growth. Make sure it is completely dry before storing your menstrual cup in it.
How to Clean a Menstrual Cup to Prevent Odor?
A menstrual cup can sometimes develop an unpleasant odor if not cleaned properly. Preventing and addressing odor issues is crucial for maintaining comfort and hygiene. Here’s an in-depth guide on how to clean your menstrual cup to keep it odor-free.
Materials Needed
- Mild, unscented soap
- Soft brush or toothbrush
- Boiling water
- Sterilizing container
- White vinegar (optional)
- Baking soda (optional)
Step-by-Step Guide
1) Empty the Cup:
When you remove your menstrual cup, empty the contents into the toilet. Rinse the cup under cold running water to remove any residual blood. Using cold water initially helps prevent staining and makes subsequent cleaning easier.
2) Initial Rinse with Mild Soap:
Use a small amount of mild, unscented soap to wash the cup. Avoid fragranced or antibacterial soaps, as these can cause irritation and might leave residues that alter the pH balance of your vagina. Rinse thoroughly with water to ensure no soap residue remains.
3) Scrub the Cup:
Gently rub the cup with a soft brush or toothbrush. Pay particular attention to the air holes near the rim, as they can trap menstrual fluid and create odor over time. A brush helps remove any stuck-on debris and ensures all crevices are cleaned properly.
4) Deep Cleaning in Boiling Water:
Boiling your menstrual cup sterilizes it and removes any lingering smells. Place the cup in a heat-resistant container and pour boiling water over it, or submerge it in a pot of boiling water for 5-10 minutes. Be sure the cup does not touch the bottom of the pot to prevent damage.
5) Optional Vinegar Rinse:
If your cup smells, rinse it with white vinegar and water. Mix one vinegar with nine parts water and let the cup soak for 30 minutes. Vinegar is a natural disinfectant and can help neutralize odors without damaging the cup.
6) Baking Soda Scrub (Optional):
Make a paste with baking soda and water and scrub the menstrual cup for stubborn odors. Baking soda is mildly abrasive and helps to deodorize. Rinse the cup thoroughly after baking soda to remove all residue.
7) Regular Sterilization:
Incorporate routine sterilization into your menstrual cycle hygiene routine. Depending on personal preference and manufacturer recommendations, this can involve boiling the cup once a month or after each cycle.
8) Dry and Store Properly:
After cleaning, place the cup on a clean, dry cloth and let it air dry completely. Once dry, store it in a breathable, clean pouch. Avoid airtight containers, as they can trap moisture and lead to bacteria growth and odors.
Additional Tips to Prevent Odor
- Avoid Fragrances: Avoid using fragranced products on your cup or wash it with scented soaps. These can mask odors temporarily but may contribute to bacterial growth and worsen odors over time.
- Empty Regularly: Depending on your flow, empty your menstrual cup every 4-12 hours. Regular emptying prevents the accumulation of menstrual fluid, which can lead to odor.
- Stay Hydrated: Staying hydrated can help neutralize odors caused by concentrated menstrual flow. A balanced diet and proper hydration maintain overall bodily health, which can reduce odor issues.
- Check for Damage: Inspect your cup regularly for any damage, like cracks or tears, which can harbor bacteria and cause unpleasant smells. Replace your cup as recommended by the manufacturer.
What Not to Use When Sterilizing a Menstrual Cup?
When sterilizing your menstrual cup, it’s important to avoid certain substances and materials that can cause damage to the cup or irritation to your body. Here’s a detailed list of what not to use:
1) Harsh Chemicals:
Avoid using bleach, hydrogen peroxide, or other harsh chemicals to sterilize your menstrual cup. These substances can degrade the silicone or rubber material, compromising the cup’s integrity and leading to irritation or health issues when reinserted.
2) Antibacterial Soaps:
While it may seem like a good idea to use antibacterial soap to clean your menstrual cup, these soaps often contain fragrances and other chemicals that can leave residues. Such residues can disturb the natural pH balance of your vagina, leading to infections or irritation.
3) Dishwashing Soap:
Some dish soaps contain abrasives and strong detergents unsuitable for menstrual cup care. These can break down the cup’s material over time, making it more susceptible to damage and less effective.
4) Oil-based soaps or Lubricants:
Oil-based products can cling to the surface of the cup and be difficult to wash off. Oils can create a barrier that traps bacteria, leading to odor and potential infections.
5) Harsh Scrubbing Tools:
Using abrasive scrubbing pads or wire brushes can scratch or degrade the surface of the menstrual cup. These scratches can harbor bacteria and cause the cup to deteriorate faster.
6) Microwave Sterilization:
While some menstrual cups are marketed as microwave-safe, it’s generally safer to avoid microwave sterilization unless explicitly stated by the manufacturer. The uneven heating in microwaves can cause the cup to melt or become damaged if not done properly.
7) Hand Sanitizer:
Hand sanitizers contain alcohol and other additives unsuitable for menstrual cup cleaning. These substances can be harsh on the material and leave residues that are hard to rinse off, which could harm vaginal health.
8) Dishwasher Cleaning:
While throwing your menstrual cup in the dishwasher for convenience might be tempting, it’s not recommended. The high heat and detergents used in dishwashers can affect the resilience and lifespan of the cup material.
By avoiding these substances and methods, you can maintain the longevity and safety of your menstrual cup. Always follow the manufacturer’s instructions for care and sterilization to ensure optimal hygiene and performance.
When to Replace Your Menstrual Cup?
Replacing your menstrual cup largely depends on various factors, including usage, care, and the manufacturer’s recommendations. On average, a high-quality menstrual cup can last anywhere from 1 to 5 years, with some brands suggesting they can be used for up to 10 years with proper care. Here are key signs that indicate it might be time to replace your menstrual cup:
1) Noticeable Wear and Tear:
If you spot any cracks, tears, or holes in your menstrual cup, it’s crucial to replace it immediately. Even small damages can compromise the cup’s effectiveness and harbor bacteria.
2) Persistent Odor:
Despite regular cleaning and sterilization, if your cup consistently retains a strong odor, it might be time to get a new one. Persistent smells can indicate that the material has started to degrade.
3) Discoloration:
While some staining is normal over time, significant discoloration that doesn’t go away with thorough cleaning can signify material breakdown.
4) Texture Changes:
If the silicone or rubber becomes sticky, powdery, or loses its flexibility, it clearly indicates that the cup’s integrity is compromised and should be replaced.
5) Manufacturer’s Guidelines:
Always adhere to the replacement period recommended by the manufacturer. Extending the use of your cup beyond this period can decrease its effectiveness and increase the risk of irritation or infection.
6) Comfort Issues:
If your cup suddenly feels uncomfortable, irritates, or experiences leaks despite proper insertion, it may be time to assess whether you need a different size or a new cup altogether.
Remember, replacing your menstrual cup as needed ensures comfort, optimal hygiene, and health. Always consult the user manual provided with your menstrual cup for any specific guidelines regarding its lifespan and care.
You might be interested in: What Are Sanitary Pads? | Why Are Sanitary Pads Important?
Conclusion
Maintaining proper hygiene and care for your menstrual cup is essential for longevity and health. By following the appropriate sterilization methods and regularly checking for signs of wear, you can ensure your menstrual cup remains effective and safe. Always avoid harsh chemicals and unsuitable cleaning methods to prevent damage and preserve the cup’s integrity. For those new to menstrual cups or seeking more tips, resources are abundant on how to clean menstrual cups available online. Staying informed and attentive to your cup’s condition will help you manage your menstrual health more efficiently and comfortably.
