Home Blog Page 2

Tea Towel vs Dish Towel: The Ultimate Guide to Key Differences and Uses

0

Tea towels and dish towels are everyday kitchen essentials that often go unnoticed but play crucial roles in maintaining a clean, functional, and stylish kitchen. While they may appear similar at first glance, these two types of towels offer distinct benefits and serve different purposes, from drying delicate glassware to handling heavy-duty spills. Understanding the unique qualities of each can help you make informed decisions on which towels best suit your kitchen needs. In this guide, we’ll explore the differences between tea towels and dish towels, covering their key features, materials, uses, and care instructions, so you can optimize your kitchen setup with the right tools. This article provides the best answer to the comparison of Tea Towel vs. Dish Towel.

Understanding Tea Towels and Dish Towels

Tea towels, typically made from lightweight materials like cotton or linen, are known for their smooth texture, making them ideal for drying delicate glassware and cutlery without leaving streaks or lint. Dish towels, on the other hand, are often thicker and made from absorbent materials like terry cloth or microfiber. These towels are better suited for wiping down countertops, drying large pots, and handling heavier kitchen tasks. Whether you’re exploring dish cloths vs tea towels, they serve essential roles in maintaining a clean, organized kitchen.

Key Features of Tea Towels and Dish Towels

Both tea towels and dish towels boast distinct features that cater to different kitchen tasks. Tea towels, usually crafted from cotton or linen, are lightweight and smooth, perfect for drying dishes, covering baked goods, or adding a decorative element to your kitchen space. Their soft texture makes them suitable for delicate kitchen tasks, like polishing glassware or drying hands. Dish towels, made from more robust fabrics like terry cloth or microfiber, are built to handle heavy-duty jobs. These towels are thicker and more absorbent, ideal for cleaning spills, wiping down countertops, and drying cookware. By understanding the key features of tea towels vs dish towels, you can select the right towel for the task at hand, maximizing efficiency in your kitchen.

Types of Fabrics Used in Tea Towels and Dish Towels

The materials used for both tea towels and dish towels impact their performance in the kitchen. Tea towels are typically made from either cotton or linen, each offering unique benefits. Cotton tea towels are soft and highly absorbent, making them ideal for drying dishes, while linen tea towels dry faster due to their textured weave, making them excellent for polishing and ensuring no lint is left behind. Dish towels, crafted from fabrics like terry cloth or microfiber, are designed for heavy-duty cleaning. Terry cloth’s looped fabric allows for superior absorbency, making it ideal for drying large dishes and soaking up spills. Microfiber dish towels are quick-drying and effective in picking up dirt and grime, offering versatility in modern kitchens. For tips on maintaining their quality, check out our guide on how to wash microfiber towels. The comparison between tea towel vs dish cloth or dish towel vs tea towel often comes down to the fabric choice and the task at hand.

Common Uses for Tea Towels and Dish Towels

Tea towels and dish towels are both highly versatile, with each offering unique applications in the kitchen and beyond. Tea towels are perfect for drying dishes and glassware, handling hot bakeware, and covering bread dough while it rises. Their decorative designs also allow them to be used as table accents, eco-friendly gift wraps, or even as placemats. Dish towels, thanks to their thicker, more absorbent nature, are ideal for drying dishes, wiping up spills, and cleaning kitchen surfaces. They can also be used for handling hot cookware, drying hands, or wiping down kitchen counters after cooking. Whether you’re choosing between tea towel vs dish towel or tea towel vs dish cloth, both options offer essential versatility for any kitchen.

Choosing the Right Towels for Your Needs

Selecting between tea towels and dish towels depends on the specific tasks you need them for. Tea towels, often made from lightweight, absorbent cotton or linen, are perfect for everyday kitchen tasks like drying glassware, polishing surfaces, or serving as decorative accessories. They are particularly useful for lighter tasks where a smooth, lint-free finish is required. Dish towels, made from thicker materials such as terry cloth or microfiber, are designed for more rigorous kitchen duties. These towels are durable and absorbent, making them ideal for drying large dishes, cleaning spills, and wiping down surfaces. When deciding between tea towels vs dish towels, consider both the functionality and aesthetic you want in your kitchen, ensuring you select towels that best fit your routine.

Proper Care for Your Tea Towels and Dish Towels

To ensure your tea towels and dish towels remain in optimal condition, proper care is essential. Tea towels, especially those made from cotton, should be washed in warm water with mild detergent to maintain their absorbency, while linen towels should be washed in cold water and air-dried to avoid shrinking. Avoid using fabric softeners, as they can reduce absorbency over time. Dish towels, especially those made from terry cloth or microfiber, should be washed in hot water to remove any bacteria or residue from heavy-duty use. Regular washing and rotating your towels will extend their lifespan and ensure they remain effective for all your kitchen tasks. Whether you’re washing kitchen towels like tea towels or dish towels, proper care ensures they stay in great shape and are ready for use whenever needed.

Why Tea Towels and Dish Towels Are Kitchen Essentials

Both tea towels and dish towels are indispensable in any well-equipped kitchen. Tea towels excel in delicate tasks like drying glassware and serving as decorative pieces, while dish towels offer high absorbency and durability for more demanding jobs, like drying large cookware or wiping down kitchen counters. Understanding the differences between these two types of towels whether you’re evaluating tea towels vs dish towels or comparing tea towels vs dish cloths will allow you to create a more efficient and organized kitchen. Investing in high-quality towels not only enhances your kitchen’s functionality but also adds a touch of style to your space.

What is a Tea Towel? A Complete Guide to Uses, Care, and Benefits

0

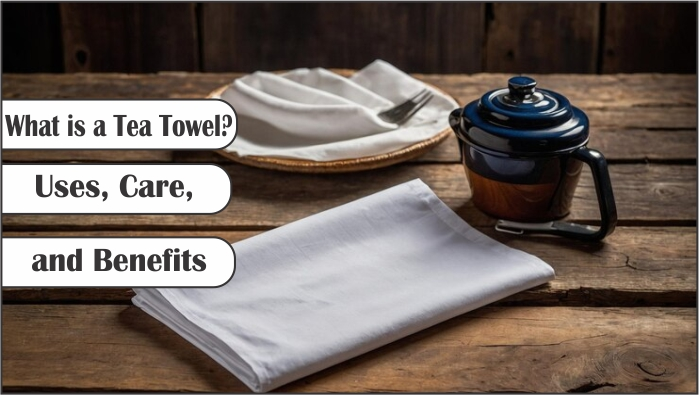
Tea towels are versatile, everyday items that have been a staple in homes for centuries. Whether used in the kitchen, for cleaning, or even as decor, tea towels serve multiple purposes. But what exactly is a tea towel, and how does it differ from other towels you might use at home? In this article, we’ll explore everything you need to know about tea towels their uses, history, materials, and how to care for them. Along the way, we’ll explore how tea towels have become essential household items, making them a must-have in any kitchen.

Understanding What a Tea Towel Is and Its Key Features

What is a tea towel? A tea towel is a versatile, lightweight cloth traditionally used for drying dishes, particularly glassware, without leaving streaks or lint. Typically made from cotton or linen, tea towels are highly absorbent and gentle, making them ideal for delicate kitchen tasks. Their smooth texture sets them apart from other kitchen towels like dishcloths, which are often thicker and more rugged. Available in a variety of colors and designs, tea towels serve both functional and decorative purposes, enhancing kitchen aesthetics while being practical everyday tools.

What Makes a Tea Towel Different from Other Kitchen Towels?

Diiferent-Kichen-Towels

Tea towels differ from other kitchen towels and sanitary towels in terms of the material used in towels for different skins, sizes, and purposes. While kitchen towels might be made of thicker fabrics like terry cloth for heavy-duty cleaning or drying, tea towels are typically smoother and more refined. Here’s a comparison:

Type of Towel Material Common Use
Tea Towel Cotton, Linen Drying dishes, covering baked goods
Dish Towel Terry Cloth Cleaning counters, drying dishes
Hand Towel Cotton Blend Drying hands

Tea towels are also more decorative and can serve as a stylish addition to your kitchen space. They are often printed with patterns or images, adding a touch of personality to your home.

Types of Fabrics Used in Tea Towels

The two most common materials used to make tea towels are cotton and linen. Each material has its advantages:

  • Cotton: Known for its softness and absorbency, cotton tea towels are excellent for everyday use. They’re machine-washable and durable, making them a popular choice.
  • Linen: Linen tea towels are more traditional and have a textured weave. They tend to dry more quickly than cotton and are ideal for polishing glassware because they leave no lint behind.

What Are the Common Uses for Tea Towels?

Tea towels are incredibly versatile and can be used in various ways around the home. Whether you’re using them for practical purposes in the kitchen or as decorative elements, tea towels add both functionality and style to daily tasks.

Using Tea Towels for Cooking and Baking

One of the most traditional uses for tea towels is in the kitchen. They are ideal for drying dishes, utensils, and counter tops without leaving any streaks. Some other common uses include:

  • Covering bread dough: When letting the dough rise, a tea towel can be used to cover the bowl, keeping the dough warm and preventing it from drying out.
  • Handling hot items: A folded tea towel can serve as a makeshift oven mitt when grabbing hot pots or pans.
  • Keeping baked goods fresh: Tea towels are perfect for covering freshly baked bread or pastries, ensuring they stay warm while allowing a bit of airflow to prevent sogginess.

Creative Uses for Tea Towels Around the Home

Beyond the kitchen, tea towels can be used creatively throughout the house. Here are some innovative ways to use them:

  • As placemats or napkins: A beautiful tea towel can double as a placemat or napkin for a rustic, homey dining setup.
  • Wrapping gifts: Tea towels can serve as an eco-friendly, reusable wrapping option for small gifts.
  • Framing as art: With their unique designs and patterns, tea towels can even be framed and used as wall art.

How to Choose the Best Towel for Your Needs

Selecting the right tea towel comes down to your personal preferences and how you plan to use them. If you’re looking for a practical towel for daily kitchen tasks, you may want to choose absorbent cotton tea towels. Similarly, when considering personal care products, it’s essential to know how to choose sanitary towels that fit your needs. If you’re more focused on aesthetics or need something for special occasions, linen tea towels with intricate designs may be more your style.

Key Factors to Consider When Buying Tea Towels

When purchasing tea towels, keep the following factors in mind:

  1. Material: As discussed, cotton and linen are the top choices. Cotton is more affordable and practical, while linen offers a classic, elegant touch.
  2. Size: Standard tea towels are around 18×28 inches, but larger or smaller options are available depending on your needs.
  3. Absorbency: For drying dishes and hands, look for highly absorbent towels made from quality cotton.
  4. Durability: Ensure the towels are machine-washable and can withstand frequent use without fading or fraying.

Popular Styles and Designs of Tea Towels

Tea towels come in a wide array of styles and designs, making them a fun addition to your kitchen decor. Popular options include:

  • Floral patterns: A classic choice that adds a touch of nature to your kitchen.
  • Vintage prints: Nostalgic designs that evoke a sense of charm.
  • Minimalist styles: Simple, understated designs for a modern kitchen.

How to Properly Care for Your Tea Towels

Caring for your tea towels properly will ensure they remain in top condition and last longer. Regular washing and proper storage are key to maintaining the absorbency and appearance of your tea towels.

Washing and Drying Tea Towels

When washing your tea towels, it’s important to use the correct method to preserve the fabric:

  • Cotton towels: Wash in warm water with mild detergent. Avoid fabric softeners, as they can reduce absorbency.
  • Linen towels: Wash in cold water to prevent shrinking and air dry to maintain the fabric’s texture.

Tips for Maintaining Longevity and Quality

To extend the life of your tea towels, consider the following tips:

  • Avoid bleach: While bleach may remove stains, it can also weaken the fibers and cause fading.
  • Rotate your towels: Use different tea towels on rotation to avoid overusing a single one, which can lead to wear and tear.

Discover the Versatility of Tea Towels for Everyday Use

Tea towels are much more than just kitchen aids they offer many uses beyond the obvious. Tea towels have countless applications, from eco-friendly alternatives to disposable products to creative DIY projects.

Eco-Friendly Advantages of Using Tea Towels

Tea towels are a great sustainable option for households looking to reduce waste. They can replace paper towels, napkins, and even single-use gift wrapping. By using tea towels, you’re not only saving money but also making an eco-conscious choice.

Tea Towels as Gifts or Decor

Tea towels can make thoughtful, practical gifts. You can easily personalize them for special occasions, or choose ones with unique prints that match the recipient’s personality. Additionally, they can be used as table runners or decorative elements in the kitchen or dining room.

Expert’s Suggestion: Why Tea Towels are a Kitchen Essential

So, what is a tea towel? It’s more than just a piece of cloth it’s an indispensable tool in any kitchen and home. From drying dishes to adding a decorative touch, tea towels are as functional as they are stylish. With proper care of tea towels, they can last for years, providing value and versatility in your daily routine. Whether you’re a seasoned chef or someone who appreciates a well-kept home, tea towels are a must-have item that no household should be without. Learn more about tea towels to explore their history and other uses!


How to Wash Microfiber Towels & Cloths the Right Way

0

Microfiber towels and cloths are among the most efficient cleaning tools available today, known for their ability to pick up dirt, dust, and bacteria with minimal use of chemicals. However, to maintain their performance and longevity, cleaning microfiber cloth and washing microfiber towels properly is essential. This guide will walk you through the most effective ways to wash and maintain these useful cleaning tools, ensuring they stay in top shape for years. This article provides the best answer to the question, ‘How to Wash Microfiber Towels.’

Let’s start by understanding why microfiber cleaning towels need special care.

Table of Contents

Why Microfiber Towels Need Special Care

Microfiber towels and cloths are made from ultra-fine synthetic fibers, typically a blend of polyester and polyamide. Their unique structure allows them to capture tiny dust particles, grease, and bacteria more effectively than traditional towels. However, this structure also makes cleaning microfiber towels a delicate task. The fibers are prone to damage if not handled correctly, reducing their effectiveness over time.

What Makes Microfiber So Effective?

  • Microfiber strands are 1/100th the diameter of a human hair, allowing them to clean surfaces at a microscopic level.
  • The fibers create an electrostatic charge that attracts dust and dirt, making cleaning microfiber cloths especially effective on glass, screens, and delicate surfaces.
  • They absorb 7 times their weight in water, making them excellent for drying surfaces without streaks.

While washing microfiber cloths sounds simple, using the wrong detergent or washing them with other fabrics can clog the fibers, making them less absorbent and less effective over time.

How Improper Care Affects Microfiber Towels

Improper washing methods like using fabric softeners or mixing microfiber with cotton can cause several problems:

Issue Impact on Microfiber Towels
Fabric softener use Coats the fibers, reducing absorbency and cleaning power.
High heat drying Melts or warps the fine fibers, leading to stiff and brittle cloths.
Washing with lint-prone fabrics Cotton or wool lint clogs the fibers, diminishing their effectiveness.
Wrong detergent usage Some detergents leave residues that attract dirt, reducing the towel’s ability to clean.

These are just a few examples of how improper washing microfiber towels can shorten their lifespan. Avoiding these pitfalls will keep your towels performing like new for much longer.

Signs Your Microfiber Towels Need Cleaning

While microfiber towels are highly durable, they still need regular care. Look out for these signs to know when it’s time to wash them:

  1. Reduced Absorbency: Towels leave streaks or fail to absorb water as effectively as before.
  2. Odors: A musty or sour smell is a clear sign they need cleaning.
  3. Dust or Lint Residue: The cloths leave behind lint or dirt, indicating clogged fibers.
  4. Stiffness: Towels that feel stiff or rough to the touch need proper washing and conditioning.

Regular cleaning microfiber cloths and towels ensures they stay fresh and effective for multiple cleaning tasks, whether it’s drying cars, wiping down kitchen counters, or polishing windows.

The Negative Impact of Washing Microfiber Towels Incorrectly

Washing microfiber towels and cloths incorrectly can cause them to lose their unique cleaning abilities, become less durable, and even develop unwanted odors. Since microfiber cleaning towels are made of synthetic fibers that are sensitive to certain chemicals and temperatures, improper washing techniques can render them ineffective. Below, we’ll break down the specific problems caused by improper care and provide insights into what to avoid.

1. Reduced Absorbency

One of the most valuable features of microfiber towels is their ability to absorb water and other liquids efficiently. When you use the wrong detergent or wash these towels with fabrics that shed lint (like cotton), the fibers become clogged. This blockage reduces their absorbency and makes them ineffective for tasks like drying cars or cleaning windows.

Solution:

  • Wash microfiber cloths separately from lint-producing fabrics.
  • Avoid fabric softeners and oily detergents to prevent clogging the fibers.

2. Loss of Cleaning Effectiveness

Microfiber works by generating an electrostatic charge that attracts dust, dirt, and bacteria. However, washing these towels with fabric softeners or dryer sheets coats the fibers, neutralizing the charge and preventing the towel from picking up particles efficiently.

Did you know? Even using too much detergent can leave residues on washing microfiber cloths, causing them to smear surfaces instead of cleaning them.

Solution:

  • Use a detergent designed for microfiber cleaning towels, often labeled as “microfiber detergent.”
  • Run an extra rinse cycle to ensure no detergent residue remains.

3. Stiff, Brittle Towels After Drying

Using high heat in the dryer can damage the fine fibers of microfiber towels, causing them to warp, melt, or become brittle over time. This stiffness not only makes the towels uncomfortable to use but also reduces their ability to trap dust and water effectively.

Solution:

  • Always dry microfiber towels on a low-heat setting or air dry them.
  • Never use dryer sheets as they leave a waxy residue on the fibers.

4. Lint Contamination

Microfiber is specifically designed to pick up tiny particles, but when washed with cotton or other fabrics that shed lint, the fibers become clogged. As a result, the towels may leave lint behind on surfaces, making them useless for cleaning tasks like polishing glass or screens.

Solution:

  • Wash microfiber towels separately from other fabrics.
  • Regularly inspect and clean out the washing machine’s lint filter before washing microfiber cloths.

5. Foul Odors That Won’t Go Away

If not dried properly or left damp for too long, microfiber cleaning towels can develop a sour smell. The fine fibers trap moisture, making them susceptible to mold or mildew growth if stored when wet. Once odors set in, it can be challenging to remove them with standard washing.

Solution:

  • Ensure that towels are completely dry before storing.
  • If odors persist, add a half-cup of vinegar to the rinse cycle when washing microfiber towels to break down lingering residues.

6. Shortened Lifespan

Improper care can cause microfiber towels to deteriorate faster than they should. Given their cost and usefulness, it’s essential to handle these towels properly to get the most out of them. On average, well-maintained microfiber cleaning towels can last through 500 to 1,000 washes.

Solution:

  • Follow the recommended care practices to extend the lifespan of cleaning microfiber cloths.
  • Rotate towels regularly to avoid overuse of a single towel.

7. Can Microfiber Towels Ruin Delicate Surfaces?

Worn-out or poorly maintained microfiber towels can become rough and scratch sensitive surfaces, such as eyeglass lenses or polished wood. Even though microfiber cloths are designed to be gentle, fibers that have been damaged through improper washing may cause unintended scratches.

Solution:

  • Use dedicated microfiber cloths for delicate surfaces, and wash them carefully following manufacturer instructions.

Summary of Negative Impacts and Solutions

Problem Impact on Microfiber Towels Solution
Reduced absorbency Towels leave streaks or fail to absorb liquids. Avoid lint-prone fabrics and fabric softeners.
Loss of cleaning effectiveness Towels smear dirt instead of trapping it. Use microfiber detergent and rinse thoroughly.
Stiff or brittle towels Towels become uncomfortable and less effective. Dry on low heat or air dry.
Lint contamination Towels leave lint on surfaces. Wash separately from other fabrics.
Foul odors Towels develop a sour smell. Add vinegar during rinse cycle and dry thoroughly.
Shortened lifespan Towels wear out quickly. Rotate towels and follow proper care instructions.
Scratching delicate surfaces Damaged towels scratch glass or screens. Reserve separate towels for delicate items.


By avoiding these common mistakes, you can ensure that your microfiber cleaning towels stay in excellent condition, providing streak-free, effective cleaning for a long time.

Next, we’ll explore a step-by-step guide to washing microfiber towels so you can maintain their performance and extend their lifespan with the right care techniques.

Step-by-Step Guide to Washing Microfiber Towels & Clothes

Washing microfiber towels requires more than just throwing them in the machine. Proper care ensures they maintain their absorbency, softness, and ability to trap dirt. Follow this step-by-step guide for cleaning microfiber cloths the right way, and avoid common mistakes that reduce their effectiveness.

1. Separate Microfiber Towels Before Washing

Microfiber towels need to be washed separately from other fabrics, especially those that shed lint, like cotton or wool. Mixing them with lint-producing fabrics clogs the fine fibers, reducing their cleaning power.

  • Tip: Wash microfiber towels in small batches. This ensures they get thoroughly cleaned and reduces the chance of lint contamination.
  • Important: If you’ve used microfiber towels for different tasks (e.g., car detailing, kitchen cleaning), separate them by use. Towels used for oily or greasy tasks should not be mixed with others.

2. Pre-Treat Heavily Soiled Towels

For microfiber towels used in messy tasks such as cleaning grease or detailing cars pre-treating stains can improve washing results.

  • How to Pre-Treat:
    1. Rinse the dirty microfiber cloths under warm water to remove loose dirt.
    2. Use a small amount of microfiber detergent or mild liquid laundry detergent on stained areas.
    3. Gently rub the detergent into the fibers with your fingers.
    4. Let the towels sit for 10–15 minutes before washing.

This process loosens dirt and oils, making it easier to clean microfiber cloths during the main wash cycle.

3. Choose the Right Detergent

When washing microfiber towels, it’s essential to use a gentle, fragrance-free detergent to avoid damaging the fibers. If you’re also looking for soft and skin-friendly options for personal care, explore our guide on Sanitary Towels for Sensitive Skin to find the best solutions for comfort and care.

  • Use: A detergent designed for microfiber cleaning towels, or a mild, unscented detergent without additives.
  • Avoid:
    • Fabric softeners
    • Dryer sheets
    • Bleach or harsh chemicals

These additives coat the fibers, reducing their ability to absorb water and trap dust effectively.

4. Use the Correct Water Temperature

Microfiber towels can generally be washed with warm or cold water, but avoid hot water as it can damage the fibers. Warm water helps break down oils and residues, especially for towels used in kitchens or garages.

Water Temperature Best For
Cold water (below 30°C) General cleaning towels
Warm water (30–40°C) Greasy towels, kitchen use, or car detailing
  • Note: Always check the care label on the towel to see if the manufacturer recommends a specific temperature.

5. Washing Microfiber Towels in a Washing Machine

Using a washing machine is the easiest way to keep your microfiber cleaning towels fresh. Here’s how to do it properly:

  1. Select a Gentle Cycle: Use a delicate or light wash cycle to minimize fiber damage.
  2. Choose a Rinse-Only Option (If Available): Microfiber holds onto detergent, so an extra rinse ensures all residues are removed.
  3. Use Minimal Detergent: A small amount about half the usual amount works best for washing microfiber cloths.
  4. Avoid Overloading the Machine: Give the towels space to move around for a thorough clean.
  • Pro Tip: If you need to wash microfiber towels quickly, using cold water in the machine works well for lightly soiled cloths.

6. Should You Wash Microfiber Towels with Other Towels?

It’s generally not recommended to wash microfiber towels with other types of fabric, especially lint-prone materials like cotton. However, if you must wash them together:

  • Use Only Similar Towels: Stick to other synthetic fabrics that don’t shed lint.
  • Double Rinse: Run two rinse cycles to make sure lint is washed away.

7. How to Dry Microfiber Towels Without Damaging Them

Drying microfiber towels correctly is essential to preserve their softness and performance. High heat can melt the synthetic fibers, while air-drying incorrectly can make the towels stiff.

  • Best Practices for Drying:
    1. Air Dry: Lay the towels flat on a drying rack or hang them to dry. This method ensures they maintain their softness.
    2. Low-Heat Dryer: If you prefer to use a dryer, set it to the lowest heat setting.
    3. Avoid Dryer Sheets: As mentioned earlier, dryer sheets leave waxy residues on the fibers.
  • Pro Tip: Shake the towels gently after drying to fluff the fibers and restore their softness.

8. Best Way to Store Microfiber Towels

Proper storage helps maintain the absorbency and softness of microfiber towels. Similarly, personal care items like menstrual cups require careful cleaning and storage for optimal use. Learn the best cleaning methods in our guide on How to Clean Menstrual Cup.

  • How to Store Microfiber Towels:
    1. Make sure the towels are completely dry before storing to prevent mold or mildew growth.
    2. Fold or roll the towels neatly to keep them free from dust.
    3. Store them in a cool, dry place, such as a cabinet or drawer.
    4. Avoid storing microfiber towels in plastic bags for long periods, as trapped moisture can cause odors.

Summary: Quick Checklist for Washing Microfiber Towels

Step Key Actions
Separate towels Wash microfiber towels separately from lint-producing fabrics.
Pre-treat soiled towels Rinse and apply mild detergent to stained areas.
Choose the right detergent Use unscented or microfiber-specific detergent.
Select water temperature Use warm or cold water based on the task.
Machine wash with care Use a delicate cycle and avoid overloading the machine.
Dry properly Air dry or use low-heat dryer settings.
Store with care Keep towels dry and dust-free in a cool place.


Following these steps will ensure your microfiber cleaning towels and cloths remain effective for cleaning, drying, and polishing. By handling them with care, you’ll extend their lifespan and keep them working like new.

How to Wash Microfiber Cloths for Specific Uses

Different cleaning tasks call for tailored care routines, especially for items like microfiber cloths used for glasses, electronics, or polished surfaces. These cloths require a gentler approach to ensure they remain effective without causing damage to delicate surfaces.

Microfiber Cloths for Glasses and Electronics: Special Care Tips

Microfiber cloths used to clean eyeglasses, screens, and electronics are more delicate than those used for general cleaning. These clothes need to remain lint-free and soft to avoid scratching sensitive surfaces. Here’s the best way to wash them:

Steps to Wash Microfiber Cloths for Glasses & Screens

  1. Pre-Rinse the Cloths: Gently rinse the cloths under cold water to remove dust and oils.
  2. Use Gentle Detergent: Wash with a microfiber detergent or mild, fragrance-free soap. Avoid bleach or harsh chemicals.
  3. Hand Wash Preferred: If possible, hand wash these clothes to minimize agitation.
  4. Machine Wash (If Necessary): Use the delicate cycle with cold water if you prefer a machine wash. Keep the load small.
  5. Air Dry Only: Lay the clothes flat to air dry. Avoid dryers altogether to prevent any potential fiber damage.
  • Pro Tip: Store clean microfiber cloths in a dust-free container, like a resealable bag, to keep them in perfect condition between uses.

How to Wash Microfiber Towels Used for Car Detailing

Car detailing towels encounter grease, wax, and dirt, which makes their cleaning process a bit more rigorous. Proper care ensures these towels stay soft and absorbent for streak-free polishing.

Steps for Washing Car Detailing Microfiber Towels

  1. Separate the Towels by Use: Keep wax, polish, and drying towels separate from general cleaning ones.
  2. Pre-Treat Greasy Towels: Apply microfiber detergent to heavily soiled areas and let them soak for 10–15 minutes.
  3. Use Warm Water: Wash with warm water to break down grease and dirt without damaging the fibers.
  4. Rinse Thoroughly: Make sure all detergent is washed out to avoid streaks when drying cars.
  5. Air Dry or Low-Heat Dryer: Avoid high heat to prevent the fibers from becoming brittle.
  • Pro Tip: Use microfiber cleaning towels exclusively for detailing. Avoid cross-use with household cleaning tasks.

Microfiber Cloths for Polished Furniture and Glass Surfaces

Towels used for delicate surfaces like mirrors, windows, or polished wood require extra care to stay streak-free and lint-free.

How to Wash Polishing Towels & Glass Cleaning Cloths

  1. Rinse Lightly After Use: Rinse cloths used for glass to remove dust and dirt before washing.
  2. Cold Water Wash: Use cold water to avoid warping the fibers.
  3. Minimal Detergent: Use only a small amount of microfiber detergent to avoid residue that could leave streaks.
  4. Air Dry to Prevent Lint Buildup: Lay flat to air dry, as a dryer may cause lint to stick to the fibers.

How Often Should You Wash Microfiber Towels for Specific Uses?

The frequency of washing your microfiber towels depends on how frequently they are used and the type of cleaning they perform. Here’s a quick guide:

Type of Microfiber Cloth Recommended Washing Frequency
Eyeglass and electronics cloths After every few uses
Car detailing towels After each detailing session
Household cleaning towels After every use
Polishing and glass towels After each cleaning session


How to Revive Old or Ineffective Microfiber Cloths

Even with the best care, microfiber towels can lose their effectiveness over time. If your towels feel stiff or don’t absorb water as they used to, follow these steps to restore them:

  1. Deep Clean with Vinegar: Add half a cup of vinegar to the rinse cycle to break down residue.
  2. Boil for a Quick Reset: Boil the towels in water for 5–10 minutes to loosen fibers clogged with detergent buildup.
  3. Use Baking Soda for Odors: Add a tablespoon of baking soda to your wash to eliminate odors.

By following these tips, you can keep your microfiber cloths performing like new for longer.

Expert’s Suggestion and Maintenance Tips for Microfiber Towels

Microfiber towels and cloths are versatile cleaning tools that require proper care to maintain their absorbency, softness, and effectiveness over time. Whether you’re using them for car detailing, household cleaning, or delicate surfaces like electronics, following a structured washing routine ensures they stay in top condition.

Key Takeaways for Washing Microfiber Towels and Cloths

  • Use a dedicated microfiber detergent or mild, unscented detergent to protect the fibers.
  • Avoid harsh chemicals, fabric softeners, and dryer sheets, as they coat the fibers and reduce absorbency.
  • Separate microfiber towels by type of use and wash them on delicate or gentle cycles.
  • Dry properly: Air drying is the safest, but if using a dryer, keep it on a low heat setting.
  • Store towels carefully in a clean, dry area to keep them free from dust and moisture.

Tips for Extending the Lifespan of Microfiber Towels

  1. Rotate Towels: Using the same set of microfiber towels repeatedly can wear them out quickly. Rotate between several sets to extend their lifespan.
  2. Spot Clean Immediately: Pre-treat heavily soiled areas as soon as possible to prevent stains from setting in.
  3. Use Purpose-Specific Towels: Assign certain towels for specific tasks (e.g., car detailing, glass cleaning) to avoid cross-contamination.
  4. Deep Clean Periodically: Every few months, wash microfiber towels with a vinegar rinse or boiling method to remove detergent buildup.
  5. Inspect Regularly: If you notice fraying or stiffness, it’s time to restore or replace the towels to maintain cleaning performance.

By following the right washing and drying methods, you can prolong the life of microfiber towels and cloths and ensure they perform optimally for all your cleaning needs. Whether you’re wiping down car surfaces, polishing glass, or cleaning delicate screens, these tips will help you keep microfiber towels in top shape and ready for use.

Consistent care also makes a difference in cost savings over time properly maintained microfiber towels last longer, reducing the need for frequent replacements. Make washing microfiber cloths a regular part of your routine to enjoy streak-free, lint-free, and highly absorbent results every time.


How to Remove a Stuck Tampon: Your Complete Guide to Safety

0

If you’ve ever experienced a stuck tampon, you’re not alone it’s a more common issue than people think. While tampons are generally safe to use, improper insertion, forgetting to remove one, or a missing string can sometimes lead to the unpleasant experience of trying to remove a stuck tampon. Staying calm and knowing the right steps will make the removal process easier and help prevent complications. In this guide, we’ll walk you through everything you need to know, from recognizing a stuck tampon to safely removing it. This article provides the best answer to the question, ‘How to Remove a Stuck Tampon.’

Why Tampons Sometimes Get Stuck

There are several reasons why a tampon might feel stuck or become difficult to remove. One common cause is improper insertion, which can happen if you’re not fully familiar with how to put in a tampon correctly. Inserting a tampon at the wrong angle or too deep can make retrieval tricky, especially if the string gets tucked inside. Additionally, using a higher absorbency tampon than necessary or waiting too long to change it can cause it to become dry, making removal uncomfortable.

Understanding these scenarios helps you stay calm and confident when managing a stuck tampon. It also highlights the importance of learning how to put in a tampon properly to prevent future issues and ensure comfort and ease throughout your period.

Common Reasons a Tampon Might Get Stuck

  1. The string gets tucked inside: The tampon string may accidentally slip inside the vaginal canal, making it hard to pull the tampon out.
  2. Incorrect positioning: If the tampon is inserted too deeply or at an angle, it may shift further up the vaginal canal.
  3. Forgetting to remove a tampon: It’s possible to forget a tampon, especially during busy days or when switching between tampons and pads.
  4. Tampon swelling: Leaving a tampon in too long can cause it to swell, making removal more challenging.
  5. Using two tampons by accident: Sometimes, a second tampon is inserted without realizing the first one is still inside.

Can a Tampon Really Get Lost Inside Your Body?

One of the biggest worries people have is whether a tampon can get “lost” inside the body. Fortunately, this is physically impossible. The vaginal canal is a closed space that leads only to the cervix, which acts as a barrier. A tampon cannot travel beyond the vaginal canal and get lost inside your body. However, it can become lodged higher in the canal, which may make it hard to find or remove without some effort.

If you can’t find the string or feel the tampon, don’t panic there are effective ways to retrieve it. The key is to remain calm and avoid forcing removal, as this can cause discomfort.

Symptoms of a Stuck Tampon

It’s not always obvious when a tampon is stuck inside, especially if the string has been tucked in or forgotten. However, the body may provide certain signs that alert you to the problem. Identifying these symptoms early on can help prevent discomfort or infections. Below are the most common symptoms of a stuck tampon and what to look for.

Signs to Watch Out For

If a tampon is lodged inside or has been left in too long, you might notice one or more of the following symptoms:

  • Unpleasant odor or discharge
    • A foul odor is often the first sign, as bacteria begin to accumulate.
    • You may also experience unusual yellow or brown discharge, sometimes mixed with blood.
  • Vaginal discomfort or pelvic pain
    • A stuck tampon can cause discomfort or a dull ache in the vaginal area.
    • Pain may increase with movement, especially if the tampon is swollen.
  • Unusual bleeding or spotting
    • You might see irregular spotting or light bleeding, especially if the tampon has blocked your menstrual flow.
  • Persistent itching or irritation
    • If left inside too long, the tampon can cause vaginal dryness or irritation.

Can You Feel a Tampon Inside You?

In most cases, you should be able to feel the tampon with your fingers if you reach inside the vaginal canal. However, if it has shifted far up or the string is no longer accessible, locating it may be more challenging. Here are a few things to try:

  1. Wash your hands thoroughly to avoid introducing bacteria.
  2. Sit on the toilet or squat this shortens the vaginal canal and makes it easier to reach inside.
  3. Use two clean fingers to gently feel around for the tampon or string.
  4. Relax your muscles to reduce any tension that could make it harder to search.

When to Act on These Symptoms

If you notice any of the above symptoms, especially an unpleasant odor or discharge, it’s important to act sooner rather than later. A stuck tampon that remains inside for too long can cause infections or even lead to serious complications such as Toxic Shock Syndrome (TSS).

Make sure to take action within 8 to 12 hours if you suspect a tampon is stuck. In the next section, we’ll walk through step-by-step instructions on how to safely remove a stuck tampon yourself before seeking medical assistance.

Step-by-Step Guide: How to Remove a Stuck Tampon

Removing a stuck tampon may feel stressful, but following a calm and careful process can help you retrieve it without discomfort. If the tampon string is not visible, or if it seems lodged higher in the vaginal canal, the steps below will guide you through the safest way to remove it yourself.

Step 1: Stay Calm and Relax

The most important thing to do is relax. When you’re tense, your pelvic muscles tighten, which can make it more difficult to reach the tampon. Use these simple tips to stay calm:

  • Take a few deep breaths to relax your muscles.
  • Lie down or sit comfortably in a private space.
  • Don’t panic tampons can’t get lost inside your body, and with a bit of patience, removal is achievable.

Step 2: Try Different Positions to Make Retrieval Easier

Positioning your body correctly can help shorten the vaginal canal and make it easier to locate the tampon. Try one of the following positions:

  • Squatting: Squat low to the ground with your knees apart.
  • Sitting on the toilet: This position naturally relaxes your pelvic muscles.
  • Propping one leg on the toilet seat: This opens the canal for better access.

Step 3: Use Clean Hands to Locate the Tampon or String

Before attempting to retrieve the tampon, wash your hands thoroughly to avoid introducing bacteria.

  • Insert two fingers (usually your index and middle fingers) into the vaginal canal.
  • Gently feel around to see if you can locate the tampon or string.
  • If the string is not accessible, use your fingers to grasp the base of the tampon itself.

Step 4: Gently Remove the Tampon

Once you’ve located the tampon, follow these steps to remove it:

  1. Grip the string or tampon firmly, but gently.
  2. Pull slowly and steadily avoid pulling too hard to prevent discomfort.
  3. If the tampon feels stuck, pause, breathe, and relax your muscles. Try again with less force.
  4. If the tampon is swollen, you might need to adjust your angle slightly to ease it out.

Step 5: What to Do If You Can’t Remove the Tampon

If the tampon is difficult to reach or feels stuck despite your efforts, don’t force it. Forcing removal could cause vaginal irritation or injury. Here are your next steps:

  • Rest and try again in a few minutes. Relaxing between attempts can help.
  • Use lubrication to make removal easier if dryness is an issue.
  • If the tampon remains stuck or causes pain, it’s time to seek medical assistance. A doctor can safely remove it without causing harm.

Can You Wash or Clean a Tampon If It’s Stuck?

It’s important to remove the tampon promptly rather than attempting to wash it out with water or other solutions. The goal is to extract it safely and prevent infections such as Toxic Shock Syndrome (TSS), a rare but serious condition caused by bacterial toxins.

Why You Shouldn’t Delay Removal

The sooner you act, the easier the removal will be. Delaying the removal can cause the tampon to:

  • Swell further due to moisture absorption.
  • Lead to bacterial growth and potential infections.
  • Increase the risk of Toxic Shock Syndrome (TSS) if left for more than 8 hours.

By following these steps, most people can successfully remove a stuck tampon without needing medical assistance. If you’re unable to remove it or feel severe discomfort, however, don’t hesitate to contact a healthcare professional for help.

What to Do If You Can’t Find or Remove the Tampon

In some cases, you may try to retrieve a tampon and either struggle to find it or be unable to remove it. While it’s natural to feel anxious in this situation, there are safe steps to follow and professional help available if needed. This section explains what you should do when a tampon can’t be located or removed on your own.

Step 1: Double-Check for the Tampon

It’s possible that the tampon was already removed but forgotten. If you can’t feel it or see the string, take a moment to:

  1. Recall your tampon use:
    • Did you replace it with a new one recently?
    • Could you have already removed it but forgotten?
  2. Check for signs of a used tampon:
    • Look in your trash bin or laundry hamper to see if it was removed earlier.
  3. Gently search again:
    • Wash your hands and, in a calm position, try feeling for the tampon or string using two fingers.
    • Squatting may help shorten the vaginal canal and make it easier to find.

Step 2: When to Seek Medical Assistance

If you still can’t locate or remove the tampon after a few attempts, it’s important to seek professional help. A doctor or gynecologist can safely remove the tampon with specialized tools. Situations that require immediate attention include:

  • Severe pain or discomfort during your attempts to remove the tampon.
  • Unpleasant odor, discharge, or itching indicating potential infection.
  • Symptoms of Toxic Shock Syndrome (TSS), such as high fever, rash, or dizziness.
  • Tampon left inside for over 12 hours with no success in removal.

Most doctors will perform a simple vaginal exam and remove the tampon quickly, with minimal discomfort. Don’t hesitate to make an appointment if you feel worried or uneasy.

What Happens During a Doctor’s Visit?

If a tampon is stuck inside, your doctor will use a speculum to gently open the vaginal canal and locate it. Here’s what you can expect during the visit:

  • Step 1: You’ll be asked to lie on an exam table in a relaxed position.
  • Step 2: The doctor will use a speculum to look inside the vaginal canal for the tampon.
  • Step 3: If the tampon is present, the doctor will remove it using sterile forceps.
  • Step 4: If necessary, the doctor may check for signs of infection and prescribe antibiotics if needed.

The process is usually quick and painless, offering peace of mind and preventing complications.

Risks of Leaving a Tampon Inside for Too Long

If a tampon is left inside for an extended period (beyond 8-12 hours), it can lead to the following risks:

Risk Description
Bacterial infections Stuck tampons create a moist environment, encouraging bacterial growth.
Toxic Shock Syndrome A rare but life-threatening condition caused by bacterial toxins.
Vaginal irritation Prolonged tampon use can dry out and irritate the vaginal walls.
Foul odor or discharge Bacteria buildup can result in unpleasant-smelling discharge.

Acting promptly and seeking medical help ensures these risks are minimized.

Prevention Tips to Avoid a Stuck Tampon in the Future

Preventing tampons from becoming stuck is easier than you think. Here are some helpful tips to keep in mind:

  1. Always leave the string accessible: Ensure the string is hanging outside the vaginal opening.
  2. Avoid inserting a new tampon too soon: Double-check if the current one has been removed first.
  3. Use a light-flow tampon if needed: Tampons swell more with heavy flows, making them harder to remove.
  4. Set reminders for removal: Use a timer or phone alert if you’re worried about forgetting.
  5. Alternate with pads: Consider switching to pads during light-flow days to reduce tampon use.

Understanding Toxic Shock Syndrome (TSS)

Toxic Shock Syndrome (TSS) is a rare but potentially life-threatening condition that can occur when tampons are left in place for too long. Understanding Toxic Shock Syndrome (TSS), its symptoms, and its prevention can help you manage your health effectively, especially during your menstrual cycle. In this section, we will explore what Toxic Shock Syndrome (TSS) is, how it develops, its symptoms, and how to prevent it while using tampons.

What is Toxic Shock Syndrome (TSS)?

TSS is caused by bacterial toxins, most commonly from Staphylococcus aureus (staph) bacteria. This bacteria can enter the bloodstream through wounds, surgical sites, or, in some cases, through the vaginal canal if tampons are left in for extended periods.

Although TSS is not solely linked to tampon use, certain factors increase the risk, such as:

  • Using super-absorbent tampons
  • Leaving tampons in for more than 8 hours
  • Having a recent surgery or injury
  • Vaginal infections or conditions

It’s important to recognize that not all people who use tampons will develop TSS; it remains a rare condition, but awareness is crucial.

Symptoms of TSS

Recognizing the symptoms of TSS early is vital for prompt treatment. Symptoms can develop suddenly and may include:

  • High fever (often over 102°F or 38.9°C)
  • Rash that resembles sunburn and may peel
  • Low blood pressure (leading to dizziness or fainting)
  • Confusion or disorientation
  • Muscle aches
  • Nausea or vomiting
  • Severe headaches

If you or someone you know experiences these symptoms after using tampons, seek emergency medical attention immediately. Early intervention can significantly improve outcomes.

How to Prevent TSS

Preventing TSS is primarily about being mindful of tampon use. Here are key tips to help you avoid the risk:

  1. Limit the use of super-absorbent tampons: Choose the lowest absorbency needed for your flow.
  2. Change tampons regularly: Switch out tampons at least every 4 to 8 hours, even on lighter flow days.
  3. Consider alternative menstrual products: Use pads, menstrual cups, or panty liners when possible, especially overnight.
  4. Stay aware of your body: Be alert for any unusual symptoms during your cycle and respond promptly.
  5. Educate yourself: Understanding how TSS develops helps in recognizing risks associated with tampon use.

What to Do If You Suspect TSS

If you suspect you may have TSS, act quickly:

  • Remove the tampon immediately if you’re still wearing one.
  • Seek medical attention without delay, even if symptoms seem mild.
  • Be prepared to share your history of tampon use, including how long they’ve been in place.

Prompt treatment is crucial to managing TSS and minimizing complications.

Stay Informed and Safe about TSS

While TSS is rare, knowledge about the condition, its symptoms, and how to prevent it can keep you safe during your menstrual cycle. By being mindful of tampon usage and aware of your body’s signals, you can minimize risks and enjoy peace of mind. Remember that staying informed is key to a healthy and safe experience with menstrual products.

Expert’s Suggestion: Key Takeaways and Reminders

In this guide, we have covered important information about how to manage a stuck tampon, recognize the symptoms of Toxic Shock Syndrome (TSS), and maintain safe tampon use. Below are the key takeaways and reminders to ensure a healthy and stress-free experience during your menstrual cycle.

Key Takeaways

  1. Stuck Tampons Can Be Retrieved Safely:
    • If you find yourself unable to remove a tampon, stay calm and try different positions to make retrieval easier.
    • Always wash your hands before attempting removal, and if you cannot retrieve it, seek medical assistance promptly.
  2. Recognize the Signs of TSS:
    • TSS is a serious condition that requires immediate medical attention. Know the symptoms high fever, rash, dizziness, and confusion.
    • The sooner you act, the better the chances of a full recovery.
  3. Prevention is Key:
    • Limit tampon usage to no more than 8 hours and consider using lower absorbency options.
    • Explore whether tampons or pads are a better fit for your needs by reading our in-depth guide: Tampons vs Pads.
    • Educate yourself about alternative menstrual products, such as sanitary pads or menstrual cups, to reduce reliance on tampons.
  4. Be Proactive:
    • Set reminders to change your tampon regularly, especially during heavy flow days.
    • Trust your instincts: if something feels off, don’t hesitate to consult a healthcare provider.

Reminders for Safe Tampon Use

  • Always Keep the String Accessible: Ensure the tampon string is visible and accessible before insertion.
  • Use Lubrication if Needed: If dryness is an issue, use a water-based lubricant on the tampon for easier insertion.
  • Rotate Menstrual Products: Consider alternating between tampons and pads to lessen the risk of TSS.
  • Stay Informed: Regularly educate yourself on menstrual health and product safety to make informed choices.

Final Thoughts

Menstrual Hygiene Management is an essential aspect of overall well-being. Understanding how to safely manage tampon use and recognizing the symptoms of potential complications, such as TSS, empowers you to take control of your health. Whether you’re using tampons, pads, or other menstrual products, awareness and proper care can help ensure a smooth and healthy menstrual experience.

If you have any questions or concerns about tampon use or your menstrual health, don’t hesitate to reach out to a healthcare professional. Stay informed, and take care of yourself!


How to Put in a Tampon: A Comprehensive Guide for New Users

0

Navigating the world of menstruation can be daunting, especially when it comes to understanding how to put in a tampon. Many new users find the process intimidating or unsure of where to start, leading to frustration and discomfort. This comprehensive guide aims to demystify the topic, providing clear and practical instructions on how to put in a tampon safely and comfortably. Whether you’re a first-time user or simply looking for tips to make the experience smoother, this guide will equip you with the knowledge and confidence you need. Let’s delve into the step-by-step process, common concerns, and helpful tips to ensure a positive and stress-free tampon experience.

What Is a Tampon and How Does It Work?

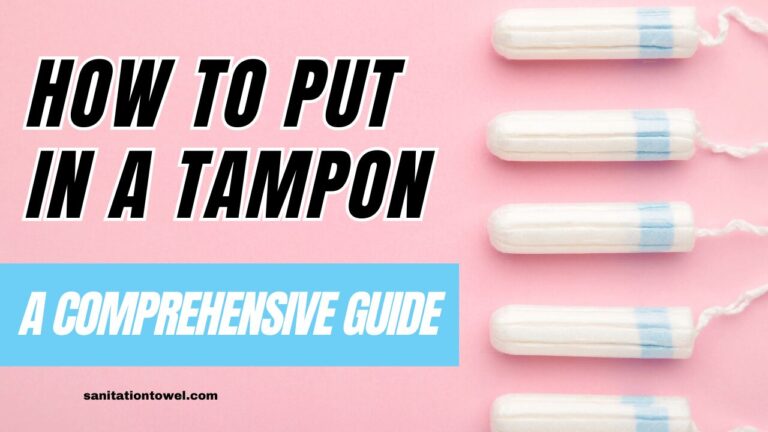
To put it simply, a tampon is a feminine hygiene product that is inserted into the vagina during menstruation to absorb menstrual flow. Unlike pads worn externally, tampons are placed inside the body and collect blood as it leaves the uterus. They typically have a cylindrical shape with an absorbent material and string attached for easy removal.

Tampons work by expanding in size once they come into contact with moisture. This allows them to absorb menstrual blood and prevent any leakage effectively. Because they are inserted directly into the vaginal canal, tampons can provide more discreet protection than pads, making them a popular choice for many individuals.

Health and Safety First

Before we get into the nitty-gritty of inserting a tampon, it’s crucial to understand the basics of your anatomy and menstrual hygiene. The female reproductive system includes the vagina, cervix, uterus, and ovaries. During your menstrual cycle, your body sheds the uterine lining, which exits through the vagina.

Always wash your hands before and after handling a tampon to maintain hygiene. This helps prevent infections and ensures you keep everything as clean as possible. When inserting a tampon, ensure you’re in a comfortable environment where you can take your time rushing can lead to mistakes and discomfort.

Choosing the Right Tampon

One of the first steps in using a tampon is selecting the right one for your needs. Tampons come in various sizes and absorbencies, from light to super-plus. If you’re a first-time user, starting with a slender or light tampon is generally best to ease the insertion process.

Organic and sustainable options are also available. These tampons are made from 100% organic cotton and are free from harmful chemicals. Brands like Organyc and Natracare offer excellent organic choices that are both effective and eco-friendly.

Step-by-Step Guide to Inserting a Tampon

Inserting a tampon can seem daunting, but with a little practice, it will become second nature. Here’s a step-by-step guide to help you through the process:

Step 1: Wash Your Hands

Always start by washing your hands with soap and water. This ensures that you do not introduce bacteria into your body.

Step 2: Get Comfortable

Find a position that feels comfortable for you. Some people prefer to squat, others to place one foot on the toilet seat, and some like to sit on the toilet.

Step 3: Unwrap the Tampon

Remove the tampon from its packaging. Hold it with your dominant hand by the string end, making sure the string is hanging down.

Step 4: Insert the Tampon

With your free hand, gently open the labia (the outer folds of skin around your vaginal opening). Place the tip of the tampon at the entrance of your vagina and gently push it in at a slight angle towards your lower back. Push the tampon until the applicator is fully inside, then use the plunger to push the tampon out of the applicator and into your vagina.

Step 5: Dispose of the Applicator

Once the tampon is securely in place, remove the applicator and dispose of it in a trash bin. Never flush the applicator down the toilet.

Step 6: Check Comfort

The tampon should be comfortable, and you shouldn’t feel it once it’s in place. If it’s uncomfortable, it might not be inserted far enough. If this happens, remove it and try again with a new tampon.

Troubleshooting and FAQs

Even with the best instructions, you might encounter some challenges. Here are common concerns and their solutions:

Difficulty with Insertion

If you’re having trouble inserting the tampon, try using a smaller size or a tampon with a plastic applicator, which can be easier to insert than cardboard. Relaxation is key; tension can make your vaginal muscles tighten, complicating insertion.

Discomfort After Insertion

It might not be inserted far enough if you can feel the tampon. It should sit comfortably in the middle third of the vagina. Remove it and try again with a fresh tampon if you need to.

Removing a Tampon

To remove a tampon, gently pull the string at the same angle you used to insert it. It might not be fully saturated if it doesn’t come out easily. Never leave a tampon in for more than 8 hours.

How often should I change my tampon?

Tampons should be changed every 4-6 hours to avoid potential health risks. However, if you have a heavy flow, you might need to change it more frequently.

Can I sleep with a tampon in?

It’s not recommended to sleep with a tampon in for longer than 8 hours. Instead, opt for an overnight pad or menstrual cup for extended protection while sleeping.

Does using a tampon hurt?

Using a tampon should not be painful. If you experience discomfort, it may be due to incorrect insertion or using the wrong size. Make sure to relax and try again with a new tampon if needed.

You might be interested in: Tampons vs Pads: Which Menstrual Product is Right for You?

Conclusion

Navigating your first experience with tampons doesn’t have to be overwhelming. By understanding how to choose the right tampon, following a step-by-step insertion guide, and troubleshooting common issues, you’ll be well on your way to mastering this useful menstrual product.

Tampons offer many benefits, including convenience, discretion, and the freedom to engage in activities like swimming and sports without worry. By making informed choices about your menstrual products, you’re taking an important step toward better menstrual hygiene and overall comfort.

Remember, each person’s experience with tampons can be different. It may take a few tries to get it right, and that’s perfectly okay. For more personalized advice and to share your experiences, feel free to join our community or ask any questions.

Tampons vs Pads: Which Menstrual Product is Right for You?

0

Choosing between tampons and pads can be daunting for many individuals, particularly for those new to menstruation or looking to switch products. The debate about tampons vs pads centers around various factors, such as comfort, convenience, and health considerations. Each product has its unique set of advantages and potential drawbacks, making it essential to understand their respective features before making a decision. In this blog, we’ll break down the basics of tampons and pads, discuss their health and environmental implications, and provide practical tips to help you find the perfect fit. Let’s get started on this essential topic.

Understanding the Basics

What Are Tampons and How Do They Work?

Tampons are small, cylindrical products designed to be inserted into the vagina to absorb menstrual blood directly. Made from cotton, rayon, or a blend of both, tampons expand as they soak up fluid, conforming to the body’s shape.

Different types of tampons are available, including those with applicators and those without. Applicator tampons come in plastic or cardboard varieties, making insertion easier for some users. Non-applicator tampons require manual insertion but are often preferred for their reduced environmental impact.

What Are Pads and How Do They Work?

Pads, also known as sanitary napkins, are absorbent products worn outside the body and adhered to the inside underwear. Made from layers of absorbent material, pads come in various sizes and thicknesses to cater to different flow levels.

Pads are straightforward and do not require insertion, making them a popular choice for many. They have adhesive strips that keep them in place; some have wings to prevent leakage.

Pros and Cons of Tampons

Pros:

  1. Discreet and invisible under clothing.
  2. Convenient for physical activities, including swimming.
  3. Offers up to eight hours of protection.

Cons:

  1. Risk of Toxic Shock Syndrome (TSS) with prolonged use.
  2. Can be uncomfortable for some users.
  3. Requires insertion, which may be challenging for beginners.

Pros and Cons of Pads

Pros:

  1. Easy to use and change.
  2. No risk of TSS.
  3. Available in various sizes and absorbencies.

Cons:

  1. Visible under tight clothing.
  2. Can feel bulky and uncomfortable.
  3. May shift out of place during physical activities.

Health and Environmental Considerations

Impact on the Environment

Both tampons and pads have drawbacks when it comes to environmental impact. Pads contribute to landfill waste due to their plastic components, which are not biodegradable. Tampons, especially those with plastic applicators, also contribute to environmental waste.

However, eco-friendly alternatives are available. Organic cotton tampons and reusable menstrual pads are becoming popular among environmentally conscious consumers. These products offer a sustainable option without compromising on effectiveness.

Health Implications

Health considerations are crucial when choosing between tampons and pads. Tampons carry a risk of Toxic Shock Syndrome (TSS), a rare but serious condition caused by bacterial toxins. To minimize this risk, tampons must be changed every 4 to 8 hours and used with the lowest absorbency possible.

Pads, on the other hand, do not pose a TSS risk. However, if not changed frequently, they can cause skin irritation or rashes, especially in hot and humid conditions. Practicing good hygiene and choosing products that suit your skin type is important.

Lifestyle and Convenience Factors

Managing Different Flow Levels

Both tampons and pads come in various absorbencies to manage different flow levels. Tampons are available in light, regular, super, and super plus absorbencies, making them versatile for any stage of your period.

Pads also offer a range of options, from panty liners for light days to overnight pads designed for heavy flow. Matching the product’s absorbency to your flow ensures maximum comfort and protection.

Effect on Physical Activities

Tampons are often the preferred choice for those with an active lifestyle. They are discreet, stay in place, and allow for a full range of motion, making them ideal for sports and swimming.

Pads can be cumbersome during physical activities. However, some brands offer slim, ultra-absorbent pads designed for active use. It’s a matter of personal preference and finding what works best for your body and routine.

Making the Right Choice Between Tampons Vs Pads

1) Consider Your Lifestyle and Preferences

Choosing between tampons and pads ultimately boils down to personal preference, lifestyle, and comfort. Both products are equally effective in managing periods; it’s a matter of finding what works for you.

2) Be Mindful of Health and Environmental Implications

It is crucial to consider the health implications of both products, particularly the risk of TSS associated with tampon use. Additionally, opting for eco-friendly alternatives can help reduce your environmental impact.

3) Experiment with Different Brands and Products

Try out different brands and types of tampons and pads to find what fits best for your body. It may take some trial and error, but don’t be afraid to explore different options until you find the perfect fit.

4) Seek Advice from a Healthcare Professional

If you have any concerns or questions about using tampons or pads, don’t hesitate to consult with your healthcare provider. They can offer personalized advice and recommendations based on your specific needs.

You might be interested in:How to Clean Menstrual Cup for a Healthy Cycle!

Conclusion

Ultimately, the decision between tampons and pads is a personal one. Both products have their unique features and considerations, making them suitable for different individuals and situations. By understanding the difference between tampons vs pads, considering your health and lifestyle needs, and being mindful of environmental impact, you can make an informed choice that suits your body and preferences. Remember to prioritize comfort and convenience above all else, as managing periods should never be a source of discomfort or inconvenience. So, whether you prefer tampons or pads, know that both options are effective and can help you easily navigate your period.

Top 6 Best Always Sanitary Towels | Tested and Reviewed

0

When it comes to menstrual hygiene, finding reliable and comfortable sanitary towels is a top priority for many people who menstruate. Unfortunately, the market is flooded with a wide range of options, making choosing products that offer quality and performance difficult. Among the myriad choices, Always sanitary towels have consistently stood out for their efficacy and comfort. In this article, we have meticulously tested and reviewed the top six best Always sanitary towels to help you make an informed choice and stay comfortable and protected during your menstrual cycle.

Table of Contents

Reasons Why You Should Buy Sanitary Towels?

Enhanced Hygiene

Sanitary towels provide an unparalleled level of hygiene during the menstrual cycle. Unlike other options, these pads are specifically designed to absorb menstrual blood effectively, reducing the risk of infections and maintaining a cleaner, safer experience. They are often made from materials that prevent the growth of bacteria and fungi, ensuring good sanitary practices.

Superior Absorbency

High-quality sanitary towels, particularly those from the Always brand, offer exceptional absorbency. These products can handle various flow intensities, from light spotting to heavy bleeding. This feature minimizes the need for frequent changes, making them both convenient and economical. With their superior absorbency, you can go about your day confidently without worry.

Comfort and Convenience

Modern sanitary towels are designed with comfort in mind. Features such as soft material, wings for secure placement, and ergonomic shapes ensure that the towels conform to your body and stay in place throughout the day. This maximizes comfort and minimizes the chances of chafing or skin irritation, allowing you to engage in daily activities with ease.

Discreet and Secure

Sanitary towels have evolved to provide discreet protection. Many products are ultra-thin yet highly absorbent, making them inconspicuous under clothing. Advanced odor control technology helps neutralize unpleasant smells, boosting your confidence during your menstrual period. With secure attachment mechanisms like adhesive strips or wings, you can rest assured that the towel will stay in place.

Skin-Friendly Options

For those with sensitive skin, there are hypoallergenic and Hypoallergenic and organic sanitary towels are available for those with sensitive skin, reducing available that reduce the likelihood of skin reactions. These products are free from fragrances and harsh chemicals, making them ideal for users prone to allergies or irritation. You can maintain comfort and avoid health issues by choosing skin-friendly sanitary pads.

Environmentally Friendly Choices

Many brands now offer environmentally friendly sanitary towels made from biodegradable materials. These options reduce your carbon footprint and are often produced to high ethical standards. Choosing eco-friendly products contributes to sustainability efforts while enjoying reliable menstrual protection.

Broad Availability

Sanitary towels are widely available in various sizes, absorbency levels, and types to meet individual needs. They can be purchased easily from supermarkets, pharmacies, and online stores, ensuring you can find a suitable product quickly and conveniently.

By considering these reasons, it’s evident that sanitary towels are a practical, safe, and convenient option for menstrual hygiene management.

Our Pick Up Of Top 6 Always Sanitary Pads

Our team carefully evaluated numerous options and shortlisted the top six best Always sanitary pads based on our testing results and real-life user feedback. These products stood out for their exceptional performance in absorbency, comfort, material quality, odor control, environmental impact, and overall user satisfaction.

  1. Always Infinity Feminine Pads for Women
  2. Always Anti-Bunch Xtra Protection Daily Liners Long Unscented
  3. Always Maxi Feminine Pads for Women
  4. Always Thin Daily Panty Liners For Women
  5. Always Discreet Adult Moderate Long Incontinence Pads
  6. Always Discreet Adult Ultimate Extra Protection Incontinence & Postpartum Pads

1) Always Infinity Feminine Pads for Women – Zero Feel- Zero Leaks

Always Infinity Feminine Pads for Women

Experience unparalleled comfort and protection with Always Infinity FlexFoam pads. Designed to provide a zero feel and zero leak period, these pads absorb up to 10 times their weight. Their ultra-thin and flexible construction ensures that the pad moves with you, not against you. The advanced FlexFoam technology features super absorbent holes that pull wetness away from your skin, keeping you dry and comfortable.

These sanitary pads with wings boast a breathable top layer, which is dermatologically tested and approved by the Skin Health Alliance, making them suitable even for sensitive skin. With Always Infinity pads, you get up to 12 hours of leak-free protection, making them ideal for overnight use. Say goodbye to hot and stuffy nights and hello to a fresher, cleaner feeling throughout your menstrual cycle. These Always regular pads are FSA/HSA Eligible, adding an extra convenience layer.

Product Features

  • 22 Count x 3 Packs
  • Suitable for Extra Heavy Overnight use
  • Equipped with wings
  • Zero Leaks: Absorbs up to 10 times their weight
  • Zero Feel: Thin and flexible FlexFoam material
  • Zero Bunching: Conforms to your body for a secure fit
  • Breathable top layer
  • Made of FlexFoam, not fluff

Specifications Of Always Infinity Feminine Pads

SpecificationsValues
Sanitary Napkin TypeMenstrual Pad
Sanitary Napkin AbsorbencyExtra Heavy Overnight
SizeExtra Heavy Overnight (Size 5)
Style66 count

Always Infinity Feminine Pads

👍

Pros

  • ✅ Unscented and suitable for sensitive skin
  • ✅ Available in 5 sizes
  • ✅ Helps you stay dry with a breathable top layer
  • ✅ Suitable for sensitive skin
👎

Cons

  • 🚫 Some users report inadequate absorbency for heavy flows
  • 🚫 May not fit securely for everyone, leading to potential leaks
  • 🚫 Some users found the pads inflexible

2) Always Anti-Bunch Xtra Protection Daily Liners Long Unscented – Anti-Bunch

Always Anti-Bunch Xtra Protection Daily Liners Long Unscented

Searching for consistent freshness throughout the day, regardless of how active you are? The Always Anti-Bunch xtra protection daily liners long are specifically crafted to provide dependable protection using their innovative Anti-Bunch Technology. These pantiliners boast a remarkable 5X dryness compared to Always Thin, courtesy of their dual-layer construction that swiftly absorbs and securely locks away moisture. This ensures you feel clean and fresh for up to 10 hours. Moreover, the Edge-2-Edge adhesive is designed to keep the liner securely in place. Always ultra thin overnight pads offer a Fit sizing chart that accommodates various shapes and requirements, ensuring you find the perfect liner that suits your needs.

Product Features

  • Comfortable protection without bunching
  • Five times drier than Always Thin liners
  • Dual-layer design quickly absorbs and locks away leaks
  • Edge-2-Edge Adhesive ensures the liner stays in place
  • Provides up to 10 hours of freshness and comfort

Specifications Of Always Anti-Bunch Xtra

SpecificationsValues
Sanitary Napkin TypePanty Liner
Style108 count
Sanitary Napkin AbsorbencyXtra Protection
SizeLong

Always Anti-Bunch Xtra

👍

Pros

  • ✅ Thin and comfortable design for everyday use
  • ✅ Provides long-lasting freshness and dryness
  • ✅ Suitable for sensitive skin
  • ✅ Fits securely in place with Edge-2-Edge adhesive
👎

Cons

  • 🚫 Some users found the liners too narrow or short for their liking

3) Always Maxi Feminine Pads for Women – Best For Overnight Absorbency

Feminine Pads for Women

Experience ultimate leak-free comfort with Always Maxi pads, designed to provide up to 100% protection. These pads feature 2X more back coverage than the Always Maxi regular size, making them ideal for overnight use. Enjoy a perfect night’s sleep with Always Maxi pads offering enhanced coverage and superior absorbency.

These always overnight pads offer exceptional protection. They have a thicker core that effectively wicks away gushes using RapidDRY Technology. This ensures swift absorption, keeping you dry and comfortable throughout your menstrual cycle. The LeakGUARD technology locks in leaks, providing long-lasting protection so you can confidently go about your day.

The SecurelyFITS technology keeps your pad in place all day for added security. Always maxi pads with wings are also FSA/HSA eligible, so you can check with your FSA or HSA plan regarding coverage for feminine products.

Product Features

  • Provides reliable protection against leaks.
  • Offers extended coverage compared to Always Maxi Regular Size for overnight use.
  • Rapidly absorbs gushes to keep you dry.
  • Locks in leaks for lasting protection.
  • Ensures the pad stays in place all day.
  • May be covered by your FSA or HSA plan.

Specifications of Always Maxi Feminine Pads

SpecificationsValues
Sanitary Napkin TypeMenstrual Pad
Style36 count
Sanitary Napkin AbsorbencyExtra Heavy Overnight
SizeExtra Heavy Overnight (Size 5)

Always Maxi Feminine Pads

👍

Pros

  • ✅ Provides exceptional overnight protection
  • ✅ Locks in leaks and keeps you dry all night long
  • ✅ Wings ensure the pad stays securely in place
  • ✅ Suitable for sensitive skin
👎

Cons

  • 🚫 Some users found the pad lacking in adequate absorbency for heavy flows
  • 🚫 Some users found the pads inflexible

4) Always Thin Daily Panty Liners For Women – Perfect for Teens

Always Thin Daily Panty Liners For Women

Looking to stay fresh all day no matter what activities you engage in? Meet the Always Thin No Feel Protection Daily Liners Regular! These Always ultra thin pads are designed to offer discreet protection against daily discharge and odors. Crafted exceptionally thin and absorbent, they provide everyday freshness and comfort without feeling bulky.

What sets Always Thin Regular Liners apart is their unique Edge-2-Edge™ adhesive. This advanced adhesive technology ensures the liners stay securely in place better than traditional adhesives, meaning you can confidently go about your day. Whether running errands, working out, or engaging in sports, these Always Thin Panty Liners won’t disappoint you. They stay put, no matter how active you are.

Convenience is also a key feature, as each liner is individually wrapped, making it easy to carry them wherever you go. The Always Liners Fit sizing chart includes various options to suit different body shapes and needs, ensuring you find the perfect fit.

Experience daily protection against discharge and odors that are so discreet that you’ll forget you’re even wearing a liner. Everyday liners are designed to be thin, discreet, and comfortable, giving you a fresh underwear feel every day. Ideal for maintaining a fresh feeling throughout the month, Always panty liners are your go-to for effective, safe, and comfortable protection, no matter where your day takes you.

Product Features

  • Lightweight and thin for everyday use
  • Edge-2-Edge adhesive for superior hold
  • Discreet and individually wrapped for convenience
  • Provides daily protection against discharge and odors

Specifications of Always Thin Daily Panty Liners

SpecificationsValues
Sanitary Napkin TypePanty Liner
StyleWithout Wings
Sanitary Napkin AbsorbencyRegular
SizeRegular

Always Thin Daily Panty Liners

👍

Pros

  • ✅ Thin and comfortable for everyday wear
  • ✅ Provides long-lasting freshness and odor protection
  • ✅ Fits securely in place with advanced adhesive technology
  • ✅ Conveniently individually wrapped
👎

Cons

  • 🚫 They do not stick to your underwear
  • 🚫 They don’t absorb absolutely any moisture

5) Always Discreet Adult Moderate Long Incontinence Pads – Best For Heavy Flows

always flex foam pads

Always Discreet pads offer unparalleled protection against bladder leaks, making them perfect for those with heavy flows. Engineered with a highly absorbent RapidDry core, these pads can hold up to five times the average leak, ensuring you stay dry and confident.

Designed to be thin and flexible, the pads contour to your natural shape, providing a barely noticeable fit that remains discreet under clothing. The innovative LeakGuards feature efficiently keeps wetness away from the edges, minimizing the risk of leaks. The Exclusive OdorLock technology works instantly and continuously, neutralizing odors for lasting freshness.

The Always Discreet My Fit size chart simplifies finding the right pad size for your needs, ensuring you achieve the perfect fit for maximum protection and comfort. These sanitary pads are also available in bulk for added convenience, making them ideal for postpartum care and regular bladder leak protection.

Moreover, Always sanitary pads for women are eligible for FSA and HSA plans, offering a practical and financially savvy option for purchasing essential feminine hygiene products.

Product Features

  • Absorbent RapidDry core holds up to 5 times the average leak
  • Thin, flexible design for a barely noticeable fit
  • LeakGuards prevent wetness from reaching the edges
  • Exclusive OdorLock technology neutralizes odors instantly and continuously
  • Always Discreet My Fit size chart helps you find the right size
  • Available in bulk for postpartum and bladder leak protection
  • FSA and HSA eligible

Specifications Of Always Discreet Adult Pads

SpecificationsValues
Sanitary Napkin TypeIncontinence Pad
StyleIncontinence Pad
Sanitary Napkin AbsorbencyModerate Long
SizeLong

Always Discreet Adult Pads

👍

Pros

  • ✅ High absorbency due to RapidDry core
  • ✅ Discreet and comfortable fit
  • ✅ Effective odor neutralization
  • ✅ Available in bulk for convenience
  • ✅ FSA and HSA eligible
👎

Cons

  • 🚫 While the pads are thin, they do not always provide adequate protection
  • 🚫 Users report that the core of the pads sometimes releases a salt-like substance

6) Always Discreet Adult Ultimate Extra Protection Incontinence & Postpartum Pads – Best For Rapid Dry

always ultra thin with wings

Always Discreet Adult Ultimate Extra Protection Pads offer long-lasting protection and comfort for those with heavy bladder leaks or postpartum needs. These pads feature a dual-layer design that quickly absorbs and locks away wetness for up to 12 hours, keeping you dry and feeling fresh all day.

These bladder control pads are designed to be thin and flexible, providing a discreet, barely noticeable fit that contours to your natural shape. LeakGuards are incorporated to prevent wetness from escaping the edges, enhancing dryness and comfort. The Exclusive OdorLock technology neutralizes odors instantly and continuously, ensuring you feel fresh and confident all day.

Available in bulk, these extra protection pads are perfect for postpartum care and managing bladder leaks, offering the convenience and enhanced protection you deserve. Additionally, Always incontinence pads and panty liners for women are eligible for FSA and HSA plans, making them a practical and financially sound choice for essential feminine hygiene products.

Product Features

  • Dual layer design absorbs and locks away wetness for up to 12 hours
  • Thin and flexible for a discreet fit
  • LeakGuards prevent wetness from escaping the edges
  • Exclusive OdorLock technology neutralizes odors instantly and continuously
  • Available in bulk for postpartum and bladder leak protection
  • FSA and HSA eligible

Product Specifications Always Discreet Adult

SpecificationsValues
Number of Items1
ColorWhite
Incontinence Protector TypeIncontinence Pad
Age Range (Description)Adult

Always Discreet Adult

👍

Pros

  • ✅ Soft and absorbent for all-day comfort
  • ✅ Discreet and comfortable fit
  • ✅ Gives you confidence with long-lasting protection
  • ✅ This pad fits your entire panty
  • ✅ It never overflowed
👎

Cons

  • 🚫 The scent of the new version is overpowering
  • 🚫 Too narrow for some users’ preferences

Key Factors to Consider When Choosing Always Sanitary Pads

When choosing the right sanitary pad, there are a few factors to consider. Here are some tips to help you find the perfect fit for your needs:

Absorbency Level

One critical factor in selecting the right sanitary pad is its absorbency level. Always offers various absorbency options, from light to heavy flow, to cater to different needs throughout your menstrual cycle. If you experience heavy flows or bladder leaks, opting for pads marked as ‘Ultimate’ or ‘Heavy’ will ensure maximum protection. Conversely, a ‘Moderate’ or ‘Regular’ absorbency pad will provide adequate coverage for lighter days while maintaining a thinner, more comfortable fit.

Comfort and Fit

Sanitary pads need to be comfortable to be worn for extended periods. Always pads are designed to be thin and flexible, conforming to your body’s natural shape. Based on your personal preference, consider styles with or without wings. Wings can provide extra security by preventing the pad from shifting, while wingless options may offer a more seamless feel. Always’s My Fit size chart can guide you in finding the right pad size, ensuring the pad fits your body and provides optimal security.

Odor Control

Odor control is another crucial aspect to consider. Always pads come equipped with Exclusive OdorLock technology that neutralizes odors instantly and continuously. This feature is especially useful for those concerned about freshness, ensuring you remain confident and comfortable throughout the day. Products like the Always Discreet Adult Moderate Long Incontinence Pads and Always Discreet Adult Ultimate Extra Protection Pads are excellent options for superior odor control.

Adhesive Quality

The adhesive quality of a sanitary pad determines how securely it stays in place. Always pads utilize advanced adhesive technologies that provide edge-to-edge adhesion, ensuring the pad stays firmly in place no matter how active you are. This is particularly important for those who participate in sports or have active lifestyles.

Availability in Bulk

Stocking up on sanitary pads can save time and money. Pads are always available in bulk options, which is convenient for postpartum care and regular menstrual or bladder leak protection. Buying in bulk can also help avoid the inconvenience of running out of pads unexpectedly.

Financial Benefits

Consider the financial aspects when choosing sanitary pads. Many Always pads are eligible for Flexible Spending Accounts (FSA) and Health Savings Accounts (HSA), offering a practical and financially savvy option for purchasing essential feminine hygiene products. Checking for FSA- or HSA-eligible labels can make a significant difference in managing your healthcare expenses effectively.

How We Tested?

Selection Criteria

To ensure that our review was comprehensive and unbiased, we began by selecting a variety of Always sanitary towels available on the market. Our selection criteria included absorbency levels, length, thickness, material, and additional features like wings or scent.

Absorbency Tests

We primarily focused on absorbency, testing each towel’s ability to hold moisture without leaking. Our testers used each product during various menstrual cycle stages to simulate different flow intensities, from light to heavy. We measured the amount of liquid each towel could absorb and recorded any instances of leaks or overflow.

Comfort and Fit

Comfort is as crucial as absorbency in determining the effectiveness of a sanitary towel. Our testers wore each sanitary towel for several hours, noting skin irritation, chafing, or discomfort. We also assessed the fit, whether the towels stayed in place throughout the day, and how easily they adapted to different body movements.

Material and Skin Sensitivity

We evaluated the material used in each towel by looking at its texture, breathability, and hypoallergenic properties. We particularly considered sensitive skin types and checked for reactions like rashes or itching. Products labeled as ‘organic’ or ‘natural’ were scrutinized for the authenticity and safety of their materials.

Odor Control

We tested each always sanitary pad for odor control during the menstrual cycle. Testers recorded their observations regarding the effectiveness of each product in neutralizing or masking odors, ensuring that the products provide discretion and confidence during use.

Environmental Impact

Finally, we examined each product’s environmental impact. We assessed whether the towels were made from biodegradable or recyclable materials and considered the brands’ environmental policies, such as their commitment to reducing plastic usage and carbon footprint.

Real-Life Feedback

Real-life feedback from users was invaluable. We collected reviews from diverse users, including those with different menstrual health conditions, lifestyle habits, and personal preferences. This comprehensive feedback helped us ensure that our recommendations meet a broad spectrum of needs and expectations.

This rigorous testing method enabled us to present an authentic and holistic review of the top six best Always sanitary pads. Discover why you should buy sanitary towels for your menstrual hygiene needs.

FAQs

Q: Can Always pads be used for postpartum care?

Yes, many Always pads are suitable for postpartum needs. The Always Discreet Adult Ultimate Extra Protection Pads and the Always Radiant Postpartum Overnight Sanitary Pads are designed for postpartum care and provide longer-lasting protection and comfort.

Q: How often should I change my always pad?

The frequency of pad changes depends on your flow level. For light to moderate flows, it is recommended that you change your pad every 4-6 hours. For heavy or overnight use, consider changing every 2-3 hours.

Q: Are Always pads environmentally friendly?

Always recognizes the need for sustainable practices and is committed to minimizing environmental impact. Its Always Pure cotton pads are made with 100% organic cotton, making them a more eco-friendly option. The company has also implemented various sustainability initiatives in its production processes.

Q: Why should I choose Always Pads over other brands?

Always has been a trusted brand for feminine hygiene products since 1984. They have continuously improved and innovated their products to provide women with the best protection and comfort. With options tailored to different needs, advanced features like OdorLock technology, and eligibility for FSA and HSA plans, Always pads are a top choice among women worldwide.

Q: When should I use Always pads?

Always pads can be used during your menstrual cycle, for postpartum care, and to protect your bladder from bladder leaks. They are versatile and designed to provide comfort and security for women across different stages of life.

Conclusion

Selecting the right sanitary pad can significantly enhance your daily comfort and confidence. Always sanitary towels offer exceptional products that cater to diverse needs, from menstrual cycle management to postpartum care and bladder leak protection. With their advanced absorbency levels, superior comfort, odor control technology, and reliable adhesive quality, Always pads provide optimal protection that adapts to your lifestyle. For a solution that combines reliability, comfort, and smart financial options, choose Always sanitary towels, available in bulk and eligible for FSA and HSA benefits. Embrace peace of mind and make Always Pads your trusted companion because you deserve the best daily care.

How to Clean Menstrual Cup for a Healthy Cycle

0

Menstrual cups have become popular among women seeking sustainable and healthier alternatives to traditional menstrual products. Yet, like any reusable product, they require proper cleaning to remain safe and effective. This blog post will guide you how to clean menstrual cup and ensure a healthy menstrual cycle while being kind to the environment. We’ve covered you, from boiling your cup to using the right soap.

Table of Contents

What is a Menstrual Cup?

A menstrual cup is a small, flexible cup made of medical-grade silicone, rubber, or latex that is inserted into the vagina to collect menstrual fluid. Unlike tampons and pads, menstrual cups do not absorb blood but catch and hold it until emptied. They are reusable and can last several years with proper care, making them an eco-friendly and cost-effective choice for many women.

Menstrual cups come in various sizes and shapes to suit different body types and flow levels. They offer the freedom to engage in various activities without worrying about leaks, making them an excellent option for active individuals.

Switching to a menstrual cup can initially feel daunting, but once you get the hang of it, you may find it more convenient and comfortable than traditional methods. But remember, proper cleaning is key!

You Just Bought a Menstrual Cup – Now What?

Congratulations on switching to a menstrual cup! Before using it for the first time, it’s essential to clean it thoroughly. Most cups come with specific cleaning instructions, so be sure to read those carefully.

Start by washing your hands with soap and water. Then, rinse the cup with clean water and boil it for 5-10 minutes to sterilize it. This step removes any residual manufacturing residue, leaving your cup fresh and ready for use.

Once your cup is cool, you’re ready to insert it. Remember, practice makes perfect, so don’t be discouraged if it takes a few tries to get it right.

How to Clean a Menstrual Cup?

How to Clean a Menstrual Cup? complete guide

Properly cleaning your menstrual cup is essential for maintaining its integrity and ensuring your menstrual health. Here are some tried-and-true methods to keep your cup in tip-top shape.

Rule #1 Boil Between Periods

Boiling your menstrual cup between cycles is a simple yet effective sterilization method. Bring a pot of water to a rolling boil and submerge your cup for 5-10 minutes. This process kills bacteria and ensures your cup is clean and safe.

Be sure not to leave your cup unattended while boiling, as it could cause the silicone to deteriorate. Use a dedicated pot for this purpose, or thoroughly clean the pot before and after boiling your cup.

Allow the cup to cool completely before handling it. Once cooled, store it in a breathable pouch to keep it dry and away from dust.

Rule #2 During Periods, Wash with Clean Water

During your period, you’ll need to empty and rinse your menstrual cup every 4-12 hours, depending on your flow. Start by washing your hands with soap and water. Then, remove the cup, empty its contents into the toilet, and rinse it thoroughly with clean water.

If clean water isn’t available, you can wipe the cup with unscented tissue or a menstrual cup wipe until you can rinse it properly. Always wash your hands before reinserting the cup to prevent introducing bacteria.

Regular rinsing during your period keeps the cup clean and reduces the risk of infections.

Can I Use Soap? The Best Soap to Clean a Menstrual Cup

Yes, you can use soap to clean your menstrual cup, but choosing the right kind is crucial. Opt for a mild, fragrance-free, and oil-free soap that won’t leave any residue on the cup. Avoid harsh chemicals and antibacterial soaps, as they can degrade the silicone and cause irritations.

Squirt a small amount of soap onto the cup and gently scrub it with your fingers or a soft brush. Rinse thoroughly with clean water to ensure no soap residue remains, which can cause discomfort and infections.

Ensure the cup is completely dry before storing it in a breathable pouch. This prevents bacteria growth and keeps your cup in good condition for future use.

How to Clean Air Holes in a Menstrual Cup

Air holes near the rim of your menstrual cup help create the necessary suction to keep it in place. Cleaning these holes can be tricky but is essential for maintaining the cup’s functionality.

Use a soft-bristled toothbrush, a toothpick, or a specialized menstrual cup brush to clean the air holes. Gently scrub or poke through each hole to remove any buildup. Rinse the cup thoroughly afterward.

Regularly cleaning the air holes ensures your cup functions correctly and maintains a good seal.

How to Clean a Menstrual Cup in a Public Restroom?

Cleaning your menstrual cup in a public restroom can seem daunting, but with some preparation, it can be managed easily and discreetly. Here’s a step-by-step guide to help you maintain cleanliness while on the go:

1) Come Prepared:

Before heading out, pack a small kit with essential items. Include a water bottle, unscented tissue or menstrual cup wipes, and hand sanitizer. These items will help you clean your menstrual cup efficiently.

2) Find a Private Stall:

If available, choose a stall with a toilet and sink. If not, a regular stall will suffice. Wash your hands with soap and water before entering the stall to minimize the introduction of bacteria.

3) Remove the Cup:

Sit or stand comfortably, then gently remove your menstrual cup following your usual method. Be cautious to avoid any spills, and pour the contents into the toilet.

4) Rinse with Water:

If you have a water bottle, rinse the cup thoroughly. Pour water over the cup to remove any menstrual fluid. You can rinse the cup if a sink is available within the stall.

5) Wipe the Cup:

If clean water isn’t available, use unscented tissue or menstrual cup wipes to clean the cup. Wipe the inside and outside of the cup to ensure it’s clean before reinsertion.

6) Reinsert the Cup:

Once the cup is clean, reinsert it as you usually would. Make sure it’s positioned correctly to prevent leaks.

7) Sanitize Your Hands:

After reinserting the cup, use hand sanitizer to clean your hands before touching public surfaces.

8) Dispose of Clean-Up Materials:

If you’ve used tissue or wipes, dispose of them properly in the trash bin. Double-check that you’re leaving the stall clean for the next person.

Following these steps ensures your menstrual cup remains clean and hygienic, even in a public restroom. With practice, this process will become second nature, allowing you to manage your menstrual health wherever you go confidently.

Tips for Cleaning a Menstrual Cup While Traveling

Tips for Cleaning a Menstrual Cup While Traveling

Traveling can present unique challenges for maintaining menstrual hygiene, but with a few practical tips, you can keep your menstrual cup clean and ensure convenience and ease throughout your journey.

Pack a Cleaning Kit

Prepare a compact cleaning kit to bring along whenever you travel. This kit should include:

  • A small, dedicated pot for boiling your cup.
  • A water bottle for rinsing.
  • Fragrance-free, oil-free soap.
  • Unscented menstrual cup wipes or tissue.
  • A soft-bristled toothbrush or a menstrual cup brush.
  • Hand sanitizer for when you lack access to soap and water.

Packing these essentials will prepare you for various cleaning situations.

Boil Before You Go

Before setting out, boil your menstrual cup at home to start your trip with a sterile cup. Bring your dedicated pot if you’re staying somewhere where boiling it again might be necessary.

Use Clean Water Bottles

Access to clean water on the go can be unpredictable. Carry a water bottle filled with purified or bottled water to rinse your cup whenever necessary. This is especially crucial when traveling to areas where clean tap water isn’t readily accessible.

Take Advantage of Wipes

When clean water is unavailable, use unscented menstrual cup wipes to clean your cup. These wipes are designed to be gentle on the silicone material and won’t leave a residue that could irritate.

Find Private Spaces

Look out for accessible private restrooms or family bathrooms that might offer more space and privacy. Airports, hotels, and rest stops often have better facilities than public restrooms, making cleaning easier and more comfortable.

Utilize Hand Sanitizer

Ensure your hands are clean before and after handling your menstrual cup. Hand sanitizer can be a lifesaver in travel scenarios where soap and water aren’t immediately available. Use it liberally to avoid introducing bacteria into your cup.

Plan Regular Cleaning Times

If you’re on a long journey, plan to clean your menstrual cup during layovers, rest stops, or hotel stays. Regularly rinsing your cup every 4-12 hours, aligned with your menstrual flow, ensures you maintain hygiene without hassle.

Store Safely

When not in use, store your menstrual cup in a breathable pouch. Avoid storing it in airtight containers, as this could promote bacterial growth. Keep your cup and storage pouch in an easily accessible part of your luggage.

With a bit of planning and the right supplies, traveling with a menstrual cup can be seamlessly incorporated into your routine. By following these tips, you can ensure that your menstrual health is well managed, no matter where your travels take you.

How to Clean a Menstrual Cup that Has Discolored?

Menstrual cups can sometimes become discolored over time, especially if used frequently. Although a change in color does not affect the performance or safety of the cup, many users prefer to maintain its clarity for aesthetic reasons. Here is an in-depth guide on how to clean a menstrual cup that has discolored:

Causes of Discoloration

Several factors can contribute to the discoloration of a menstrual cup:

  • Menstrual Blood: Natural pigments in menstrual blood can stain the silicone or rubber material over time.
  • Cleaning Products: Some soaps and cleansers can leave residues that contribute to discoloration.
  • Hard Water: Minerals in hard water can build up on the cup, leading to a yellowish tint.
  • Storage: Storing the cup in direct sunlight or an airtight container can cause or exacerbate discoloration.

Steps for Cleaning a Discolored Menstrual Cup

  1. Boiling
  • What to Do: Boil your menstrual cup in a dedicated pot for 5-10 minutes. This process sterilizes the cup and can help lift some stains.
  • Why It Works: High temperatures can break down staining agents and sterilize the cup, removing bacteria and buildup.
  1. Lemon Juice Soak
  • What to Do: Soak your cup in lemon juice for 30 minutes, then rinse thoroughly with water.
  • Why It Works: Lemon juice’s citric acid helps to bleach and break down stains, brightening the cup.
  1. Hydrogen Peroxide Solution
  • What to Do: Mix a 1:1 solution of hydrogen peroxide and water, and soak the cup for at least 6 hours or overnight. Rinse thoroughly afterward.
  • Why It Works: Hydrogen peroxide is a natural bleaching agent and can effectively remove stubborn stains and discoloration.
  1. Baking Soda Paste
  • What to Do: Create a paste using baking soda and water. Apply this paste to the cup using a soft-bristled toothbrush and scrub gently. Rinse thoroughly.
  • Why It Works: Baking soda is mildly abrasive yet gentle enough to use on silicone. It helps in lifting stains and removing stubborn residues.
  1. White Vinegar Soak
  • What to Do: Soak the cup in a 1:1 mixture of white vinegar and water for 30 minutes. Then, thoroughly rinse it.
  • Why It Works: Vinegar’s acetic acid content helps to break down mineral deposits and stains.

Preventing Future Discoloration

  • Use Fragrance-Free and Oil-Free Soaps: When washing your cup, choose mild, unscented, and oil-free soaps to reduce residue buildup.
  • Rinse with Cold Water First: After emptying your cup, rinse it with cold water before using hot water. Cold water helps prevent blood from settling into the silicone.
  • Avoid Direct Sunlight: Store your menstrual cup in a breathable pouch away from direct sunlight to minimize UV exposure that can cause discoloration.
  • Regular Boiling: Make boiling your cup a regular habit, either at the end of your menstrual cycle or periodically, to keep it clean and stain-free.

By following these steps and preventive measures, you can maintain the appearance and hygiene of your menstrual cup, ensuring it remains a reliable and clean option for menstrual management.

Menstrual cup hygiene

Which is the Easiest Menstrual Cup to Clean?

When choosing a menstrual cup that is easy to clean, several factors come into play. Different cups offer varying features that can impact how straightforward the cleaning process is. Here are some considerations to help you identify the easiest menstrual cup to clean:

Material

Menstrual cups are made from different materials, with medical-grade silicone being one of the most common. Silicone cups are generally easier to clean because of their smooth, non-porous surface that resists staining and buildup. TPE (Thermoplastic Elastomer) and rubber are other materials used but may not offer the same ease of cleaning as silicone.

Design Features

  • Smooth Rim and Body: Cups with a seamless design and smooth rim are easier to clean as they have fewer crevices where menstrual blood can get trapped.
  • Air Holes: Menstrual cups have small air holes near the rim to help with insertion and removal. Cups with larger or strategically placed holes are easier to clean as debris is less likely to get lodged in them.
  • Grip Stem: Cups with a solid, smooth grip stem are easier to clean than those with a ridged or hollow stem, which can trap residue.

Capacity and Size

While capacity and size might not directly relate to cleaning ease, a cup that suits your flow and anatomy can simplify overall maintenance. A well-fitting cup is less likely to cause leakage, reducing the need for frequent cleaning.

Cleaning Guidelines by Brand

Different menstrual cup brands offer specific cleaning guidelines that can influence the ease of maintenance:

  • DivaCup: Known for its clear silicone and straightforward design, the DivaCup includes detailed cleaning instructions and a dedicated cleaning solution.
  • Lunette: This cup has an exceptionally smooth surface and slightly larger air holes, making cleaning easier. Lunette also offers its liquid cleanser.
  • Saalt Cup: Made from medical-grade silicone, the Saalt Cup features a simple design with minimal ridges and offers clear cleaning instructions.
  • MeLuna: Available in TPE and silicone, MeLuna cups offer different stem options (classic, ball, ring) that affect ease of cleaning.

User Reviews and Feedback

User experience can provide valuable insights into which menstrual cups are easier to clean. In their reviews, many users highlight the importance of the cup’s material and design and the practicality of following cleaning instructions. Popular forums and review sites can offer firsthand accounts that might help your decision-making.

Additional Cleaning Tools

Some menstrual cup users find supplementary tools helpful for easier cleaning:

  • Cup Washers: Specialized cup washers can be used for a more thorough cleaning process, focusing on hard-to-reach areas like air holes.
  • Sterilizers: Electric or microwave sterilizers offer a quick way to sanitize the cup between uses.
  • Cleaning Brushes: Small, soft-bristled brushes can be used to clean air holes and other tight spots efficiently.

How to Deep Clean a Menstrual Cup?

Deep cleaning of your menstrual cup is crucial to ensure its longevity and to maintain optimal hygiene. While regular cleaning is essential during your cycle, a thorough, deep clean can help eliminate any lingering bacteria, stains, or odors that may accumulate over time. Here’s a step-by-step guide on how to deep clean your menstrual cup:

Boiling Method

  1. Preparation: Wash your menstrual cup with mild, unscented soap and rinse it thoroughly before boiling.
  2. Boil Water: Fill a small pot with water and bring it to a rolling boil.
  3. Submerge the Cup: Carefully place your menstrual cup in the boiling water. Ensure that the cup is fully submerged and does not touch the bottom or sides of the pot to avoid any deformities.
  4. Boiling Time: Let it boil for 3-5 minutes. Avoid over-boiling as it may degrade the silicone over time.
  5. Remove and Dry: Use tongs to remove the cup from the water. Place it on a clean, dry cloth or paper towel to cool and dry completely before storing it.

Hydrogen Peroxide Soak

  1. Solution Preparation: In a clean container, mix a 3% hydrogen peroxide solution with equal water.
  2. Soak the Cup: Place your menstrual cup in the solution and let it soak for at least 6 hours or overnight.
  3. Rinse Thoroughly: After soaking, rinse the cup thoroughly with plain water to remove any residue.
  4. Dry: Allow the cup to air-dry completely on a clean, dry cloth or paper towel.

Baking Soda Paste

  1. Make the Paste: Combine baking soda and a small amount of water to create a thick paste.
  2. Apply the Paste: Using a soft-bristled toothbrush, apply the baking soda paste to your menstrual cup, focusing on any stained areas or crevices.
  3. Scrub Gently: Gently scrub the cup with the toothbrush to remove stubborn stains and residue.
  4. Rinse and Dry: Rinse the cup thoroughly with water and let it air-dry completely before storing it.

Vinegar Soak

  1. Solution Preparation: Mix equal white vinegar and water in a container.
  2. Soak the Cup: Submerge your menstrual cup in the vinegar solution and let it soak for 30 minutes.
  3. Rinse Thoroughly: After soaking, rinse the cup well with plain water to remove any vinegar residue.
  4. Dry: Place the cup on a clean cloth or paper towel to air-dry completely.

Sterilizing Tablets

  1. Dissolve the Tablet: Follow the manufacturer’s instructions to dissolve a sterilizing tablet in water.
  2. Soak the Cup: Submerge your menstrual cup in the sterilizing solution for the recommended time, usually around 15 minutes.
  3. Rinse Thoroughly: After soaking, rinse the cup thoroughly with plain water.
  4. Dry: Allow the cup to air-dry on a clean, dry cloth.

Additional Tips

  • Check Air Holes: Make sure the air holes around the rim of your cup are clear. Use a soft-bristled brush or a toothpick to clean them gently.
  • Inspect Regularly: Check your cup regularly for signs of wear and tear, such as sticky spots, discoloration, or unusual odor. Replace the cup if it appears damaged or compromised.
  • Store Properly: After deep cleaning, store your menstrual cup in a breathable pouch away from direct sunlight to prevent any UV damage.

By following these deep cleaning methods, you can keep your menstrual cup in excellent condition, ensuring it remains a safe and reliable option for menstrual management.

Proper sterilization

How to Sterilize Your Menstrual Cup Without Boiling?

Sterilizing your menstrual cup is a key step in maintaining its hygiene and ensuring it remains free from harmful bacteria and pathogens. While boiling is a common and effective method, there are alternative ways to sterilize your menstrual cup if you lack access to a stove or want to avoid the hassle of boiling. Below are several in-depth methods to sterilize your menstrual cup without boiling:

Microwave Steam Sterilization

  1. Microwave Sterilization Bags: These bags are designed specifically for steam sterilization in the microwave. Place your cup in the bag and add the recommended amount of water (usually about 60 ml).
  2. Microwave: Seal the bag and place it in the microwave. Heat it on high for the recommended time, typically between 3 to 5 minutes, depending on the microwave’s wattage.
  3. Cooling: Allow the bag to cool for a few minutes before opening it. Carefully remove the cup using clean hands or tongs to avoid burns. Place the cup on a clean cloth to air dry.

Sterilizing Tablets or Solutions

  1. Purchase Sterilizing Tablets: These are available in most pharmacies and online. Common brands include Milton and Sterilizing Tablets from specific menstrual cup brands.
  2. Prepare the Solution: Follow the manufacturer’s instructions to dissolve the tablet in a specific amount of water. This solution is designed to sterilize baby bottles and can also be used for menstrual cups.
  3. Soak the Cup: Submerge your menstrual cup in the sterilizing solution for the recommended time, usually around 15-20 minutes.
  4. Rinse and Dry: After soaking, rinse the cup thoroughly with plain water to remove any residual chemicals. Allow it to air-dry on a clean, dry cloth.

UV Sterilizer

  1. Purchase a UV Sterilizer: These devices use ultraviolet light to kill bacteria and viruses. They are available online or in stores specializing in personal care products.
  2. Place the Cup in the Sterilizer: Most UV sterilizers have a designated space or compartment to place your menstrual cup.
  3. Activate the Sterilizer: Follow the manufacturer’s instructions to turn on the sterilizer. The process typically takes only a few minutes.
  4. Dry and Store: Once the UV cycle is complete, remove the cup and place it on a clean cloth to cool down. It will be germ-free and ready for use or storage.

Hydrogen Peroxide Soak

  1. Prepare a Solution: Mix equal parts of 3% hydrogen peroxide and water in a clean container.
  2. Soak the Cup: Fully submerge your menstrual cup in the solution and let it soak for at least 6-8 hours or overnight for thorough sterilization.
  3. Rinse Thoroughly: After soaking, rinse your cup with plain water to remove all peroxide residue.
  4. Dry and Store: Place the cup on a clean, dry cloth to air-dry completely before storing it properly.

Vinegar Solution Soak

  1. Mix the Solution: Combine equal parts of white vinegar and water in a clean container.
  2. Soak the Cup: Immerse your menstrual cup in the vinegar solution, allowing it to soak for about 30 minutes.
  3. Rinse Well: Rinse the cup thoroughly with water to remove vinegar traces.
  4. Dry Thoroughly: Place the cup on a clean, dry cloth and let it air-dry completely before storing.

Isopropyl Alcohol Wipes

  1. Purchase Alcohol Wipes: Ensure they contain at least 70% isopropyl alcohol, which is effective for sterilization.
  2. Wipe Down the Cup: Use the wipes to thoroughly clean all surfaces of your menstrual cup, paying special attention to folds and crevices.
  3. Rinse and Air Dry: After wiping, rinse the cup well with water to remove any alcohol residue. Then, let it air-dry on a clean cloth.

Key Considerations

  • Material Compatibility: Before using any sterilization method, ensure that it is compatible with the material of your menstrual cup. Some substances may degrade silicone or TPE over time.
  • Routine: Incorporate sterilization into your menstrual cycle routine, ideally after each cycle, to maintain optimal hygiene.
  • Safety: Always follow manufacturer recommendations for the menstrual cup and cleaning products. Avoid methods that could damage the cup, such as prolonged exposure to extreme heat or harsh chemicals.

Utilizing these non-boiling sterilization methods allows you to maintain a high level of hygiene for your menstrual cup, making it a reliable and safe option for menstrual management.

How to Wash Your Menstrual Cup Carry Pouches?

Keeping your menstrual cup carry pouch clean is essential for maintaining the hygiene of your menstrual cup. Here’s a comprehensive guide on washing your menstrual cup carry pouches to ensure they remain clean and suitable for storing your cup.

Materials Needed

  • Mild detergent or soap
  • A basin or sink
  • Clean water
  • Soft brush or cloth (optional)
  • Clean towel

Step-by-Step Guide

1) Empty the Pouch:

Ensure your menstrual cup is removed from the pouch before cleaning. Shake out any residual debris that might be inside.

2) Check the Label:

Before washing, check any care instructions the manufacturer provides on the label, usually found inside the pouch. Different materials may have specific washing guidelines.

3) Prepare the Cleaning Solution:

Fill a basin or sink with warm water and add a few drops of mild detergent or soap. Avoid harsh chemicals or bleach, which can degrade the fabric and potentially irritate your skin.

4) Soak the Pouch:

Submerge the pouch in the soapy water and let it soak for a few minutes. This helps to loosen any grime or stains.

5) Gently Clean:

Use your hands to agitate the pouch in the water gently. If there are any stubborn spots or stains, you can scrub them gently with a soft brush or cloth. Be careful not to be too rough, as this can damage the fabric.

6) Rinse Thoroughly:

Once cleaned, rinse the pouch under running water to remove all soap residues. Rinse thoroughly; any leftover soap can cause skin irritation or damage the fabric over time.

7) Dry the Pouch:

Lay the pouch flat on a clean towel and gently press to remove excess water. Do not wring out the pouch, which can damage the fabric and shape. Allow the pouch to air-dry completely in a well-ventilated area. Avoid direct sunlight, which can fade colors and degrade certain materials.

Special Considerations

  • Frequency of Cleaning: Ideally, the carry pouch should be washed regularly, especially after each menstrual cycle or if it has been exposed to moisture or dirt.
  • Fabric Type: Some pouches are made from delicate fabrics such as silk or organic cotton, which might require special care. Utilize gentle, eco-friendly detergents suitable for delicate fabrics.
  • Storage Post-Cleaning: After drying, store the pouch in a clean, dry place to prevent mold and mildew growth. Make sure it is completely dry before storing your menstrual cup in it.

How to Clean a Menstrual Cup to Prevent Odor?

A menstrual cup can sometimes develop an unpleasant odor if not cleaned properly. Preventing and addressing odor issues is crucial for maintaining comfort and hygiene. Here’s an in-depth guide on how to clean your menstrual cup to keep it odor-free.

Materials Needed

  • Mild, unscented soap
  • Soft brush or toothbrush
  • Boiling water
  • Sterilizing container
  • White vinegar (optional)
  • Baking soda (optional)

Step-by-Step Guide

1) Empty the Cup:

When you remove your menstrual cup, empty the contents into the toilet. Rinse the cup under cold running water to remove any residual blood. Using cold water initially helps prevent staining and makes subsequent cleaning easier.

2) Initial Rinse with Mild Soap:

Use a small amount of mild, unscented soap to wash the cup. Avoid fragranced or antibacterial soaps, as these can cause irritation and might leave residues that alter the pH balance of your vagina. Rinse thoroughly with water to ensure no soap residue remains.

3) Scrub the Cup:

Gently rub the cup with a soft brush or toothbrush. Pay particular attention to the air holes near the rim, as they can trap menstrual fluid and create odor over time. A brush helps remove any stuck-on debris and ensures all crevices are cleaned properly.

4) Deep Cleaning in Boiling Water:

Boiling your menstrual cup sterilizes it and removes any lingering smells. Place the cup in a heat-resistant container and pour boiling water over it, or submerge it in a pot of boiling water for 5-10 minutes. Be sure the cup does not touch the bottom of the pot to prevent damage.

5) Optional Vinegar Rinse:

If your cup smells, rinse it with white vinegar and water. Mix one vinegar with nine parts water and let the cup soak for 30 minutes. Vinegar is a natural disinfectant and can help neutralize odors without damaging the cup.

6) Baking Soda Scrub (Optional):

Make a paste with baking soda and water and scrub the menstrual cup for stubborn odors. Baking soda is mildly abrasive and helps to deodorize. Rinse the cup thoroughly after baking soda to remove all residue.

7) Regular Sterilization:

Incorporate routine sterilization into your menstrual cycle hygiene routine. Depending on personal preference and manufacturer recommendations, this can involve boiling the cup once a month or after each cycle.

8) Dry and Store Properly:

After cleaning, place the cup on a clean, dry cloth and let it air dry completely. Once dry, store it in a breathable, clean pouch. Avoid airtight containers, as they can trap moisture and lead to bacteria growth and odors.

Additional Tips to Prevent Odor

  • Avoid Fragrances: Avoid using fragranced products on your cup or wash it with scented soaps. These can mask odors temporarily but may contribute to bacterial growth and worsen odors over time.
  • Empty Regularly: Depending on your flow, empty your menstrual cup every 4-12 hours. Regular emptying prevents the accumulation of menstrual fluid, which can lead to odor.
  • Stay Hydrated: Staying hydrated can help neutralize odors caused by concentrated menstrual flow. A balanced diet and proper hydration maintain overall bodily health, which can reduce odor issues.
  • Check for Damage: Inspect your cup regularly for any damage, like cracks or tears, which can harbor bacteria and cause unpleasant smells. Replace your cup as recommended by the manufacturer.

monthly cycle hygiene

What Not to Use When Sterilizing a Menstrual Cup?

When sterilizing your menstrual cup, it’s important to avoid certain substances and materials that can cause damage to the cup or irritation to your body. Here’s a detailed list of what not to use:

1) Harsh Chemicals:

Avoid using bleach, hydrogen peroxide, or other harsh chemicals to sterilize your menstrual cup. These substances can degrade the silicone or rubber material, compromising the cup’s integrity and leading to irritation or health issues when reinserted.

2) Antibacterial Soaps:

While it may seem like a good idea to use antibacterial soap to clean your menstrual cup, these soaps often contain fragrances and other chemicals that can leave residues. Such residues can disturb the natural pH balance of your vagina, leading to infections or irritation.

3) Dishwashing Soap:

Some dish soaps contain abrasives and strong detergents unsuitable for menstrual cup care. These can break down the cup’s material over time, making it more susceptible to damage and less effective.

4) Oil-based soaps or Lubricants:

Oil-based products can cling to the surface of the cup and be difficult to wash off. Oils can create a barrier that traps bacteria, leading to odor and potential infections.

5) Harsh Scrubbing Tools:

Using abrasive scrubbing pads or wire brushes can scratch or degrade the surface of the menstrual cup. These scratches can harbor bacteria and cause the cup to deteriorate faster.

6) Microwave Sterilization:

While some menstrual cups are marketed as microwave-safe, it’s generally safer to avoid microwave sterilization unless explicitly stated by the manufacturer. The uneven heating in microwaves can cause the cup to melt or become damaged if not done properly.

7) Hand Sanitizer:

Hand sanitizers contain alcohol and other additives unsuitable for menstrual cup cleaning. These substances can be harsh on the material and leave residues that are hard to rinse off, which could harm vaginal health.

8) Dishwasher Cleaning:

While throwing your menstrual cup in the dishwasher for convenience might be tempting, it’s not recommended. The high heat and detergents used in dishwashers can affect the resilience and lifespan of the cup material.

By avoiding these substances and methods, you can maintain the longevity and safety of your menstrual cup. Always follow the manufacturer’s instructions for care and sterilization to ensure optimal hygiene and performance.

When to Replace Your Menstrual Cup?

Replacing your menstrual cup largely depends on various factors, including usage, care, and the manufacturer’s recommendations. On average, a high-quality menstrual cup can last anywhere from 1 to 5 years, with some brands suggesting they can be used for up to 10 years with proper care. Here are key signs that indicate it might be time to replace your menstrual cup:

1) Noticeable Wear and Tear:

If you spot any cracks, tears, or holes in your menstrual cup, it’s crucial to replace it immediately. Even small damages can compromise the cup’s effectiveness and harbor bacteria.

2) Persistent Odor:

Despite regular cleaning and sterilization, if your cup consistently retains a strong odor, it might be time to get a new one. Persistent smells can indicate that the material has started to degrade.

3) Discoloration:

While some staining is normal over time, significant discoloration that doesn’t go away with thorough cleaning can signify material breakdown.

4) Texture Changes:

If the silicone or rubber becomes sticky, powdery, or loses its flexibility, it clearly indicates that the cup’s integrity is compromised and should be replaced.

5) Manufacturer’s Guidelines:

Always adhere to the replacement period recommended by the manufacturer. Extending the use of your cup beyond this period can decrease its effectiveness and increase the risk of irritation or infection.

6) Comfort Issues:

If your cup suddenly feels uncomfortable, irritates, or experiences leaks despite proper insertion, it may be time to assess whether you need a different size or a new cup altogether.

Remember, replacing your menstrual cup as needed ensures comfort, optimal hygiene, and health. Always consult the user manual provided with your menstrual cup for any specific guidelines regarding its lifespan and care.

You might be interested in: What Are Sanitary Pads? | Why Are Sanitary Pads Important?

Conclusion

Maintaining proper hygiene and care for your menstrual cup is essential for longevity and health. By following the appropriate sterilization methods and regularly checking for signs of wear, you can ensure your menstrual cup remains effective and safe. Always avoid harsh chemicals and unsuitable cleaning methods to prevent damage and preserve the cup’s integrity. For those new to menstrual cups or seeking more tips, resources are abundant on how to clean menstrual cups available online. Staying informed and attentive to your cup’s condition will help you manage your menstrual health more efficiently and comfortably.

Can You Wear A Menstrual Pad During An Mri?

0

If you’re like most people, getting an MRI can be nerve-wracking. You might wonder what clothing you’re allowed to wear during the procedure. Well, here’s a question you might not have anticipated: Can you wear a menstrual pad during an MRI? It’s a valid concern, as the idea of having to remove one’s pad mid-procedure can be both embarrassing and impractical. Fortunately, the answer is it depends. While most pads are made of materials that don’t pose a risk for MRI-related issues, it’s best to check with your doctor to ensure you’re wearing the most compatible type of pad for your MRI. This article will explore the reasoning behind this precaution and suggest helpful tips to make your MRI experience as comfortable as possible.

What is an MRI Scan?

An MRI scan is a medical imaging procedure that uses a strong magnetic field, radio waves, and a computer to create detailed images of internal body structures. This non-invasive technique is commonly used to diagnose various medical conditions, from brain tumors to musculoskeletal disorders. But many women may wonder – can you wear a menstrual pad during an MRI? It’s a valid question that many may feel too embarrassed to ask, but the answer is yes – it’s perfectly safe to wear a pad during an MRI scan. The magnetic field used during the procedure will not affect the pad or cause any harm to the body, so you can feel comfortable and confident during your MRI appointment.

what is mri?

Benefits of an MRI Scan

1. Noninvasive and Painless:

MRI scans are noninvasive, meaning they require no surgery or incisions. The procedure is painless and does not involve X-rays, meaning the patient is not exposed to radiation. Unlike some older technologies, which can be uncomfortable and sometimes painful, an MRI scan allows a patient to relax and is noninvasive.

2. Early Detection of Medical Issues:

One of the most significant benefits of an MRI scan is the early detection of medical issues. MRI scans can detect and diagnose a wide range of health problems, from internal bleeding to abnormalities in the brain. Early detection of such diseases allows treatment to start immediately, giving patients the best chance of fully recovering.

3. Detailed Imaging:

MRI scans provide detailed images of internal organs, soft tissues, and bones, making it easier for doctors to see what is happening inside the body. These images are incredibly useful for diagnosing medical issues such as cancer, tumors, and other abnormalities that are too small to be seen with other imaging technology.

4. Accurate Diagnosis:

MRI scans are incredibly accurate and reliable. With an accuracy rate of over 90%, they are one of the most precise diagnostic tools available, providing doctors with a clear and accurate picture of any medical issues that may be present in the body. This accuracy ensures that doctors are given the information they need to make informed decisions about the best possible course of treatment.

5. Customized for Each Patient:

MRI scans can be customized to fit the unique needs of each patient. Doctors can use contrast agents to highlight specific body areas, allowing them to look at certain tissues or organs better. This customization ensures that each patient’s needs are met and each scan is as informative and helpful as possible.

What Are Signs and Symptoms Can Accompany PVAD During MRI?

Peripheral vascular artery disease (PVAD) is a condition that can lead to restricted blood flow in the arteries of the limbs. This can cause pain, numbness, and weakness in the affected limbs. PVAD can also cause problems with wound healing and an increased risk of infection.
MRI can be used to help diagnose PVAD.

The test can show artery narrowing or blockage and any areas of damage or inflammation. MRI can also help rule out other conditions that may cause similar symptoms.

If you have PVAD, you may experience one or more of the following symptoms:

  • Pain in the legs or feet when walking or during other activities
  • Cramping in the legs or feet at night
  • Numbness or weakness in the legs or feet
  • Coldness in the legs or feet
  • Skin changes, such as ulcers or gangrene
  • Difficulty healing wounds
  • Infections in the legs or feet

If you have any of these symptoms, could you talk to your doctor? They will ask about your medical history and perform a physical exam. You may also need tests, such as an MRI, to confirm the diagnosis.

If PVAD is causing symptoms, treatment will focus on relieving those symptoms. This may include lifestyle changes, such as quitting smoking and exercising regularly. You may also need medication to improve blood flow or surgery to bypass the blocked arteries.

PVAD is a severe condition that can lead to serious complications. However, with early diagnosis and treatment, many people with PVAD can live normal, healthy lives.

Can You Wear A Menstrual Pad During An Mri?

Can You Wear A Menstrual Pad During An Mri?

It’s generally advised to avoid wearing metal objects during an MRI scan, including jewelry, watches, and clothing with metal parts. The presence of metal can interfere with the magnetic field generated by the MRI machine, potentially distorting the images and affecting the scan’s accuracy.

1) Metal Components in Sanitary Pads

Sanitary pads often contain metal components, such as adhesive strips, which can interfere with the MRI. These metal elements are susceptible to the strong magnetic field of the MRI machine, leading to potential movement of the pad and subsequent distortion of the scan images. This movement can compromise the quality of the diagnostic images, making accurate interpretation difficult.

2) Communicating with Healthcare Providers

If you need to wear a sanitary pad before an MRI, it is essential to inform your healthcare provider. They will provide specific guidance on whether you need to remove the pad before the scan and offer alternative solutions. Communication with your healthcare team ensures that they can make appropriate accommodations for your comfort and the accuracy of the scan.

3) Alternative Feminine Hygiene Options

To address these concerns, your healthcare provider might suggest alternative feminine hygiene options or provide a disposable hospital gown to mitigate any risk posed by the sanitary pad. These precautions help maintain the integrity of the MRI scan, ensuring the best possible diagnostic outcomes.

Why Avoid Sanitary Pads During an MRI

Sanitary pads are typically constructed with layers of materials that may include small metal parts, such as adhesive strips or micro-wires used to keep the pad in place. These metal components can significantly interfere with MRI scans. The powerful magnetic field generated during the MRI process can cause these metal parts to move or heat up, potentially leading to discomfort or even injury for the patient.

Additionally, when these metal elements interact with the magnetic field, they can produce artifacts or distortions in the images captured by the MRI machine. These distortions can obscure vital anatomical details, leading to inaccurate diagnoses or complicating the identification of medical conditions. Consequently, such interference may result in the need for repeated scans, thus delaying treatment and increasing overall healthcare costs. For these reasons, it’s crucial to either avoid wearing sanitary pads during an MRI or seek guidance from healthcare providers for alternative solutions.

Alternatives to Menstrual Pad During An Mri?

There are several options to use during an MRI instead of sanitary pads. Ensuring that the alternative chosen does not contain metal components is crucial to maintaining the integrity of the MRI images and patient comfort. Here are some detailed alternatives:

Disposable Hospital Underwear or Gowns

  • Medical Design: Disposable hospital underwear and gowns are specifically designed for medical procedures, including MRI scans.
  • No Metal Components: These garments are free of any metal parts that could interfere with the MRI.
  • Comfort and Hygiene: They provide comfort and adequate hygiene, ensuring that the patient undergoes the procedure without any issues related to their period.

Tampons

  • Metal-Free: Tampons do not contain metal components, making them safe for use during an MRI.
  • Variety: Available in various absorbency levels to suit individual needs during the MRI scan.
  • Convenience: Easy to use and does not need to be changed as frequently as some other options.

Menstrual Cups

  • Reusable: Menstrual cups are reusable, eco-friendly options without any metal parts.
  • Long-Lasting: Can be worn for up to 12 hours, providing extended protection during lengthy procedures.
  • Secure Fit: Ensures a secure fit, reducing the risk of leakage and providing comfort throughout the MRI scan.

Menstrual Discs

  • Flexible Fit: Menstrual discs are designed to fit comfortably with no metal components.
  • Extended Use: Can be worn for up to 12 hours, similar to menstrual cups.
  • Less Invasive: Generally sits higher in the vaginal canal, providing a discreet and comfortable option during an MRI scan.

FAQs

Can You See A Pad In An MRI?

Yes, you can see a sanitary pad in an MRI. However, I would like to point out that not all types of sanitary pads can be seen in an MRI. For example, pads that are made of metal or have metal in them will not show up in an MRI.

Do Periods Affect Mri Scan?

You don’t need to worry about your period affecting your MRI scan. You can rest assured that the team performing your scan will take all necessary precautions to ensure that your period doesn’t affect the quality of the images.

Does Menstruation Affect Pelvic MRI?

There is no definitive answer to this question, as each person experiences menstruation differently and has a different body type. However, it is generally accepted that menstruation can affect pelvic MRI results in a few ways.

  • First, blood in the uterus can make it difficult to see the pelvic organs.
  • Second, the uterus may be enlarged during menstruation, making it difficult to see the pelvic organs.
  • Finally, some women experience cramping and pain during menstruation, making it difficult to stay still during the MRI exam.

What Should You Not Wear During An MRI?

You should not wear anything with metal during an MRI. This includes clothing with zippers, snaps, or buttons made of metal and jewelry. Metal can cause artifacts in the MRI images. You should remove any hair clips, barrettes, or other metal accessories.

What Happens If You Wear Metal In An MRI?

If you wear metal in an MRI machine, it can cause several problems.

  • First, the metal can distort the magnetic field, making the MRI machine’s images less accurate.
  • Additionally, the metal can cause the machine to produce more noise, which can be extremely loud and disruptive.
  • Finally, the metal can heat up during the MRI, which can cause burns.

What Happens If You Wear A Ring During An MRI?

If you wear a ring during an MRI, it could become magnetized. This could cause the ring to move during the MRI and potentially cause injury to you or the person operating the MRI machine.

Do you wear a bra during an MRI?

Yes, you should wear a bra during an MRI. You don’t need to remove your bra for the exam, but you may be asked to remove other clothing and jewelry before the exam.

However, MRIs are important in diagnosing and treating many medical conditions. To get the most accurate MRI, it is important to wear comfortable, loose-fitting clothing with no metal fasteners.

Conclusion

To sum it up, the answer to the burning question, can you wear a menstrual pad during an MRI? is a resounding no. While it may seem logical to keep it on for comfort, the reality is that menstruation pads are not only made of materials that could interfere with the MRI imaging process but may also cause unnecessary discomfort to the patient. It’s always best to follow your doctor or radiologist’s instructions when preparing for an MRI scan, including not wearing metallic objects or clothing and informing them of any medical conditions or implants. With that said, it’s important to remember that it’s normal to feel apprehensive about the unknown, but with the right information and guidance, you can get through any medical procedure without undue stress or anxiety.

Unfolding the Benefits of Sanitary Towels: A Comprehensive Guide

0

For many of us, sanitary towels are essential to our daily lives. But have you ever stopped to consider the real benefits of this humble yet incredibly important product? From providing comfort and security during menstruation to reducing the risk of infection, there are many reasons why sanitary towels are so valuable. Whether you’re a seasoned user or just starting, this comprehensive guide will help you explore and appreciate the many benefits of sanitary towels to make informed choices about your health and well-being. So, let’s dive in and see what makes these everyday items essential!

Why Choose Sanitary Towels Over Tampons?

Sanitary towels offer several advantages over tampons, making them a preferred choice for many. Notably, they are easy to use and don’t require insertion, thus reducing any discomfort or fear, especially for young girls just starting their periods. Towels also pose a lower risk of Toxic Shock Syndrome (TSS), a rare but severe condition linked to tampon use.

Moreover, sanitary towels provide visible proof of the flow, helping individuals better monitor their menstrual health. Also, towels come in various sizes, absorbencies, and designs, catering to users’ diverse needs and preferences.

Lastly, for those who value eco-friendliness, biodegradable and reusable sanitary towels are now available that are kinder to our planet than traditional single-use options. Choosing sanitary towels is not merely about personal comfort; it’s also about making an informed choice for your health and the environment.

Materials Used In Sanitary Towels

Sanitary towels are typically composed of three main layers: the top layer, the absorbent core, and the bottom layer. The top layer, or the “cover, ” is the part that directly touches the skin. It’s designed to be soft and comfortable and is often made of a non-woven fabric that draws menstrual fluid away from the skin and into the absorbent core.

The absorbent core is the heart of the sanitary towel, responsible for absorbing and retaining the menstrual fluid. This layer is mostly made of superabsorbent polymers (SAPs), which can absorb and hold significant amounts of fluid relative to their mass. They are often combined with fluff pulp and highly absorbent cellulose.

The bottom layer, the “back sheet”, is typically made from a thin plastic film. This layer is a barrier to prevent menstrual fluid from leaking onto the underwear. It also often has adhesive strips that allow the pad to stick to the underwear and hold it in place.

The materials used in eco-friendly sanitary towels may vary. The top layer could be made from organic cotton or bamboo, the absorbent core might be composed of biodegradable SAPs or organic cotton, and the back sheet could be made from a compostable film. These materials are designed to be kinder to the environment, breaking down more easily when disposed of or, in the case of reusable sanitary towels, washable for repeated use.

10 Benefits of Sanitary Towels:

Benefits of Sanitary Towels

1. Comfort

One key benefit of sanitary towels is comfort. They’re designed to be soft against the skin, avoiding discomfort and irritation from other menstrual products. The user doesn’t need to insert anything, making sanitary towels a particularly comfortable choice, especially for those new to menstruation.

2. Ease of Use

Sanitary towels are straightforward to use, removing any barriers for first-time users. They stick to the inside of the underwear, offering a hassle-free experience.

3. Monitoring of Menstrual Health

Sanitary towels allow for easy monitoring of menstrual flow and color, critical indicators of menstrual health. Changes in these can be early signs of potential health issues, making sanitary towels instrumental in the early detection of problems.

4. Lower Risk of TSS

The use of sanitary towels significantly lowers the risk of Toxic Shock Syndrome (TSS), a severe condition often associated with tampon use. This safety aspect makes sanitary towels a more secure choice for many.

5. Variety of Options

Sanitary towels come in various sizes, shapes, and absorbency levels. This variety caters to users’ diverse needs and preferences, ensuring that everyone can find a product that suits them best.

6. Eco-Friendly Options

The increasing availability of biodegradable and reusable sanitary towels provides eco-conscious users with options that are kinder to the environment. These eco-friendly alternatives, while offering the same benefits as sanitary towels, help to reduce waste and environmental impact.

7. Cost-Effective

Compared to other menstrual products, sanitary towels are often more affordable. This cost-effectiveness ensures that menstruation doesn’t become a financial burden.

8. Accessibility

Sanitary towels, a common menstrual product, are widely available in supermarkets, convenience stores, and online platforms. This ensures that they are accessible to everyone who needs them.

9. No Interference with Bodily Functions

Unlike tampons or menstrual cups, sanitary towels don’t interfere with the vagina’s natural functioning, allowing the menstrual flow to pass out of the body freely.

10. Allergy-Free Options

For those with sensitive skin, hypoallergenic sanitary towels are now available. These products are free from harmful ingredients that may cause skin irritation or allergic reactions.

Overall, using sanitary towels offers several benefits and advantages over other menstrual products. From comfort and ease of use to safety and eco-friendliness, these everyday items have much to offer regarding health and well-being! With so many options to choose from, there’s something for everyone.

Best Practices For Using Sanitary Towels

Choose the Right Size and Absorbency

The first step in using sanitary towels effectively is selecting the right size and absorbency level to match your needs. Sanitary towels come in different sizes, from panty liners for light-flow days to larger, more absorbent pads for heavy-flow days. Being mindful of your menstrual flow and selecting the appropriate size and absorbency can help prevent leaks and ensure comfort.

Practice Good Hygiene

Good hygiene is crucial when using sanitary towels. Always wash your hands before and after changing your pad to prevent the spread of germs. Dispose of used sanitary towels properly by wrapping them in toilet paper or a disposable bag before throwing them into a bin. Remember, flushing sanitary towels down the toilet can lead to plumbing issues and environmental damage.

Change Your Sanitary Towel Regularly

To maintain optimal hygiene and comfort, changing your sanitary towel regularly every 3 to 4 hours is a good rule of thumb, but this can depend on your flow. Leaving a sanitary towel on too long can lead to unpleasant odors and increase the risk of irritation or infection.

Position Your Sanitary Towel Correctly

Ensure your sanitary towel is correctly positioned on your underwear for effective use. The adhesive strip should stick to your underwear, and the pad should be centered where it will best absorb the menstrual flow. For sanitary towels with wings, ensure the wings are folded over the sides of your underwear to provide additional leakage protection.

Consider Night-time Needs

For a restful night’s sleep during your period, consider using specially designed night-time sanitary towels. These are often longer and wider at the back to provide extra coverage and protection while you sleep. Make sure to change your sanitary towel before bed and first thing in the morning to maintain cleanliness and comfort.

Listen to Your Body

Everyone’s body is different, and listening to your body’s signals is essential. If you notice any discomfort, rash, or irritation when using a certain brand or sanitary towel, switching to a different brand or trying an alternative product might be best. Listen to what your body tells you and make adjustments accordingly.

You might be interested in: “What Are Sanitary Pads?”

Conclusion

The benefits of sanitary towels are numerous, ranging from comfort and ease of use to the ability to monitor menstrual health closely. With various sizes, absorbency levels, and materials, including eco-friendly options, sanitary towels cater to diverse needs and preferences. Optimal utilization of these products involves choosing the right size and absorbency, practicing good hygiene, changing regularly, positioning correctly, considering night-time needs, and, above all, listening to one’s body. Making informed choices about menstrual care products contributes to overall well-being and promotes a healthier relationship with one’s body.